This 'Trad Anchors' article is part of the book - Trad Climbing Basics.
Trad Anchors: Gear Placements
The climb isn't over when you reach the top. You still need to make an anchor to attach yourself and belay your partner from. You should produce an anchor with at least two (preferably three) good pieces of gear. Gear placements are sometimes obvious and close together, and sometimes not so obvious and far apart.
If you can't find enough gear to make a secure anchor, you'll have to go somewhere else! Try a little further back or along the crag top. On a multi-pitch, you may have to climb up a bit higher, or down-climb if you've just passed a suitable place. It is essential that you find a place to make a solid anchor. Never accept that an anchor is poor quality. There are always other options.
Trad Anchors: The Central Point
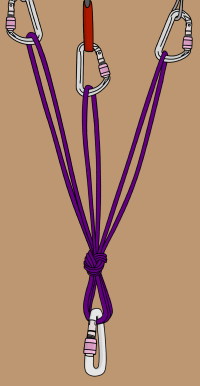
Your gear placements need to be equalized together to form a central point. This is where you attach yourself and belay from. How you create the central point will depend on what gear is available, how spaced it is, if you have one rope or two, and whether the climb is a single or a multi-pitch.
It's essential to know each technique and be able to adapt your anchor building skills for each unique situation.
Top Tip
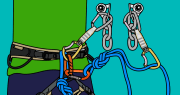
Once you've got one piece of gear in, clip the rope through it as if you're still climbing. This will protect you if you slip while building the rest of your anchor. You can unclip this later when you are safely attached to the anchor.
Trad Anchors: The Six-Point Rule
You should create an anchor which is worth at least 6 points. Only experience can teach you how many points your piece of gear is really worth. As a guideline, points are awarded as follows:
3 points: A new bolt or a sling around a large tree.
2 points: A well placed piece of trad gear.
1 point: A well placed micro nut or micro cam.
0 points: Any suspect gear which is either placed incorrectly or in bad rock.
Warning! Loose Features
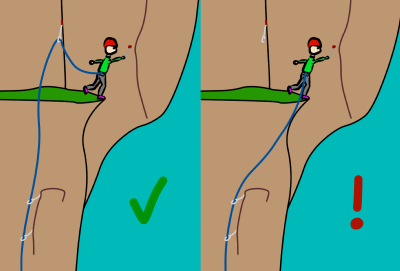
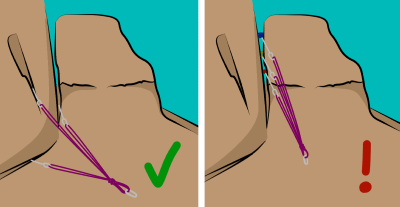
Don't place all of the anchor pieces behind the same feature (especially with flakes or blocks). If that feature is loose, your entire anchor will fall out when weighted!
For this reason, it’s better to place gear in different cracks and features.
Trad Anchors: Belay Plan
When you've found enough good gear placements for the anchor, you'll need to make a belay plan. Your plan will include:
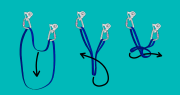
1) How you will equalize the gear together.
2) Exactly where you will sit or stand to belay.
3) How you will attach yourself to the anchor.
4) Which belay technique you will use.
5) Where you will put the extra rope.
When your plan is complete, you can start making the anchor. Each part of the belay plan is explained in the following articles.
One thought on “Trad Anchors – Part 1 of 4 > Introduction”
Comments are closed.