This article about climbing cams is part of the book - Trad Climbing Basics.
Cams are reliable and versatile pieces of trad protection that are designed to be placed in parallel sided cracks, where nuts won't work.
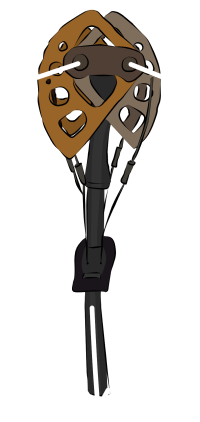
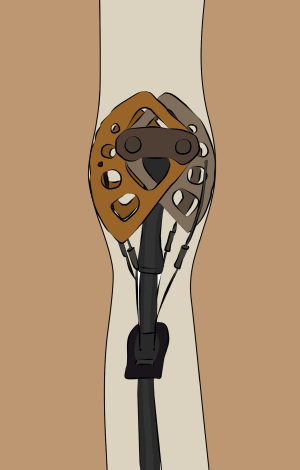
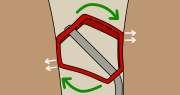
A cam has three or four lobes mounted on an axle. Each lobe is shaped according to a mathematical logarithmic spiral, so the angle between the lobes and the rock is always the same, no matter how retracted the cam lobes are. This means that the cam will work at any point of it's size range (more on this later).
When a cam is weighted, the lobes are forced apart, converting the downwards force into a huge amount of outwards pressure on the sides of the crack. It is this outwards pressure which holds the cam in position.
When you place a cam, the springs cause the lobes to press out on the sides of the crack, creating just enough friction to keep it in position. Because cams rely on this friction, make sure to only place them in clean, dry cracks. Mud, dust, water or ice reduces the friction and can cause the cam to slide out during a fall.
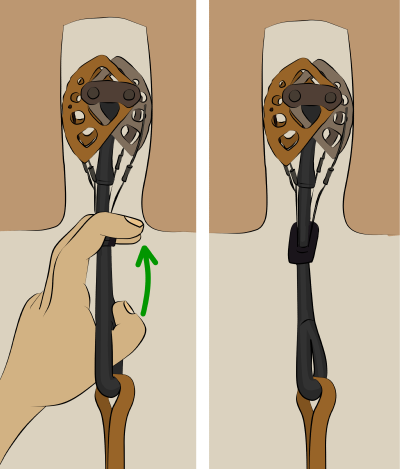
How To Place Climbing Cams
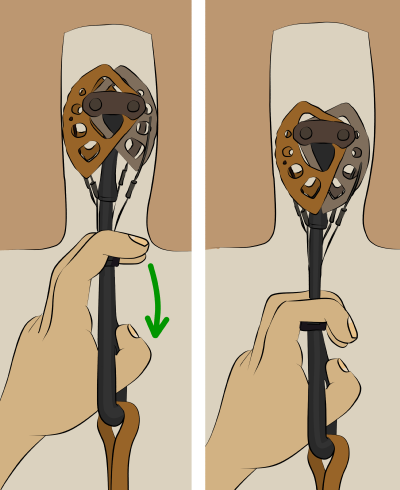
Step 1
Pull the trigger to retract the cam lobes and slot it into the crack.
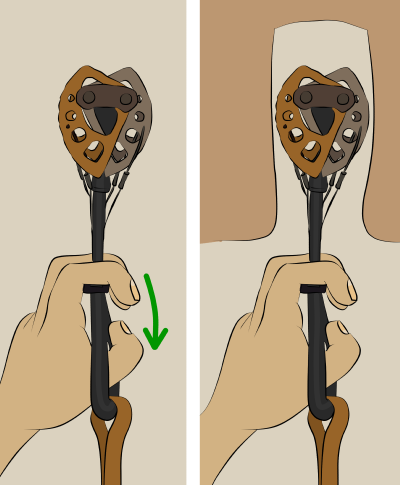
Step 2
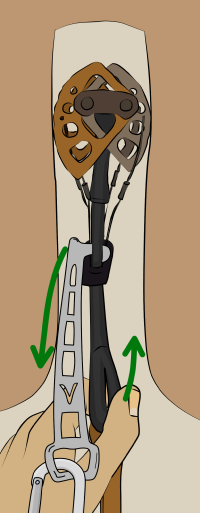
Release the trigger to allow the lobes to open up and make contact with the sides of the crack.
If the lobes open up all the way, try a bigger size.
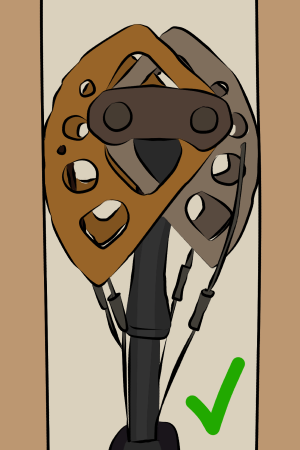
Placing Cams > Size
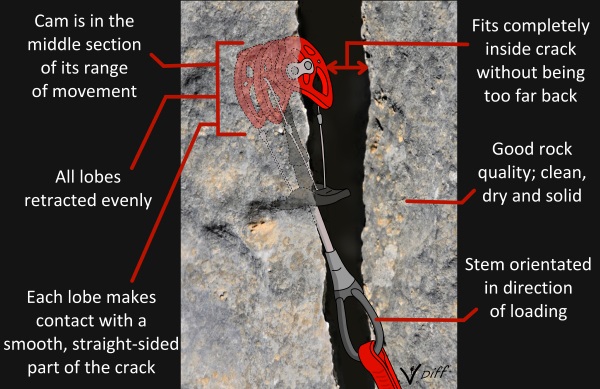
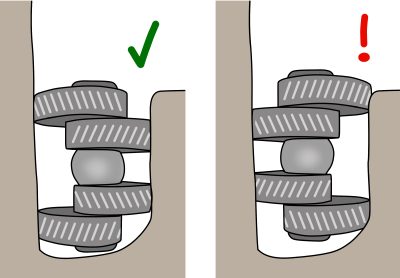
Correct Size
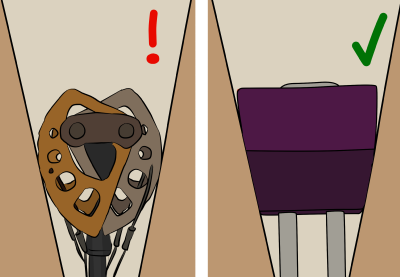
This is the ideal cam size for the crack it is in.
The strongest and optimal placement is within the middle section of the cam’s range of movement. You should aim to place every cam like this.
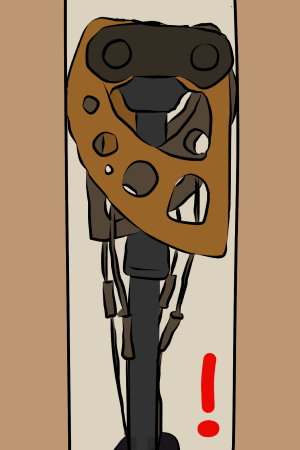
Too Big
This is 'over-cammed' and will be very difficult to remove. Use a smaller cam if possible.
Too small
This is 'tipped out' and will be very unlikely to hold a fall. During a fall, cam lobes often slip down the crack very slightly before being pressed outwards.
In this case, at least one of the lobes is likely to open completely to it's maximum range, causing the cam to slip out of the crack. Use a bigger cam.

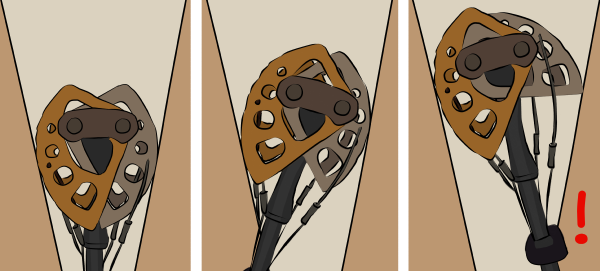
Placing Cams > Depth
You'll need to position cams far enough into the crack to accommodate for the slight slippage that can occur when the cam is loaded. In very slippery rock, a cam may slide out completely when weighted due to the lack of friction.
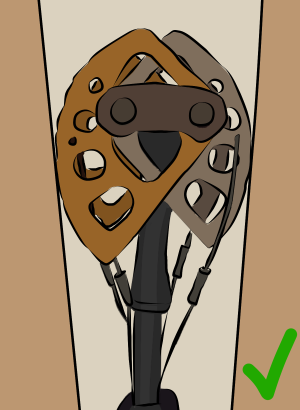
Try a cam in both orientations to see which way fits better. It’s usually better if the outer lobes are on the main wall, so they are further from the edge. In shallow placements, it’s vital that the outer lobes go on the widest area of the rock.
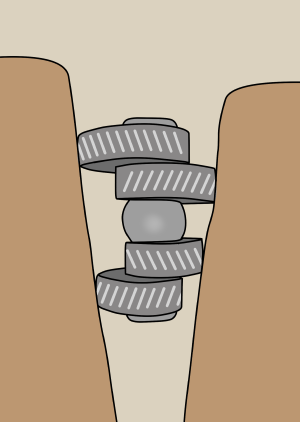
Placing Cams > Constrictions
If possible, set a cam above and below a constriction. This traps the cam in place and prevents it from walking. Placements like this are very stable.
Avoid placing cam lobes on tiny bumps or crystals which may disintegrate under load. This could cause the unit to pull out.
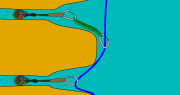
Placing Cams > Flared Cracks
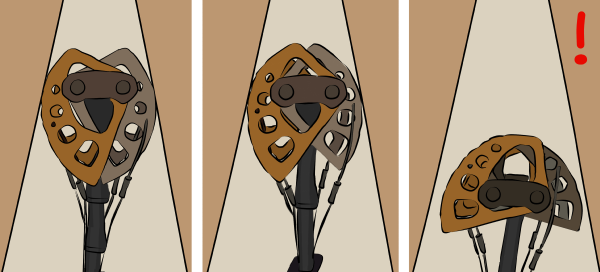
A flared crack is one which becomes narrower or wider at one side. Cracks can be flared in any direction.
Upward Flares
The placement in this slightly upward-flared crack is very good. If the cam slips down slightly during a fall, it will remain securely in the crack.
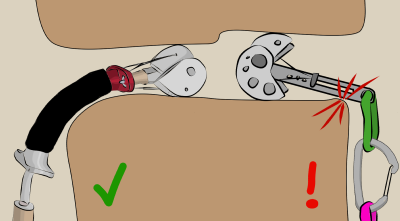
Warning - When a cam is placed in an extremely upward-flaring crack, as shown below, it could easily 'walk' upwards.
This means that it will either wiggle out of position or be impossible to retrieve. This is caused by movements in the rope as you climb above.
You can reduce the chance of this by extending the cam with a sling or quickdraw.
An alternative would be to use a nut or a hex instead.
Downward Flares
The downwards flare of this crack is too great for the cam to hold. In the event of a fall, the lobes will continue opening until they reach their maximum, at which point the cam will fall out of the crack.
Cams can hold in very slightly downward-flared cracks, but it is best to look for parallel-sided or slightly upward-flared cracks.
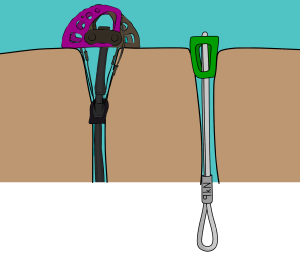
Offset Cams
Offset cams have two lobes which are a size smaller than the other two. They are excellent for protecting flared cracks and piton scars which are commonly found at granite crags.
In a flared crack, place an offset with the smaller lobes further in and the bigger lobes further out.
With regular cams, it is usually possible to orientate the cam so the outer lobe is against the main wall, and not near the edge of the crack. Unfortunately, due to the asymmetry of the design, this is not always possible with offsets.
You don’t need offset cams. But if you frequently climb at venues with flared cracks, a set of offsets will provide protection where nothing else will.
Placing Cams in Horizontal and Diagonal Cracks
Cams can be placed in horizontal or diagonal cracks.
In these types of cracks, placing your cam with the outer lobes on the bottom makes the placement more stable.
Flexible stemmed cams will bend around the edge of the rock and maintain their strength.
Rigid stemmed cams will lever over the edge, causing damage to the stem.
Using Cams Passively
Certain types of cams can be used passively (like a nut). However, in this situation nuts wedge into place better. So unless you've just dropped them all, you'll probably be better placing a nut instead.
Types of Climbing Cams
There are too many designs of cam to list here. Different brands tend to be better suited to different rock types (e.g: Metolius Fat Cams are great for soft sandstone, whereas Black Diamond C4’s are more suited to granite). When you go to buy cams, ask the shop assistant which style is best for the rock type in your local area. If you plan to climb on many rock types and in many different locations, any new, flexible-stem design will be good enough to get you started.
Removing Cams
To remove a cam, simply pull the trigger and slide it out. Sometimes you may need to wiggle it around constrictions in the rock. If a cam is stuck, focus on freeing up the lobes which won’t move. Prize them loose with your nut tool. Once all the lobes can move, it’ll be easier to wiggle it out.
If your cam trigger is unreachable, use the hook on the end of your nut tool to pull it.
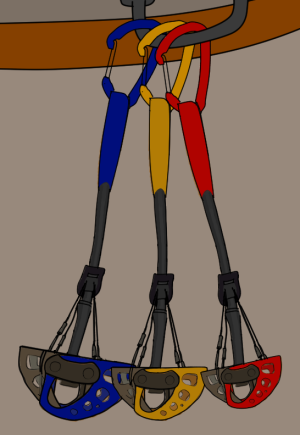
Racking Cams
An efficient way of racking cams is to put them in size order on your harness with their own separate colour-coded carabiners.
If you have small cams on a front gear loop and bigger cams further back, they'll be less annoying as you climb.
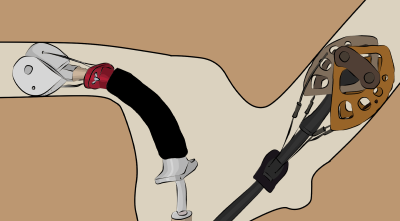
Cams Vs Nuts
Nuts are much lighter and cheaper so it’s easy to carry a lot of them. Cams are quicker to place – great if you’re getting pumped and need to place gear quickly. There are usually more options for placing cams than nuts, so it’s better to place nuts when you can and save the cams for later.
One thought on “Trad Climbing Gear > Cams”
Comments are closed.