How to Climb a Big Wall: Bolting
Bolting Ethics
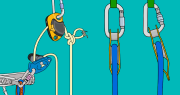
Belays
Some first-ascensionists choose to create bomber bolted belays (making a quick and relieving end to the pitch for future ascensionists), while others prefer natural belays (believing that creating an intricate belay is part of the climb). There is no right or wrong here. When repeating a route with natural belays, it is expected that you respect the adventure of the route and do not add bolts.
Blank Sections
When a climber reaches a blank section on a first ascent, should they drill a rivet and continue climbing, or claim the route to be too difficult and retreat to the ground? Again, there is no right or wrong answer. The commonly agreed ethic is that rivets and bolts should only be placed when there is absolutely no other way to climb the rock, and the number of drilled holes should be kept to a minimum.
Bat Hooks
Bat hook holes are shallow holes which have been drilled in a blank section of rock to accommodate a small pointy ‘bat hook’.When encountering a blank section, some first ascentionists choose to drill a bat hook hole instead of place a rivet or bolt. This may be because they’re running low on time, low on rivets or because they want their route to remain more dangerous.
Whatever the motive, it is commonly agreed amongst modern aid climbers that choosing to make a bat hook hole on a first ascent is poor style, and that a rivet should be placed instead. Drilling a rivet makes the route more ‘repeatable’ for future ascentionists. This is because bat hook holes are often hard to see and can blow out with very few uses, meaning that a rivet must inevitably be placed anyway.
Adding Rivets and Bolts
It is not acceptable to add bolts, rivets or bat hook holes to an established route in a place where there wasn’t one previously (‘replacing’ them is different). This would be roughly equivalent to gluing a massive plastic hold at the crux of a crimpy free climb in order to downgrade it to your level – not cool. The only exception to this rule is if part of the aid route has fallen off, creating a new blank section. With permission from the first ascentionists or local climbers, you may repair the route with the sensible addition of rivets/bolts where needed.
Replacing Rivets and Bolts
If you plan to climb a seldom travelled route, it’s a good idea to bring a bolt kit to replace old/broken bolts and rivets. The common ethic is to only replace hardware if it needs replacing, and to replace it with the same type of hardware as the original (e.g: replace a 1/4” rivet with a 1/4” rivet). An exception to this rule is to replace substandard belay bolts with a full-strength alternative (e.g: replace an old 1/4” belay bolt with a 3/8” bolt).
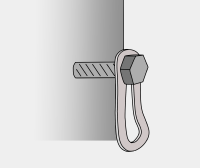
Big Wall Bolts – Material and Strength
The breaking strength of a new, well placed bolt is at least 22kN (very strong). Whereas the strength of a rivet is much less and quite variable. Even a new rivet should not be expected to hold a big fall. You should only use high-quality bolts, rivets, nuts, washers and hangers which are made of stainless steel by a reputable brand. This material lasts a long time before it rusts.
Rivets should be at least 1.5” long in solid granite. In softer rock (e.g: sandstone), use 3/8” bolts instead which are least 2” long. Belay bolts should be 3/8” in diameter and at least 2.25” long in solid granite. In softer rock, it’s recommended to use 1/2” bolts which are at least 3.5″ long.
Bolts should be used for all steep overhangs and roofs (rivets on steep ground are difficult/impossible to climb). Always leave the hangers on bolts so future teams can use them easily.
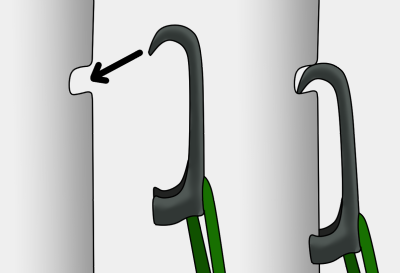
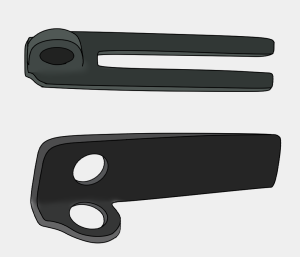
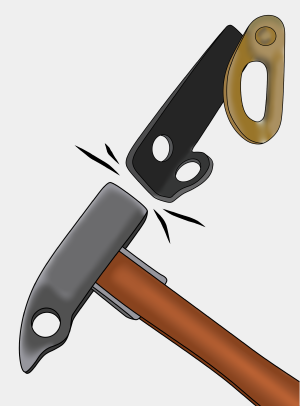
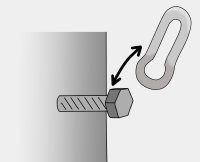
Removing Old Climbing Bolts
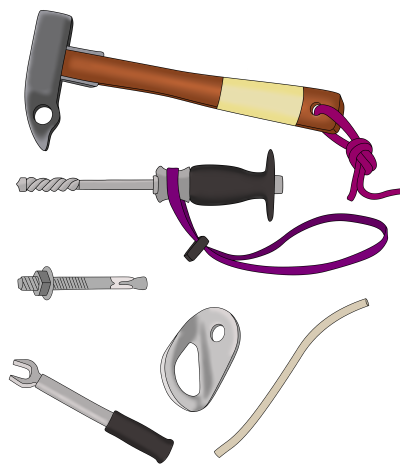
To remove an old bolt, you will need:
– Tuning fork (#4 lost arrow with its center cut out)
– Long thin knifeblade
– Epoxy glue
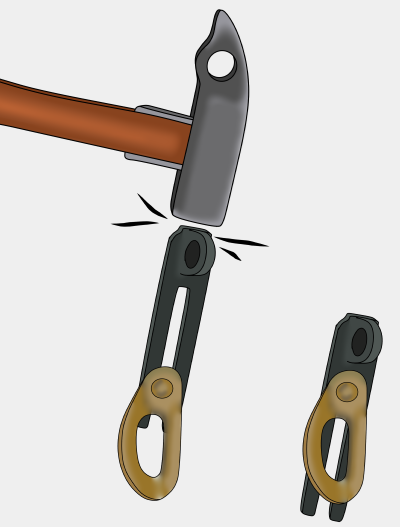
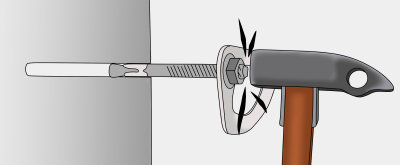
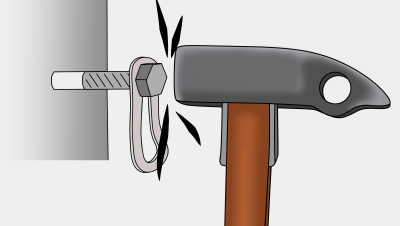
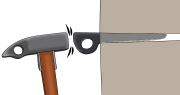
Step 1
Gently hammer a long, thin knifeblade under the bolt hanger to begin the process of prying the bolt out. Tap the knifeblade in from all sides. You may need to switch to a fatter knifeblade before the tuning fork will slip behind the hanger.
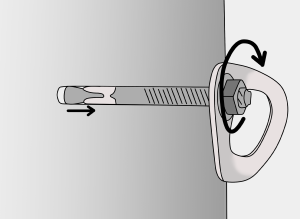
Step 2
Slide the tuning fork behind the hanger and tap it until it is driven all the way. If the bolt hasn’t already popped out, clip the tuning fork and gently weight it to lever it out.
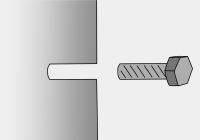
Step 3
It is theoretically possible to re-use this hole for the new bolt. However, this is not recommended because the old bolt may have moved position over time and created an uneven hole from repeated use. You can’t be certain that the original hole is smooth enough for the new bolt to function correctly. Instead, fill this hole with epoxy glue and cover the top with rock dust to camouflage it. Then drill a new hole next to it (at least 6” away).
If the bolt breaks off while you are prying it out, fill the remainder of the hole with epoxy and rock dust for a smooth finish. Once you have started removing a bolt, it is important to continue until the bolt either pops out or breaks. Leaving a half-removed bolt for the next climber is extremely dangerous!
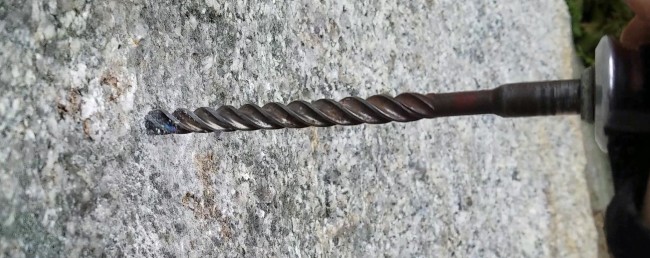
How to Place Climbing Bolts
This section describes how to place expansion bolts. Other types exist (e.g: glue-in bolts) but are not commonly used on big walls.
You Will Need
– Hammer
– SDS compatible drill with a drill bit
– Bolt hanger, washer and nut
– Torque wrench
– Blow tube
– Bolt which matches the diameter of the drill bit
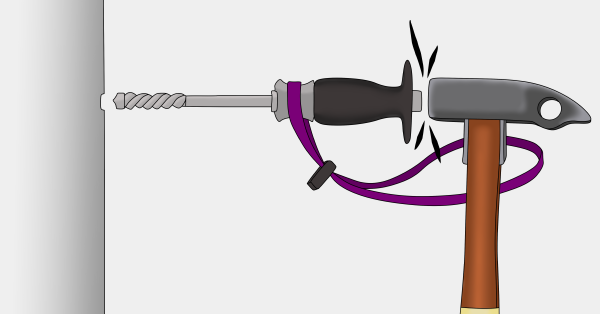
Step 1
Assess the rock. Visually inspect the area and tap it with your hammer to check that the whole area of rock surrounding the bolt is solid. Never place bolts in loose rock.
Step 2
Choose the precise area where the bolt will go. The hanger will need to be flush against a flat part of the wall when the process is complete. Visualize where the hanger will be (or place it there) to confirm exactly where to drill the hole. Use your hammer to gently remove any loose crystals or micro flakes which would stop the hanger from being flush against the wall.
Step 3
Attach the correct sized drill bit to your drill and loop the keeper sling around your wrist or clip it to something so you can’t drop it. Hold the drill 90 degrees to the rock and hit it a few times to create a small depression. It’s important to hit the rock in the exact same place when starting the hole so as not to create a ‘rounded off’ hole.
Step 4
Now the hard work begins. Keeping the drill perfectly perpendicular to the rock, hit it with steady, precise blows, rotating the drill 1/8 to 1/4 of a turn between each hit. Develop a steady rhythm and keep concentrating or else you’ll drill a wiggly hole or hit your thumb. Remove the drill every 50 or so hits and blow out the dust using your blow tube. Close your eyes when doing this, wear glasses or both.
Step 5
Once the hole is deep enough (this may take 20-30 minutes depending on the depth of the hole and rock type), carefully blow all the remaining dust out.
Measure the depth of the hole using the drill bit. It needs to be almost the same length as the bolt. If you’re not sure, it’s better to drill the hole a bit deeper, than too shallow.
Step 6
Put the hanger, washer and nut on the bolt and tap it into the hole. It should go all the way in with a few gentle taps. Adjust the nut so the bolt can go inside the hole as far as possible.
Step 7
Tighten the nut with a torque wrench, making sure the hanger stays in position. The bolt will rotate slightly initially, but then it should stay in position as you continue tightening the nut.
Check the torque recommendation for your bolt and be careful not to over-tighten. As you tighten the nut, the back of the bolt expands and locks the whole thing in place. The bolt is now complete.

How to Place Big Wall Rivets
Rivets are available in different types. Some are basically small expansion bolts. Simply place them in the same way as a bolt (see above), but using a 1/4” drill bit.
Other types of rivet work by compression. As they are hammered in, the rivet compresses and deforms. This compression holds the rivet in place. Because rivets are smaller than bolts, it is much faster to drill the hole for them (typically 5 minutes).
Step 1
Drill a hole as described above.
Step 2
With a plate hanger over the rivet, tap it into the hole, being very careful not to overdrive it.
The rivet should go in as far as possible while allowing the hanger to be removed and replaced easily.
Ideally, you would drill the hole the exact depth so that when the rivet is hammered in as far as possible, it protrudes out from the rock the correct amount. But this can be difficult to get right on your first few tries.
Related Topics

The article above is part of the book – Big Wall and Aid Climbing

E-book (pay what you want)
Paperback
Kindle
Free Sample
Learn how to:
– Lead and follow aid pitches
– Use cam hooks and skyhooks
– Set up a big wall belay
– Use different hauling systems
– Descend with a heavy load
– Place pitons and copperheads
– Camp on a vertical wall
Plus much more.