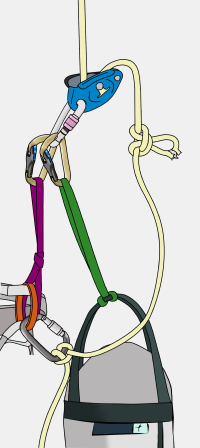
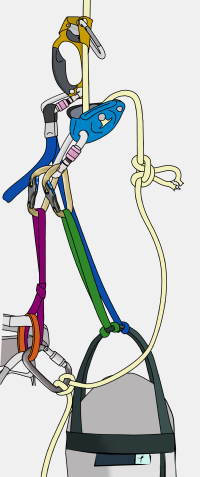
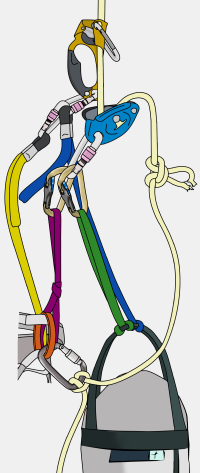
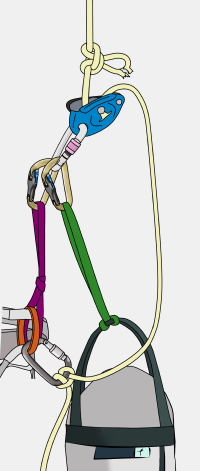
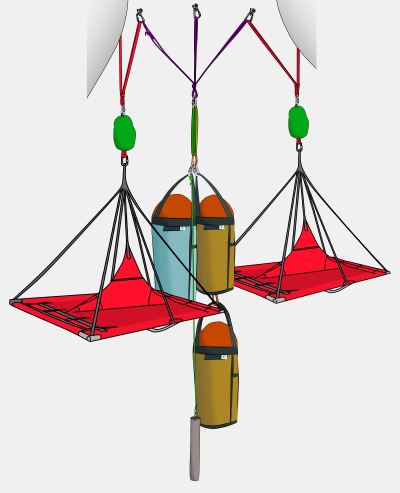
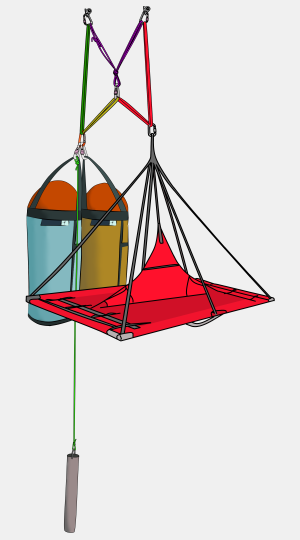
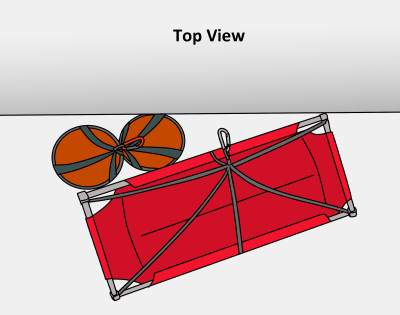
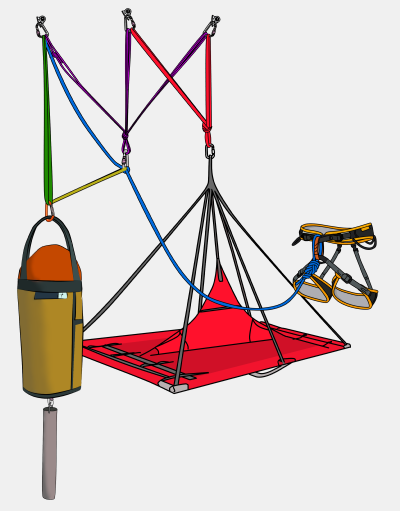
An Introduction To Big Wall Climbing

Check out the full big wall video course, or download the e-book.

What is Big Wall Climbing?

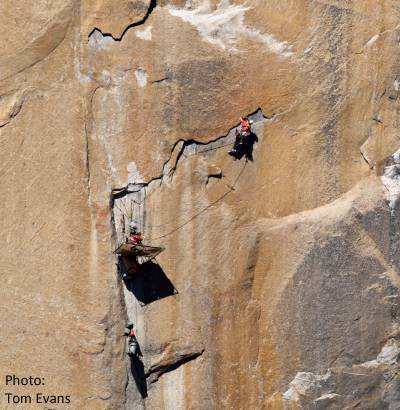
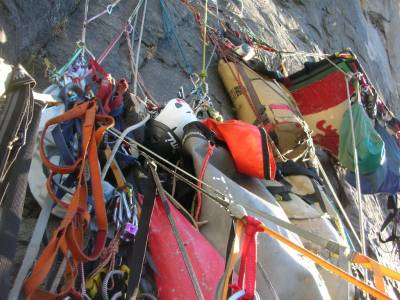
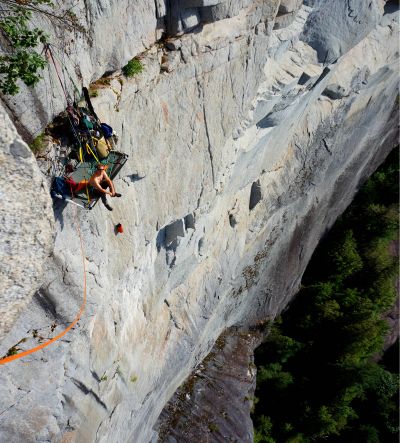
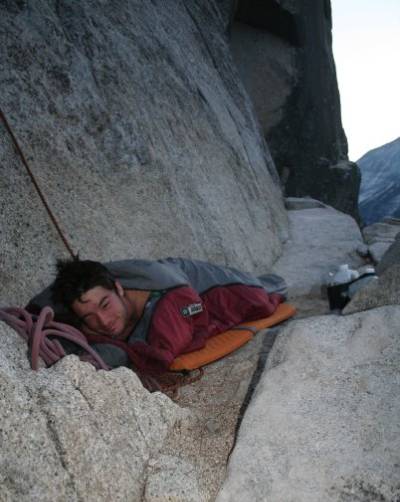
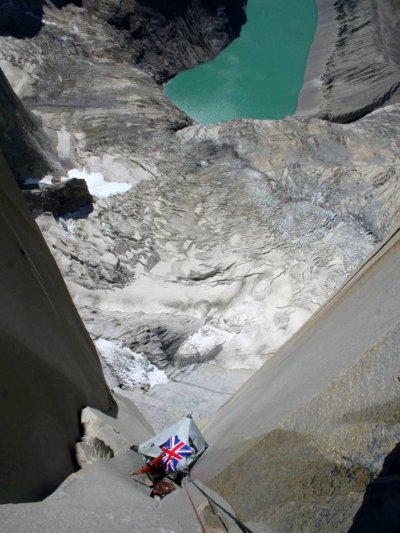
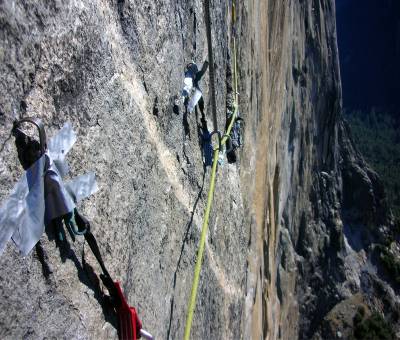
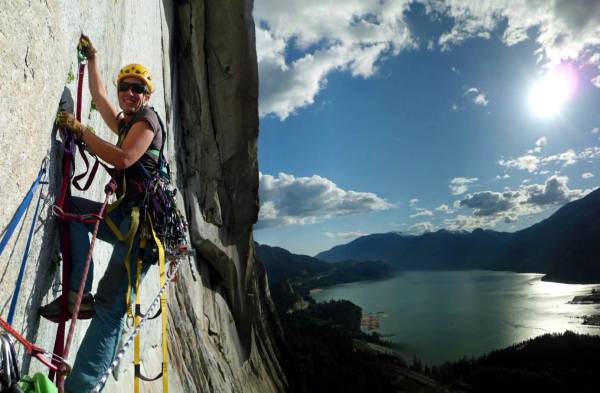
Big wall climbing is a guaranteed adventure. A big wall is essentially a vertical expanse of rock which is too big to climb in a single day. Food, water and other gear is taken up in a haul bag and nights are spent sleeping on a portaledge or natural rock ledge thousands of feet off the ground. Unless you’re a very good free climber, most routes require aid climbing to reach the summit.

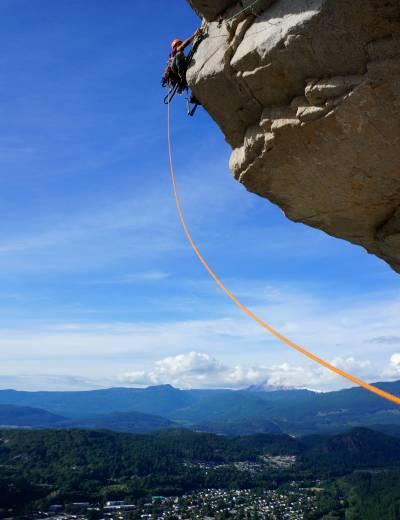
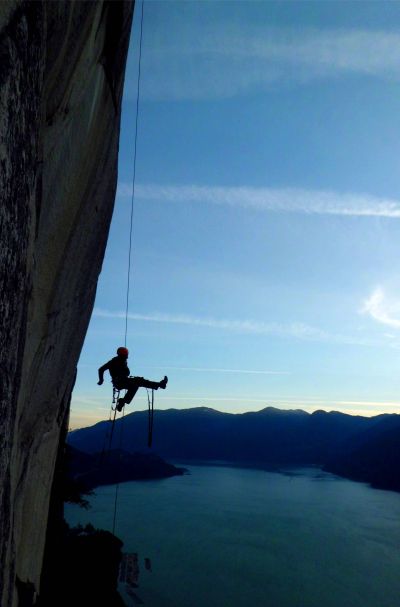
aid climbing squamish

Due to their length, steepness and complexity, big walls present a multitude of mental and physical challenges which you are unlikely to encounter in other disciplines of climbing. Easier big walls, such as the Regular Northwest Face of Half Dome, are routinely climbed in a day by climbers with chalk bags instead of haul bags. Whereas obscure aid-intensive routes may take a highly experienced team over two weeks to complete.

Big walls aren't that common – the most famous, and accessible, is El Capitan in Yosemite, although there are many more in remote locations such as Baffin Island and Patagonia.

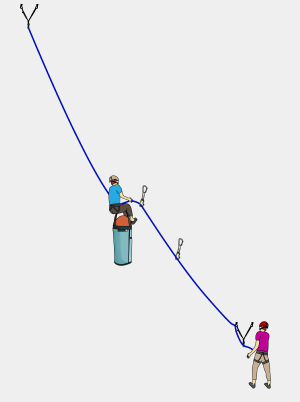
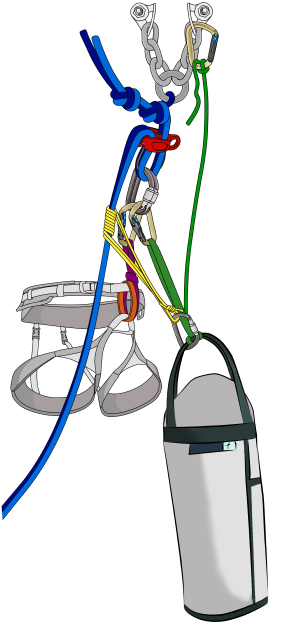
The Big Wall Climbing System – Overview

Leading
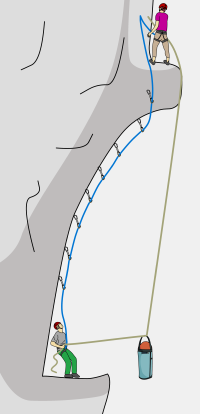
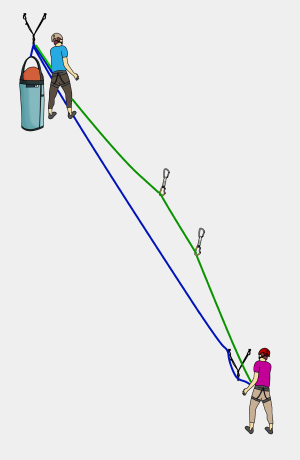
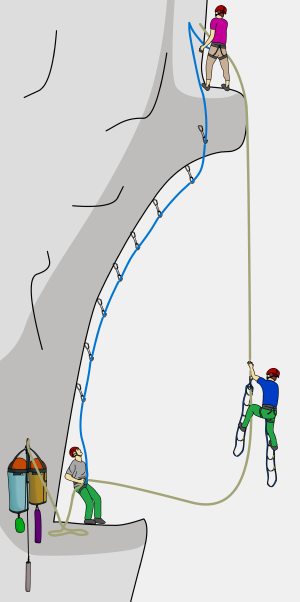
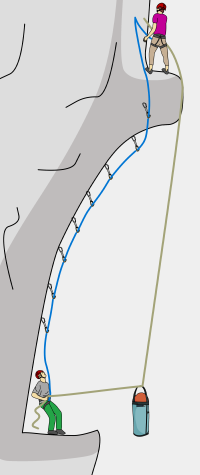
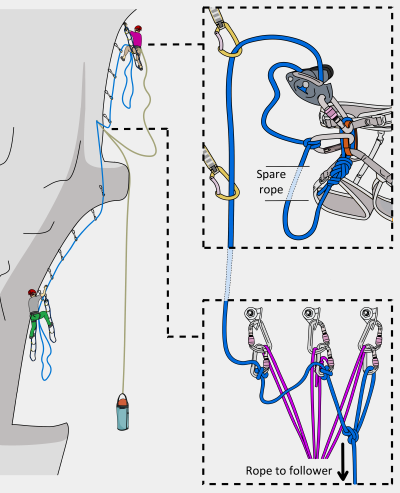
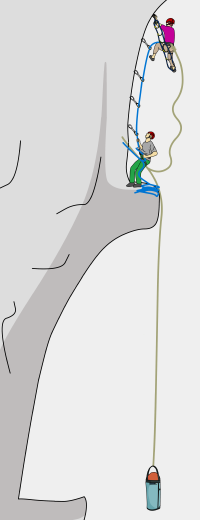
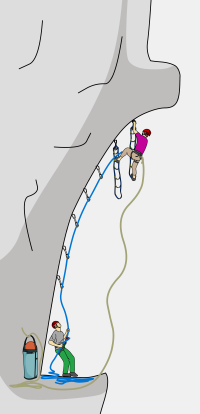
The leader ascends a pitch by aiding, free climbing, or both. They trail a haul line with them which is clipped to the back of their harness.

how to aid climb

Belay Setup
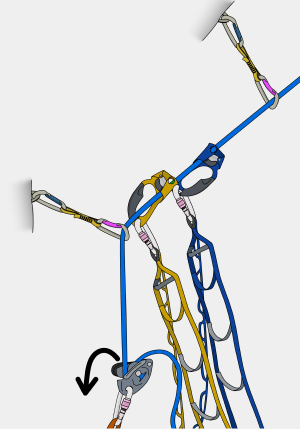
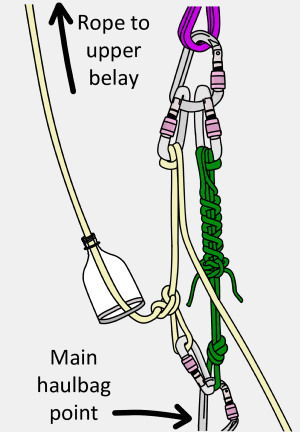
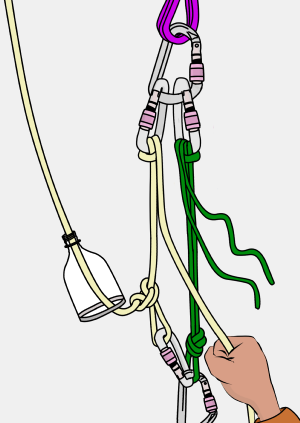
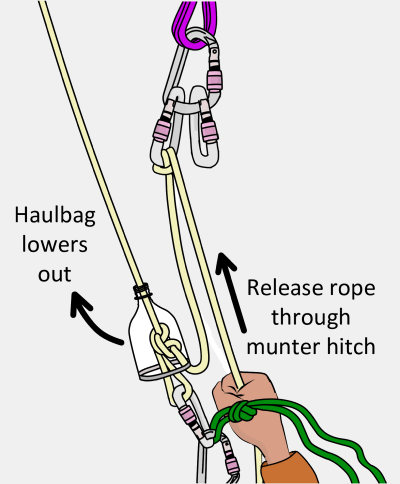
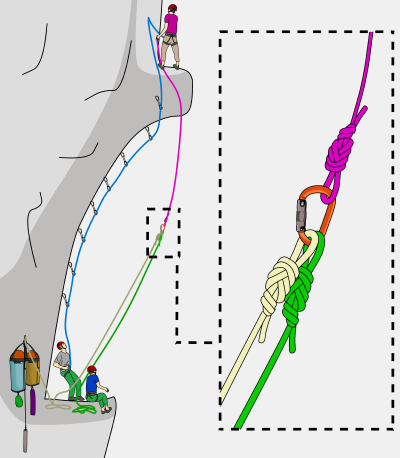
At the end of the pitch, the leader sets up the belay and hauling system. The follower releases the haulbag from the lower belay and the leader begins pulling it up.

how to climb a big wall

Hauling and Jumaring
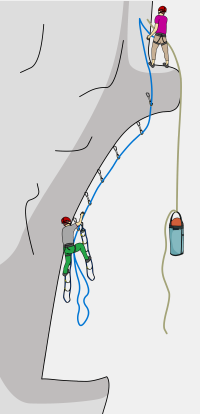
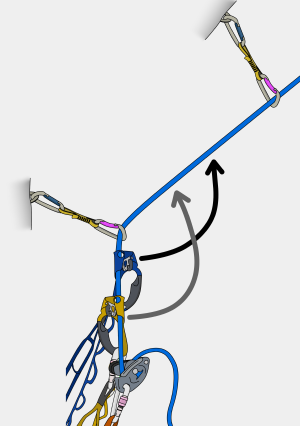
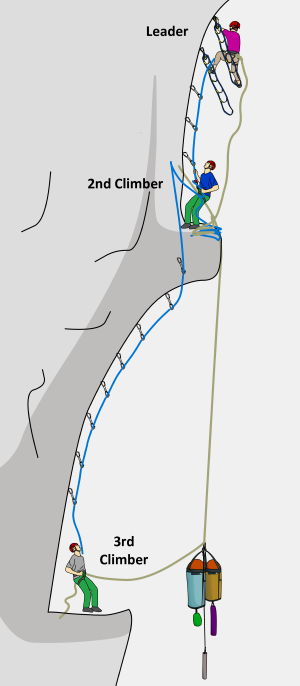
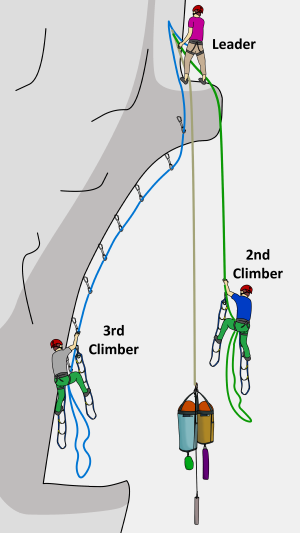
Normally, the leader does not belay their partner up. Instead, they ‘fix’ the lead rope so the follower can ascend it.

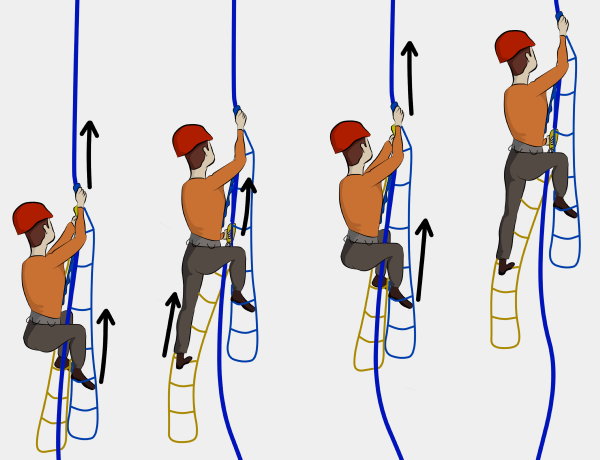
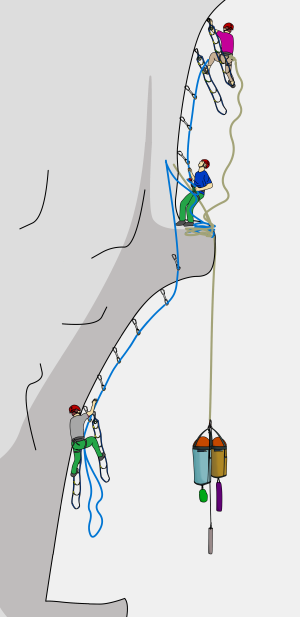
The leader continues to haul the bag while their partner jumars up the fixed lead line, removing all the protection as they go. Once both climbers and the haul bag are at the top belay, the system can be repeated again.

how big wall climbing works

big wall climbing

What is Aid Climbing?

Aid climbing is the process of using gear to support your weight as you ascend. You attach fabric ladders (etriers) to gear and walk up them to gain height.

Conversely, free climbing is the term given to using your hands and feet to climb the rock and placing gear to protect from falling. This gear is not weighted unless you fall (you probably just call this ‘climbing’).

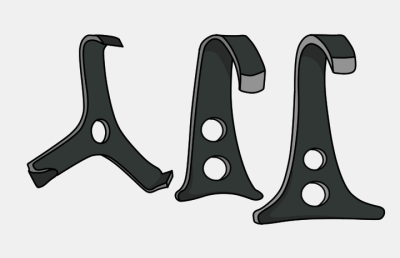
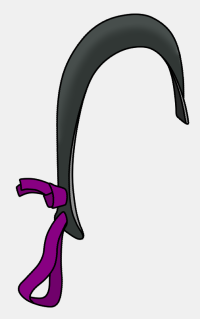
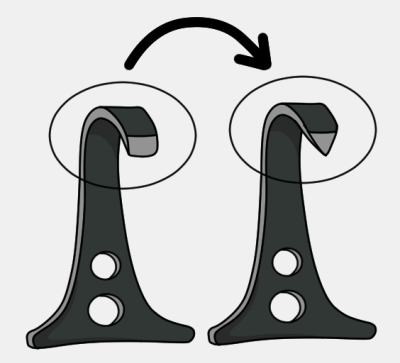
A knowledge of aid techniques allows you to climb routes which are way beyond your free climbing abilities. Aid climbing also has its own unique set of skills and problems that can be just as fun as free climbing. Beginner aid routes typically involve using the same trad protection (nuts, cams, etc..) that you’re already familiar with. More specialist aid gear (such as pitons and copperheads) is needed if you advance to harder routes.

Aid climbing is a useful skill to have even if you have no intention of climbing a big wall. Many alpine routes have sections that, in poor weather, may be impossible without using aid. Just a few aid moves may be all that is needed to reach a summit or a safer descent. Knowledge of aid techniques can also provide a way to safely move up or down a crag in an emergency.

Can I Climb a Big Wall?

Absolutely! The prospect of climbing a multi-day wall can be overwhelming, but when each part of the process is broken down into bite-size pieces, it becomes more of a realistic goal. Aid climbing, jumaring and hauling are all fairly straightforward skills to learn and well within the reach of any experienced trad climber. The important part is to go outside and practise (see Training). If you put the effort into getting these skills dialled, you’ll have a great experience on the wall.

Where Can I Climb a Big Wall?

With stable weather, simple approaches and plenty of easy routes, Yosemite Valley (California) is an excellent training ground to start your big wall career. Other beginner friendly places include Squamish (Canada), the Dolomites (Italy), Orco Valley (Italy), Catalonia (Spain) and Zion (USA).

Beyond that, big walls are spread across the world, often in wild and remote places which are expensive and difficult to get to, with extremes of weather and no rescue service. It is recommended to build up your big wall skills at easy venues first before you venture off to fulfil your wildest ambitions on a remote alpine big wall.

Choosing a Big Wall Climbing Partner

Choosing the right partner is probably the most important part of the climb. This decision can make the difference between having a great adventure or a total nightmare. The best wall partner is a person who you already know well, who’s company you enjoy, who shares the same goals and who you’ve climbed many multi-pitch routes with before.

Climbing a wall with a good friend will most likely be a fun adventure, whether you reach the top or not. Climbing with someone you just met on the internet is far less likely to work out well, regardless of their experience. You will be in close contact with each other for days; eating, sleeping and filling up poo bags immediately next to each other. It’ll make for a much better experience if you get along well.

How competent your partner is at big wall climbing should be a secondary consideration, since this is something that can easily be improved before the climb by training.

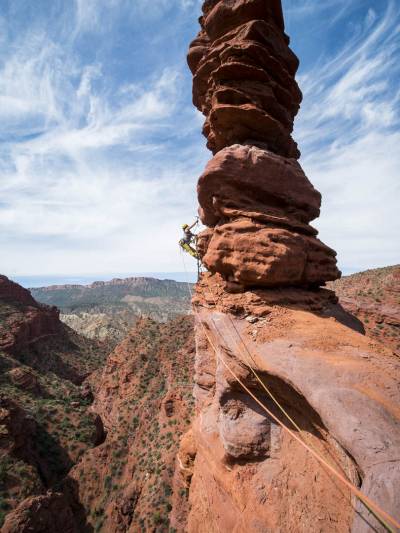
Keiko Tanaka aid climbing Fisher Towers

Choosing a Climb

Choose a route that you and your partner are excited about, a route that makes your stomach flutter when you think about it. You don’t necessarily need to be ready for it now – you only need to be ready when the time comes to climb it. Make sure to allow enough time to practise the techniques described in this book and be prepared to do an easier wall to ‘warm up’ first. Preparing for the adventure is part of the adventure.

Big Wall Climbing Etiquette

The rules on a big wall are very similar to those at any other crag. Generally, it all comes down to being polite, respecting other climbers and having common sense. Here are some basic etiquette guidelines:

- Don’t add extra bolts, rivets or bathook holes to existing routes (replacing old bolts and rivets is good though)
- Don’t chip holds or enhance placements
- Use clean aid where possible
- If other climbers arrive at a route before you, they get to climb first
- If you’re moving slow, it is polite to allow faster teams to pass
- Take your litter and human waste home


big wall aid climbing

Training

To train for a trad or sport climb, you typically need to focus on improving your strength. However to train for a big wall, you need to focus on practising aid techniques and rope systems. Forget about climbing harder grades in the gym – that will make little difference. It doesn’t matter how good you are at other disciplines of climbing, big walling is a whole different game. It helps to be competent at leading 5.9 (HVS for the Brits), but climbing harder than that is not necessary.

Your first big wall begins by making a training plan which is focused on practising the techniques described in this book. Plenty of practise is essential. Skills such as hauling and jumaring are strenuous, slow and clunky at first, but with practise you’ll develop a smooth technique and then it becomes much easier. You should aim to reach a level of competence where you can set up any system without needing to refer back to this book.

However you choose to practise, always go with a partner and always back up any system which you are not familiar with.

squamish aid climbing

The following checklist should be completed before attempting any big wall. Review what worked and what didn’t work during each session and focus on improving the things you found most difficult. This list assumes that you are already competent at multi-pitch trad climbing and self-rescue techniques. As with anything worthwhile, it will take time to build up a good level of competence. Trying to shortcut this process is extremely dangerous and will probably result in disaster.

After you and your partner have become fully competent at all the skills listed, you can try a short wall (e.g: South Face of Washington Column or West Face of The Leaning Tower). Once you have climbed a few shorter walls, you can move on to a bigger objective (e.g: The Nose or Salathe on El Capitan). With the competence gained from training and the experience gained on shorter walls, you’ll not only reach the top safely and efficiently, but also have a great time doing so!

Checklist
Placing all types of regular trad gear
Using cam hooks and skyhooks
Bounce testing
French-freeing
Leading a straight-up aid pitch
Leading an overhang
Leading a traverse
Passing gear between the belayer and leader during a pitch
Leading a pendulum
Switching between aid and free climbing during a pitch
Leading a tension traverse
Fixing mid-pitch
Setting up the belay
Releasing haulbags on a straight up pitch
Releasing haulbags on a traverse
Belay transitions
Cleaning a straight up aid pitch
Cleaning an overhang
Cleaning a traverse
Lowering out from a pendulum point
Jumaring a free-hanging rope
Packing a haulbag
Docking a haulbag
1:1 hauling
2:1 hauling
3:1 hauling
Space hauling
Hauling past a knot
Hauling low-angled terrain
Descending with a heavy load
Descending with a heavy load past a knot
Lowering haulbags
Lowering haulbags past a knot
Abseiling with a damaged rope
Descending low-angled terrain
Retreating mid-pitch
Setting up the bivi
Setting up a portaledge and fly (if applicable)
Using a hanging stove (if applicable)

Note
If you plan to fix pitches, short fix, climb as a team of three or climb a route requiring pitons, copperheads or a bolt kit, you’ll obviously need to practise those skills too.


VDiff big wall aid climbing book

How To Practise Aid Climbing

Top Rope
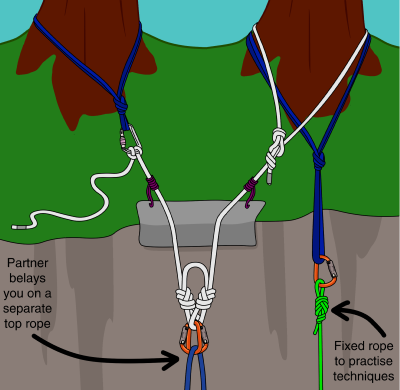
Many of the skills can be safely practised with a top rope. This could be done inside at the gym or outside at a single pitch crag. Stay away from popular routes and ideally choose a crag with crack climbs that are easy to protect.

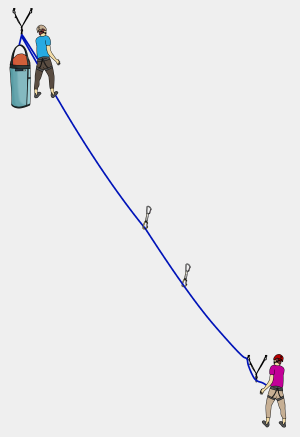
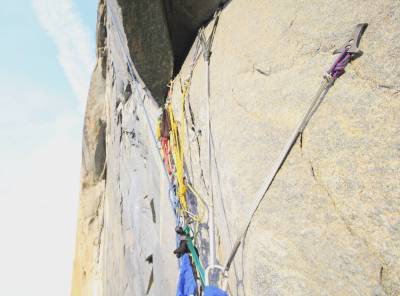
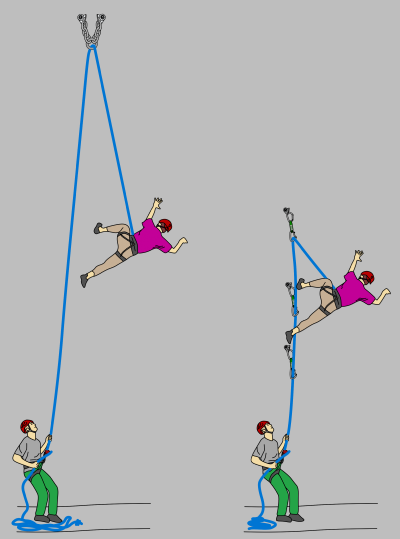
By setting up a top rope and a fixed rope as shown, you can safely practise placing gear, jumaring, cleaning gear, hauling and descending. With a sensible top rope setup, pendulums and lower-outs can be practised safely too. Progress to leading without a top rope back-up once you are confident moving up your aiders and testing gear.

top rope climbing

Rock Angle
Try setting up top ropes on different angles of rock. An angle which is vertical or slightly lower than vertical is a good starting point. Progress to steeper rock and overhangs after that. Leading and cleaning are more difficult on steeper ground and require a modified technique. You’ll need to practise them both.

Jumaring
Practise jumaring down ropes as well as up them. This helps you develop a good thumb-catch technique.

Hooks and Pitons
Stay away from established routes when practising placing hooks, copperheads or pitons. These types of gear can permanently damage the rock. Find a worthless lump of nonclimbable rock instead. If practising at ground level, bring a bouldering pad so you don’t hurt yourself if a piece blows unexpectedly. Aid-bouldering may not be the most fashionable form of climbing, but it’s a great way to learn the art of hooking and piton craft.

Hauling
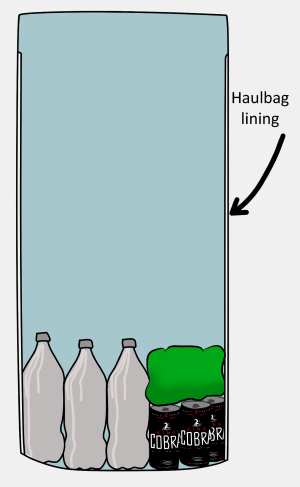
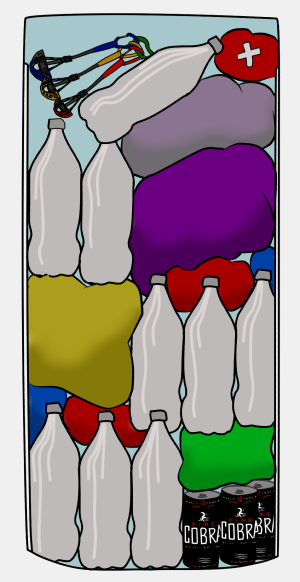
Start by hauling a light load to figure out the system and then progressively add more weight each time. Fill your haulbag with water bottles or rocks. Pad the inside of your haulbag well if using rocks (a few layers of cardboard or an old piece of carpet) so you don’t wear holes in it before even climbing a wall.

Time
Time how long it takes to lead, clean and haul a pitch of similar length and difficulty to your chosen route. Remember to factor in time spent on belay changeovers too. Keep practising to improve your time and use this as a basis for calculating how long each pitch will take on the wall.

Multi-Pitch
Once you’ve built up an understanding of big wall systems on single pitches, you can progress to a multi-pitch crack climb. Aid climb the crack (even if you could easily free climb it), set up a belay and practise your belay transition and organisation. Take a haulbag and a portaledge too. It’s much more difficult to set up a portaledge when hanging on the wall than it is when standing on the ground. Cook a meal in your hanging stove, spend the night up there and climb a pitch in the dark if you want a full simulation of life on the wall. A two-pitch climb can be done with a night’s sleep halfway and you’ll still be back down in time for work in the morning. Don’t forget your poop tube!

Aid Climbing Ratings

Check out the full big wall video course, or download the e-book.

Every climb receives a grade which determines the length of time and commitment required to climb it, with big wall routes covering grades V to VII. With only three grades to describe the length of every big wall route, the system doesn’t work so well. Generally, Grade V’s require one or two nights on the wall and Grade VI’s require two to seven nights. It is recommended to start with a few Grade V’s before trying a Grade VI. Grade VII is reserved for extremely difficult aid-intensive routes on huge walls in remote environments, often with hostile weather and no possibility of a rescue.

Aid Climbing Grades - The Theory

The grades range from A1 to A5, and from C1 to C5. 'A' grades refer to anything that requires the use of a hammer (e.g: placing pitons or copperheads), whereas 'C' grades are used if the pitch can be climbed without using a hammer (i.e: ‘clean'). A1 is super safe. A5 is super dangerous.


big wall ratings

Aid Climbing Grades - The Reality

In reality, the grading system doesn’t really work. Aid ratings are based entirely on the danger involved. The rating does not tell you how physically challenging a pitch is, or how difficult it is to figure out the moves.

To add to the confusion, aid pitches get easier with more ascents. Piton scars widen and become more reliable cam or nut placements, copperheads become fixed, ‘chicken’ bolts and rivets get added and routefinding generally becomes more obvious.

Unfortunately, there is no way of accurately measuring how dangerous a pitch is – we can only guess. This works fairly well up to A3. But in the harder grades, it becomes a measure of fear. And fear is different for each climber and each situation.

sea of dreams el cap

Aid grades of A5 or harder impress the masses, but no climb can really be given the A5 rating without proof of certain death if you fall. Those tiny copperheads could hold, but you don't know until you fall off. And no aid climber is crazy enough to test this theory. Not even Ammon McNeely.

A grade of A5 cannot even be confirmed if someone falls off. This is because every climber protects pitches slightly differently. Some climbers place more gear, equalize pieces and add shock-absorbing slings. Other climbers back-clean, don't bring enough gear or miss out key placements in the pursuit of moving faster.

A3 gets upgraded to A4 due to fear. A5 gets downgraded to A4 due to lack of proof. Therefore, the grade of A4 becomes a vast spectrum of difficulty, which is only possible to describe when you've climbed enough of it. Here's my view:

el cap aid climbing

A grade of A4 could mean there is one well-travelled and straightforward section of fixed gear in solid rock which is really A2 if you spend time climbing it well (e.g: crux pitches of Lost in America, Zenyatta Mondatta, many El Cap trade routes). Or it could be a 30+ pitch nightmare of rotten rock and death blocks. On an average pitch, the unfortunate leader will suffer in a perpetual state of mind-boggling terror as they sketch from one horrendous placement to another.

It will often take over 30 minutes to construct a science-project placement which enables the leader to tremble one foot higher up the 3000-foot wall. Fear builds exponentially as they become further and further removed from anything secure and completely uncertain that they will ever reach a belay. After 8 hours in a new and unfamiliar state of panic, dehydration and delirium, the exhausted leader will be forced to mantle out of their aiders into a long free climbing section of unknown difficulty, protected below by a string of worthless ironmongery. This must be climbed while wearing a massive clustered aid rack.

Balanced at the top of these desperate runout free moves, the leader must stretch high to place a tiny copperhead and transition back to the final section of improbable aid moves to a belay which must be constructed from pitons and duck tape. Or at least that’s how I felt on The Central Tower.

Aid Climbing and Big Wall Gear

Big wall gear is expensive, but you don’t need to buy everything to start with. Many trad climbers already own most of the rack for a clean aid route, and sufficient bivi gear for a summer wall. If you’re not sure that big wall climbing is right for you, consider choosing your first route as one which does not require a portaledge.

By choosing a fairly fast route, you can get a smaller haulbag too. You will of course need to spend more money if you want to advance to harder, longer or more remote walls. If so, it is worth getting durable kit that will last many walls. An example kit list for a short clean aid wall is given below.
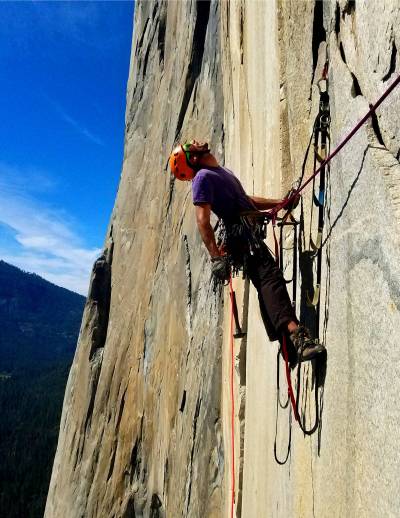
aid climbing el cap

Rack
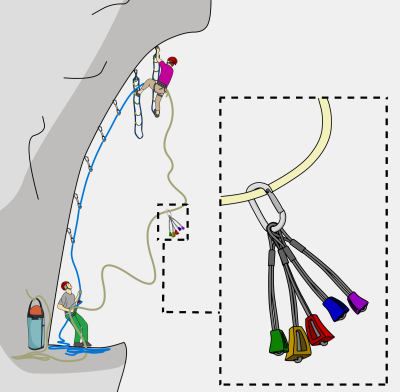
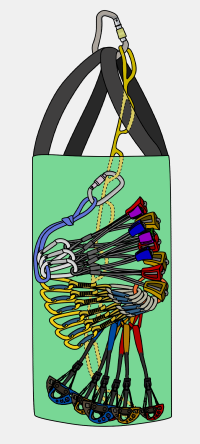
3x sets of cams up to Camalot #3
1x cams size #4 and #5
1x set of small offset cams
1x set of regular nuts
2x sets of offset nuts
2x nut tools
2x cam hooks
2x skyhooks
10x regular quickdraws
10x extendable quickdraws
5x 120cm slings
20x spare snapgate carabiners
12x spare screwgate carabiners
2x cordelettes
1x hauling device

Personal Equipment for Each Climber
Harness
Helmet
Pair of approach shoes
Pair of free climbing shoes
Pair of fingerless gloves
2x Aiders
2x Daisy chains
2x Jumars
GriGri
ATC
Prusik cord
Sleeping pad
Sleeping bag
Bivi bag
Jacket and spare clothes
Headlamp

Group Equipment
1x full size haulbag
2x 60m dynamic ropes
2x rope bags
Knot protector
Water
Food
Spoons
First aid kit
Topo
Phone
Sun protection
Small repair kit
Pocket knife
Poop tube
Hygiene products
A few stuff sacks

Big Wall Ropes

Almost every wall requires two ropes; a lead line and a tag/haul line. A length of 60 meters (for each rope) will be suitable for most walls. However, modern routes are often established with 70m ropes, so reaching the belay with a shorter cord may be impossible. The character of the route, the length of pitches and the abrasiveness of the rock dictate what ropes you should take.

Lead Rope
The lead rope is your most critical piece of gear. A burly 10-11mm diameter dynamic rope with a low impact force rating will stand up well to the abuses of aid intensive walls.

Free Climbing Ropes
For walls that you plan to mostly free climb, a lighter, 9.0-9.4mm rope will be much more practical but less durable. In this case, consider using a dynamic haul line so you have a spare rope in case your lead line gets trashed.

Dry Treatment
A rope with dry treatment will resist absorbing water. This increases its durability and maintains a low impact force when wet. The treatment also helps to stop dirt and sand getting into the rope's fibers, which means the rope will run across the rock and through carabiners with less friction than if it was untreated. It's worth the extra cost for a dry treated rope if you plan to climb wet/snowy walls.

Unicore
Some modern ropes have a unicore design – the rope’s sheath is permanently bonded to its core. This eliminates sheath slippage, making it much safer for situations such as jumaring.

Haul Rope
The haul rope should be the same length or longer than your lead rope, and can be either static or dynamic. This rope is used for:
- Hauling your bags up the wall
- Passing gear to the leader mid-pitch
- Abseiling
- Jumaring (if climbing as a team of three

Static Haul Ropes
Because a static rope has almost no stretch, it is great for hauling and fixing pitches. A 8-9mm diameter static rope is a good lightweight choice for hauling light loads. A 9- 11mm rope is a better choice for hauling heavier loads and for climbing as a team of three. Fixing pitches with a static rope is much safer than using a dynamic if the rope is running over rough rock or sharp edges.

Dynamic Haul Ropes
A dynamic haul rope theoretically lowers the efficiency of a hauling system. However, once loaded, the extra stretch is barely noticeable. A single-rated dynamic haul rope also serves as a spare in case you destroy your lead line.

Tag Line
Tag lines range from 5.5mm (dyneema) to 8mm (perlon) in diameter and are used for hauling super light loads. A half rope could also be used. For fast walls, you may choose to use one of these instead of a haul rope. If climbing a slower wall with a thick haul rope, it is worth trailing a tag line to save weight on your harness. Tag lines (and half ropes) are much lighter than haul ropes, but are not strong or thick enough for jumaring or hauling heavy loads.

Rope Bags
Ropes can be stacked in slings at the belay, but stuffing them into rope bags is a better way to tame them when windy. You can buy expensive rope bags which have sewn clip-in loops, but Ikea bags work just as well.

Big Wall Rack

The rack requirement is different for each route. Most easier routes are climbed clean (without using gear which needs a hammer to place and remove). Generally, a triple set of cams to #3 Camalot and a double set of offset nuts will be a sufficient rack for many clean aid routes. For a hard nail-up, you may need 4-5 sets of cams, 50+ pitons, 100+ copperheads, a bolt kit and plenty of other obscure pieces of ironmongery. Even on clean aid routes, it is useful to have a hammer for removing stubborn nuts (hit your nut tool with your hammer).

In general, it is a good idea to have as great a variety of gear as possible, since one particular brand of cam may fit in a certain placement much better than any other.

Slings and Quickdraws
Slings and quickdraws extend gear to reduce rope drag, help insecure placements from dislodging themselves and direct the rope away from sharp edges or flakes. 60cm and 120cm dyneema slings are particularly useful for equalizing gear on lead. Take a mixture of at least 20 slings/draws on a wall.

Screamers
Screamers (fall arresters) are energy absorbing quickdraws. A screamer activates (the stitching rips) when ~2kN force is applied. This reduces the impact force on your gear during a fall, meaning that it is more likely to hold.

Screamers are most useful when attached to the first few pieces of gear in a pitch when fall factors are the highest and also on fairly marginal gear higher in the pitch. A screamer can only be activated once, but it can be used as a full-strength extender after activation. Scream Aids work in a similar way except they activate at ~1.5kN and break completely at 7kN. They are only really useful on extremely marginal gear.
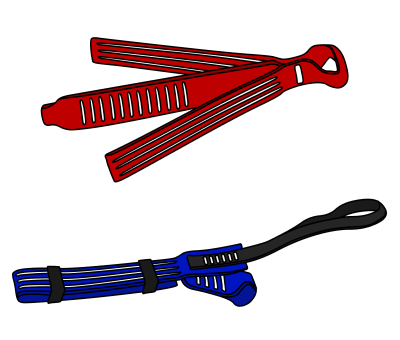
yates screamers aid climbing

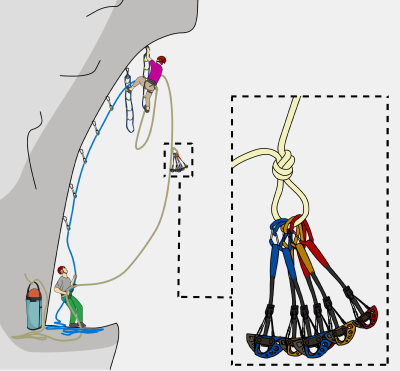
Cordelettes
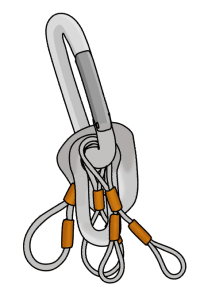
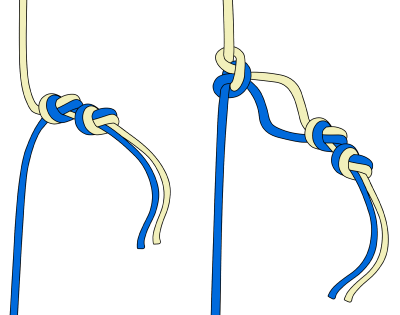
You’ll need two cordelettes on a wall – one for each belay. A 7 meter length of 8mm cord is great for equalizing 3 bolts. Simply tie it in a loop with a double fisherman’s bend. You can then coil it up (like you would with a long sling) to rack it on your harness. A shorter length of cord is more convenient for 2 bolt anchors.

Long slings can be used too, but cordelettes are more durable and much easier to untie after loading. You could also get a pre-made cordelette such as the Trango Equalizer or the Metolius Equalizer.

big wall cordelette

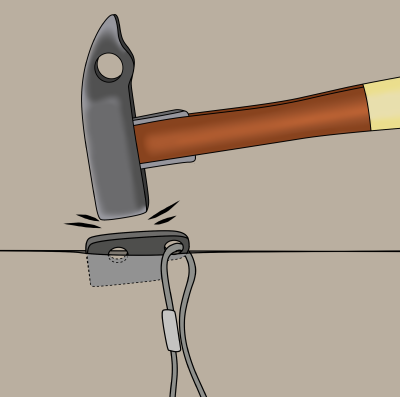
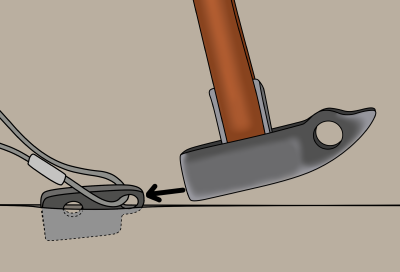
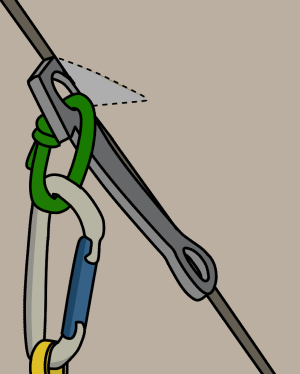
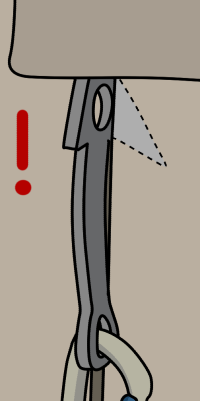
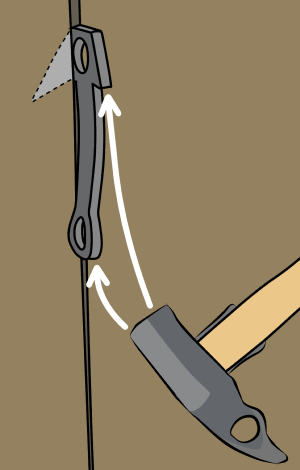
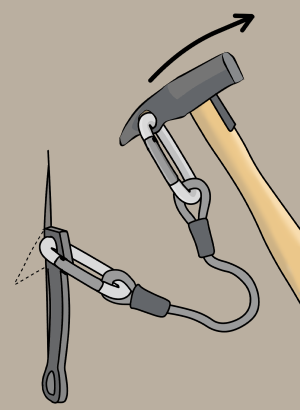
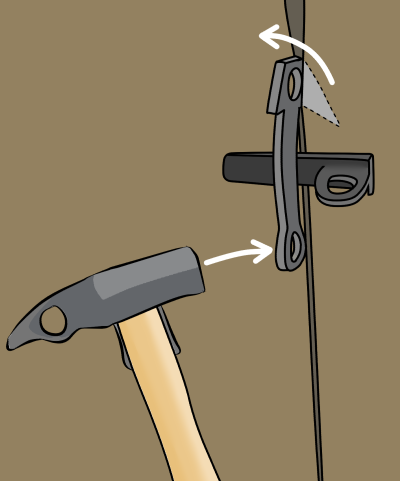
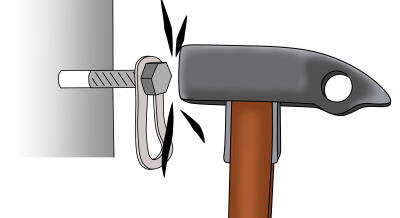
Knots in slings can be difficult to unfasten after being heavily loaded.

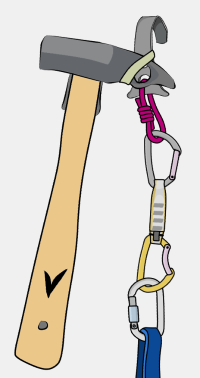
To loosen up stubborn knots, tap them against the wall with your hammer.
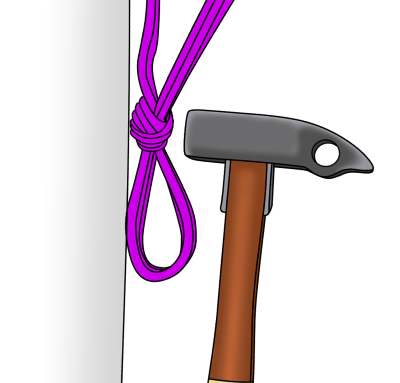
unfasten tight knot

Hauling Pulleys
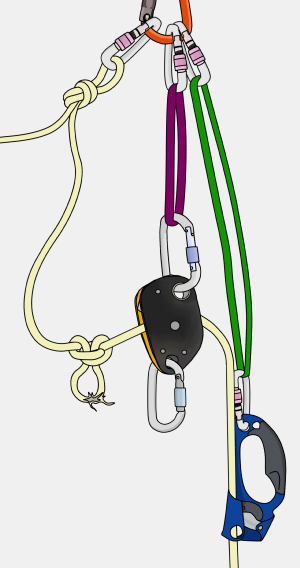
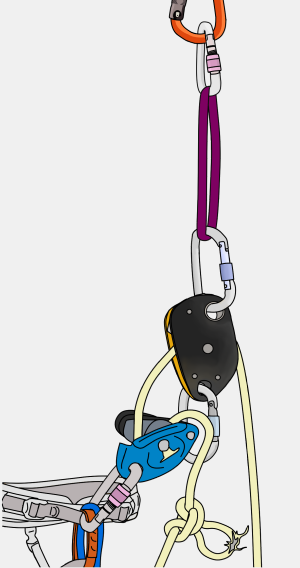
A pulley with a locking, toothed catch (such as the Petzl Pro Traxion) is essential for hauling heavy loads up the wall.

For hauling lighter loads, a smaller device (such as the Petzl Micro Traxion) will be fine.

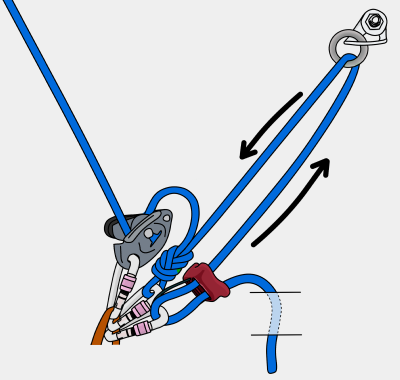
For super heavy loads, you'll need a locking pulley plus two other pulleys to create a 2:1 or 3:1 mechanical advantage hauling system.
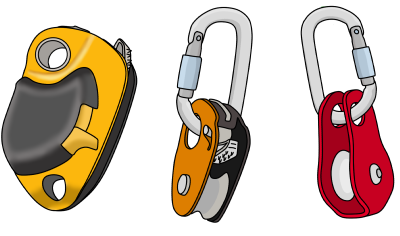
petzl hauling device

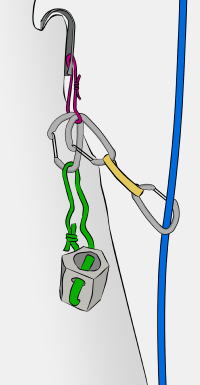
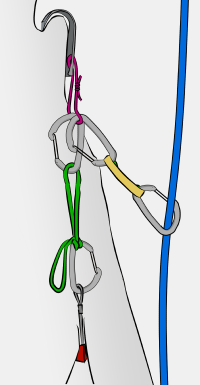
Swivel
Some climbers use a swivel on their haul bag to avoid the haul line getting kinked as the bag is lowered out on a traverse. It's not essential, but can be useful.

Carabiners
You'll need lots! There are no special aid specific carabiners, but you'll need more than you would take for your standard multi-pitch trad outing. Aim for at least 12 spare screwgates and 20 spare snapgates in addition to the carabiners already on your gear.

big wall swivel

big wall aid climbing

Personal Big Wall Equipment

Helmet
Helmets are essential on big walls. Leader falls can happen with no warning, rocks can fall and gear can be dropped. Wear one. The most important factor when buying a helmet is getting one that fits your head snugly – it shouldn't move when you tip your head. A sloppy fit reduces the helmet’s ability to protect your head.

Your helmet should adjust to accommodate a hat, and a ponytail if you have long hair. Also, make sure the headlamp attachments are compatible with your headlamp.
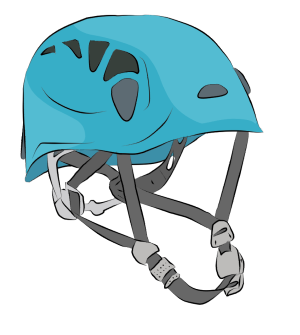
climbing helmet

Belay Device
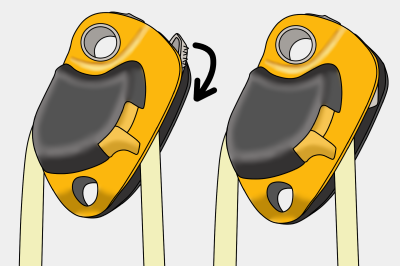
Any type of belay device can be used for big wall climbing, though using an assisted-braking belay device (such as the Petzl GriGri) is the most useful. It requires much less effort to hold a climber while they hang on the rope (e.g: during pendulums or tension traverses), it can be used as a backup when cleaning pitches and is useful for hauling.

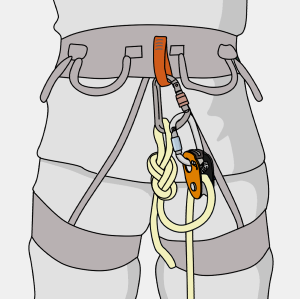
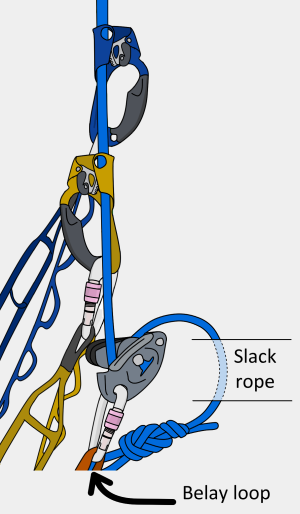
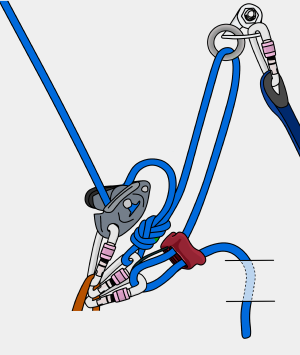
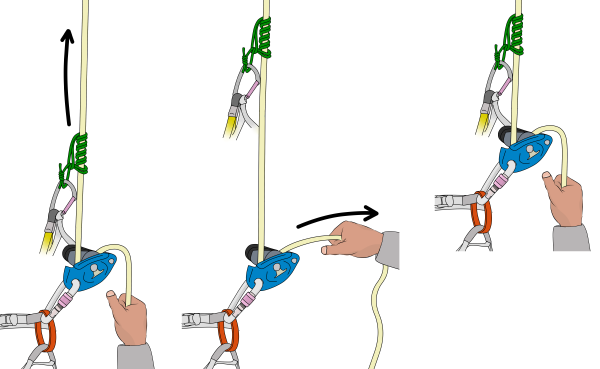
GriGri's are not auto-locking; you still have to hold the brake rope at all times, just like you would with a normal belay device. This is especially true with thinner ropes, very light climbers or if there is ropedrag on the route. To go hands-free at the belay, simply tie an overhand knot as shown.
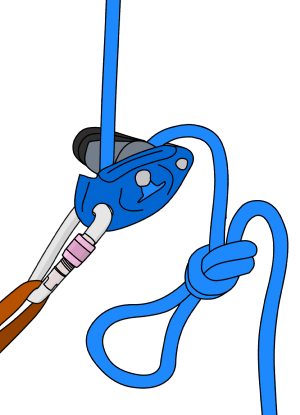
petzl grigri

GriGri's are designed to work with the following rope diameters. Make sure you're using the correct rope for your device.
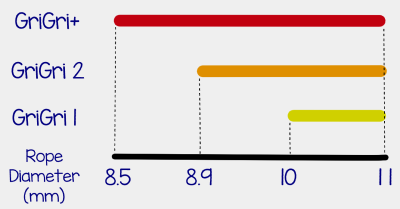
petzl grigri rope size

Harness
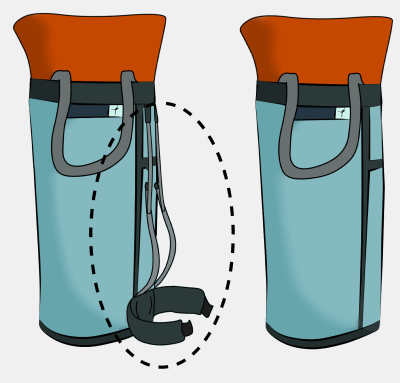
Any climbing harness will suffice, but getting a big wall specific one makes life a lot more comfortable. A typical big wall harness has:
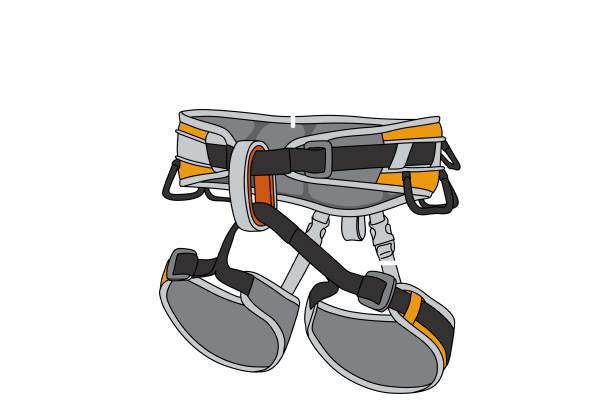
big wall climbing harness

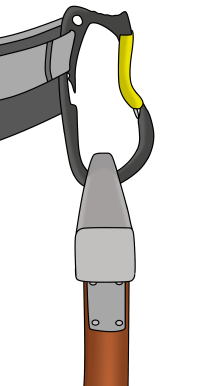
Some also feature a handy hammer holster. If your harness doesn't have a haul loop on the back, you can make one by tying webbing around the whole waist belt. It's worth going to your local shop and trying some on, rather than ordering online. Clip some heavy stuff to the gear loops and hang in the harness to simulate what it’ll be like on the wall. Good shops will have a facility for you to do this.

Waist Belt
The waist belt needs to go small enough to be tight over a t-shirt, with enough adjustment to safely doubleback the buckle when you’re wearing multiple layers.

Leg Loops
Some climbing harnesses have adjustable leg loops too. This is useful if you plan to climb in cold environments where you'll need to wear thicker pants, or if the fixed size options just don't quite fit. The leg loops should fit closely around your thighs without hindering movement.

The Rise
The rise is the distance between the waist belt and leg loops. Think of it as the measurement between your belly button and crotch. Women's harnesses tend to have a bigger rise, to fit women's body shapes better. If the rise is too short, you won't be able to get the waist belt all the way up to the smallest part of your waist.

Chest Harness
Many aid climbers also use a bandolier or chest harness to rack gear on.

Aid climbing gear is heavy – having that weight distributed between your shoulders and hips is much more comfortable. It also helps spread the gear out, making it easier to find.
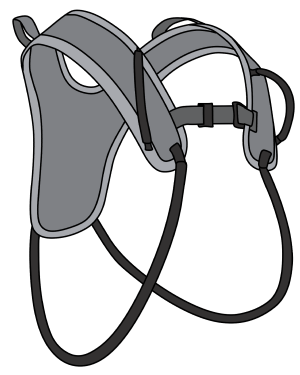
big wall chest harness

Aiders
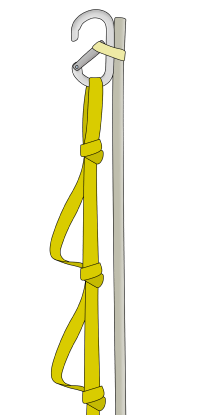
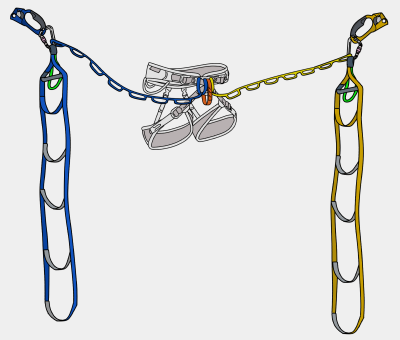
Aiders, or etriers, are multi-stepped fabric ladders, sewn as either a ladder or in alternating triangles. They attach to the gear you place (together with your daisy chain) so that you can stand your weight on it. You'll need two of them.

If getting the ladder type, look for some that have a solid plastic reinforcement on the top step, as this makes top stepping much easier. Alpine aiders are the same design but made with thinner webbing. They are light and pack up small, making them great for occasional use. Alpine aiders are uncomfortable on the arches of your feet if you stand in them for long periods of time.
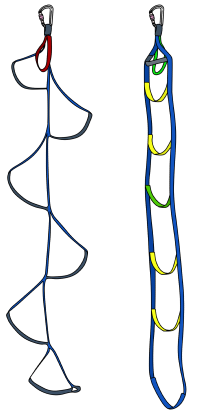
aid climbing ladders etriers

Daisy Chains
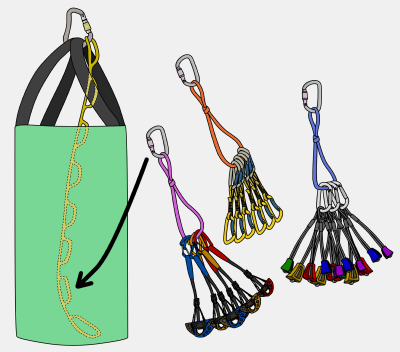
Your two daisy chains (lanyards) connect you directly to the gear which you place. Attach the daisies to your harness by girth hitching them through your harness tie-in points or belay loop. There are two main types available: Loop-style and adjustable. Which type you use mostly depends on the style of climbing you’ll be doing and personal preference. Adjustables save a lot of energy on complex aid pitches, especially overhangs.

The traditional loop-style daisies are generally better on easier, slabbier terrain when it’s not necessary to adjust your daisy so often. Combining either of these styles with an Allfrifi hook can speed things up too. Having a third daisy/aider is super useful for equalizing yourself between sketchy pieces when creeping up a hard aid pitch.
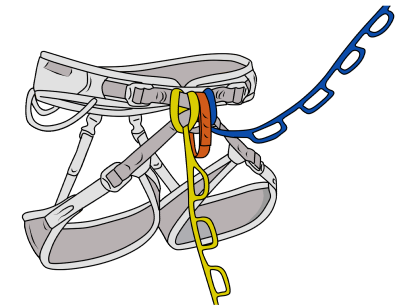
daisy chains aid climbing

Loop-Style Daisies
This traditional daisy is a full-strength nylon or dyneema sling with lots of sewn loops in it, designed to be used with a fifi hook or carabiner to adjust the length.
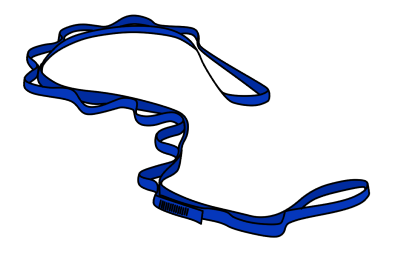
loop style daisy chain

The stitching between loops is very low strength, however. If you connect to a piece of gear by clipping a carabiner through two consecutive loops, the stitching could break, causing you to become completely detached.
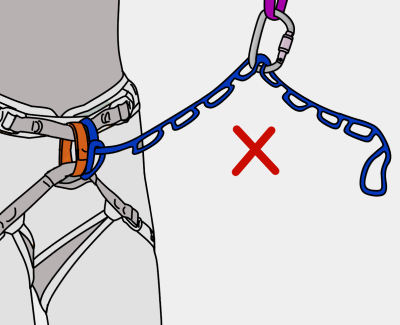
how to use climbing daisy chains

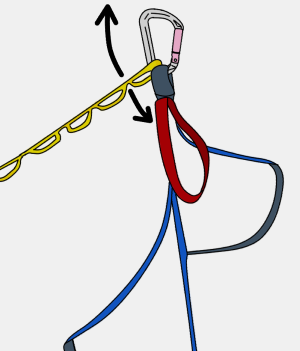
Loop-style daisies should be shortened as shown so the daisy is still connected end-to-end and therefore remains full strength.
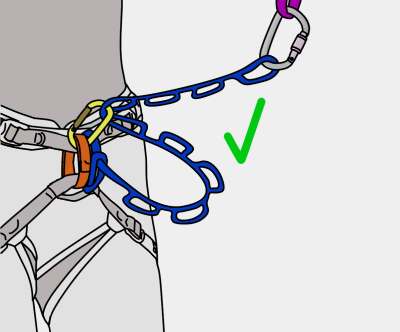
how to use daisy chains climbing

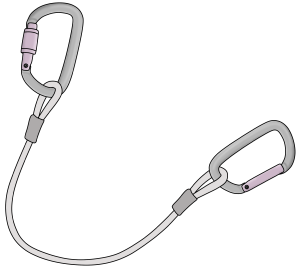
You could also use a personal anchor system (PAS) as a daisy.
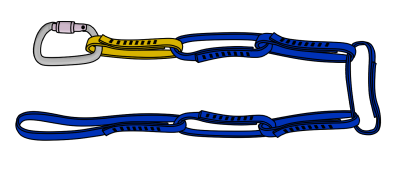
pas climbing tether

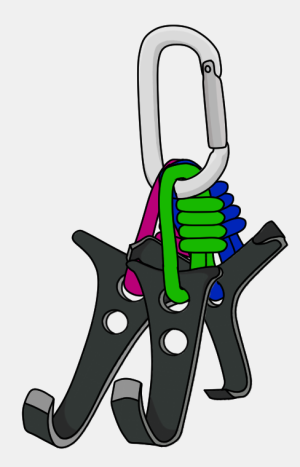
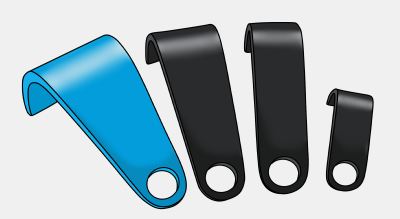
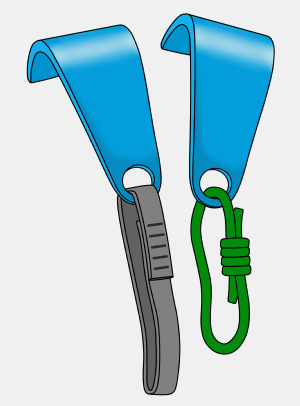
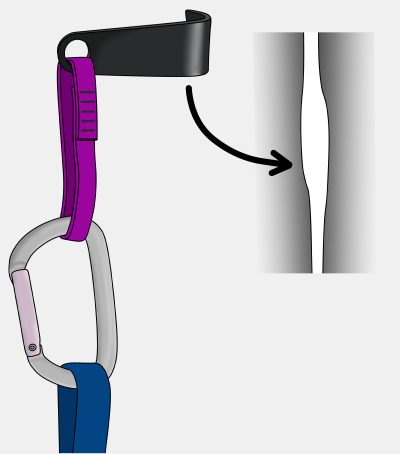
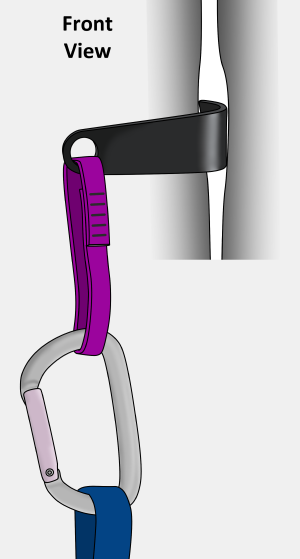
Fifi Hook
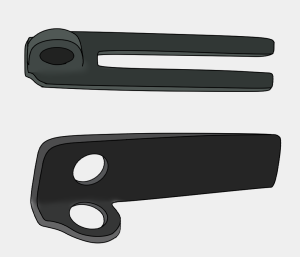
A fifi hook is a metal hook that is girth hitched to your harness. It allows you to hook into a daisy loop, or directly into a piece of gear so you can weight it at the length you choose.
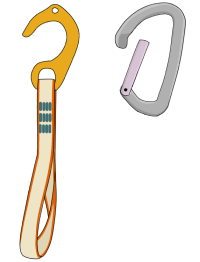
fifi hook

You can also use a snap gate carabiner instead of a fifi hook – it's a bit fiddlier but more secure. If using a carabiner, a keylock style gate (without a nose) is better, as it will snag less.
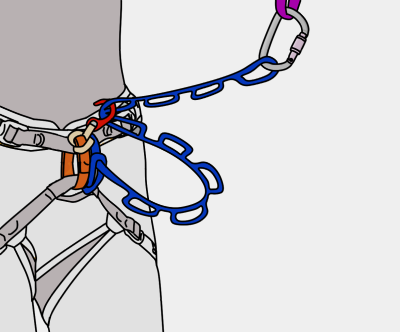
fifi hook aid climbing gear

Adjustable Daisies
Adjustable daisies use a buckle system for easy length adjustment. They are not full strength and should never be used as your primary anchor attachment. They are much quicker to adjust than the loop style and significantly less strenuous on overhanging terrain.

A few types are available with Yates producing an excellent design. Be warned that if you have the buckle facing into the rock, it can self-adjust when weighted. Other disadvantages are that the webbing gets twisted easily and wears out fast. Yates daisies are only 5kN to start with and soon become less. Consider replacing the webbing after each wall.
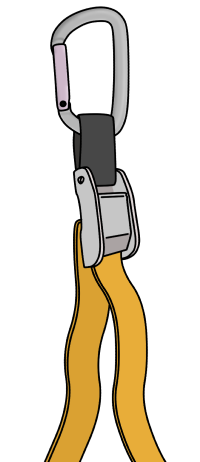
adjustable daisy chain

Metolius Easy Daisies should be avoided. They are very weak (1.5kN) and are nearly impossible to tension or release under load, making them useless on a big wall.

metolius adjustable daisy

Allfrifi Hooks
The Allfrifi is basically a fifi hook welded directly onto the buckle of an adjustable daisy. They are not essential for aid climbing, but can speed up the process a little and allow you to attach slightly closer to a piece of gear – useful when aiding on steep ground.

If you choose to use an allfrifi, you’ll still need two regular daisies since the allfrifi does not have a clip in point for an aider.
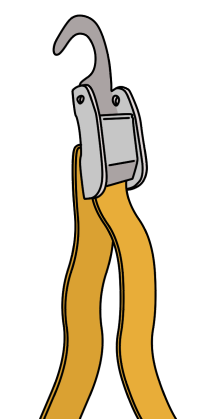
allfrifi hook aid climbing

Jumars
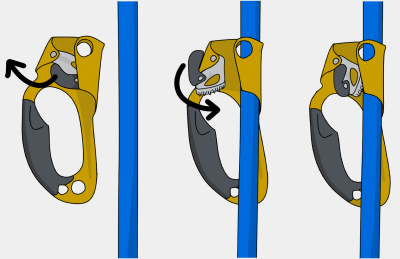
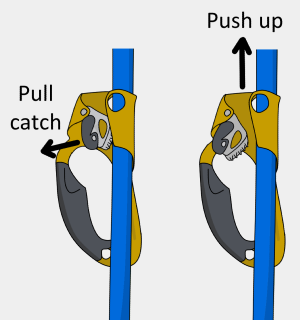
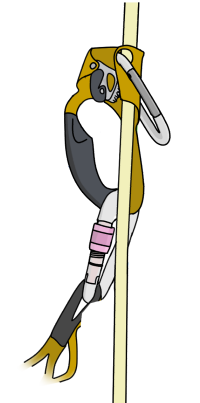
Jumars, or ascenders, are used to ascend the rope when it's fixed in place. They're like a mechanical version of a prusik (friction hitch). You use them when cleaning pitches, jumaring up fixed lines and in some hauling setups.

For most walls, a pair with large comfortable handles is best. They are made in a left and right hand model, with the cam designed to be operated by your thumb. You'll need a pair – having two left jumars is like having two left shoes.
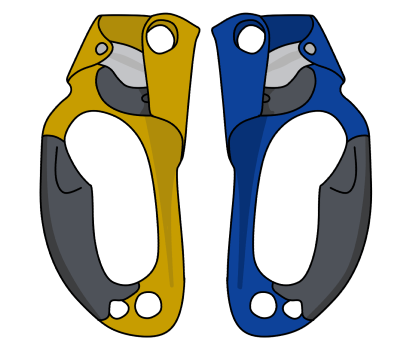
petzl jumars

Gloves
Fingerless leather gloves with a clipin point help to prevent your hands getting destroyed on the wall. You can buy specially designed wall gloves or make your own out of hardware-store gardening gloves.

Clothes
Often you will be overheating and sweating on lead, only to be shivering when belaying the next pitch. Temperatures drop significantly during storms or periods of high wind and it is often much colder high up on the wall than it is on the valley floor. Once you get cold and wet, decisions tend to be made poorly and disasters begin to happen. Prevent problems by bringing enough clothes to stay warm. Cotton has poor insulating properties, especially when wet. Merino wool and synthetic base layers and pants are a much better choice for walls. These materials insulate well when wet, are lighter, dry faster and stretch to accommodate movement when climbing. If you expect cold temperatures, bring a pair of gloves so you can belay with warm hands and then switch them out to climb. A thin hat that fits under your helmet is a very lightweight way of keeping you warm too.

Make sure to bring a good fleece, a waterproof jacket and a puffy synthetic belay jacket – even in Yosemite it gets cold high on the wall when you’ve been belaying for hours. For colder walls, you’ll obviously need even more layers including a super warm belay jacket. Down jackets are a poor choice in wet climates, but make excellent belay jackets in dry climates below freezing. Most down jackets will repel a small amount of moisture, but the feathers will clump together in a rain storm and you’ll freeze. They also tend to rip very easily on rock, so take it off for leading and cleaning.

Shoes
Your shoes need to be comfortable enough to stand in aiders all day and durable enough to withstand constant rubbing around the front and sides. A stiff-soled, sticky rubber approach shoe is good for aid intensive walls that have sections of easy free climbing. For pure aid, a stiff-soled high-cut boot may be more comfortable on those long leads. You’ll obviously need your free climbing shoes too for leading free pitches. On free climbing walls, be ready to switch out to more comfortable shoes when needed – it’s painful to clean or lead aid pitches in free shoes. It also wears them out fast.

To make your boots last as long as possible, apply a thick coat of Shoe Goo or a similar strong glue-type product to the seams most likely to blow out (mainly around the toe). Tie in loops are great for clipping in your shoes at night – if you drop your wall shoes, the rest of your climb will be extremely painful.

Knee Pads
Your knees are often in contact with the wall when aid climbing and hauling. A pair of slip on knee pads can make things a bit more comfortable, but can get in the way when free climbing and snagged in your aiders when aiding. If you want knee pads, get the lightest and most low profile ones you can find.

Sleeping Bag
Bring a good synthetic sleeping bag which is rated to a colder temperature than you are likely to encounter. Not even the best portaledge fly will keep everything dry in an epic storm. Condensation builds up on the inside of the fly and your bivi bag. Your clothes and sleeping bag will get damp, reducing their warmth. Synthetic bags retain a decent amount of warmth if they get soaked in a storm, whereas down-filled bags are completely useless. The feathers will clump together in a wet pile at your feet, offering zero warmth for the rest of the wall. Take a synthetic bag instead. Sew decent clip-in loops on your sleeping bag rather than just clipping the cord on the zip.

Bivi Bag
Rain always seems to find a way into a portaledge fly somewhere. Usually it sneaks in through the seams, combines with condensation and soaks down into the edges of the nylon bed. A waterproof and breathable bivi bag will give you greater protection during those intense storms. You should definitely take a bivi bag if you don’t have a portaledge fly.

Foam Pad
A foam pad isn’t essential on warm walls, but it makes a huge difference in colder climates. To make a clip-in point, tie a loop of cord through a tape reinforced hole. An inflatable pad packs down smaller but is likely to pop when stuffed in a haul bag next to a rack of beaks. Take a repair kit if going inflatable.


big wall climbing

Group Big Wall Equipment

Haul Bag
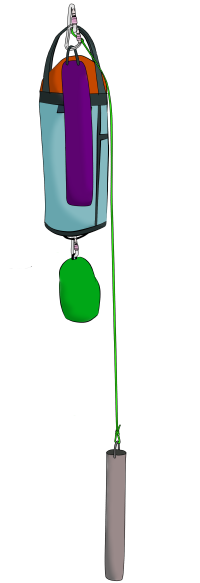
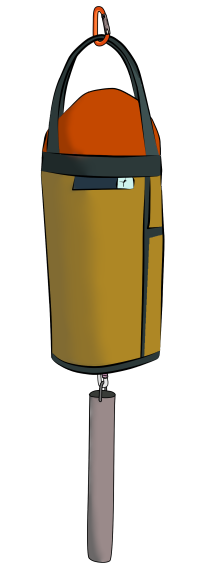
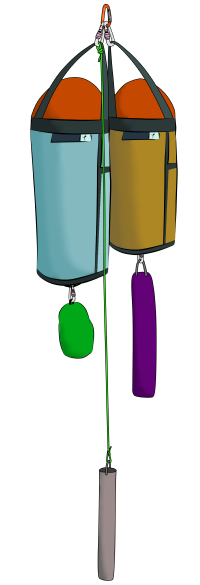
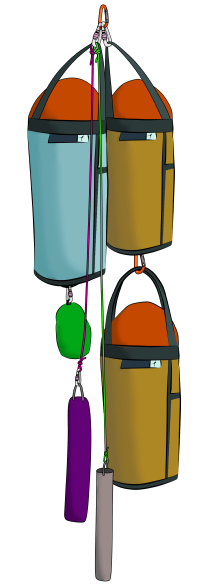
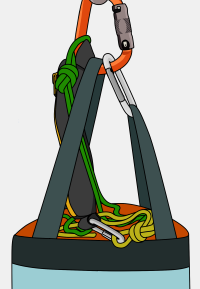
For multi-day aid routes, you'll need to haul. Haulbags are generally made of thick vinyl fabric and are durable enough to be dragged up rough slabs all day. Different sizes are available, up to around 160 litres.

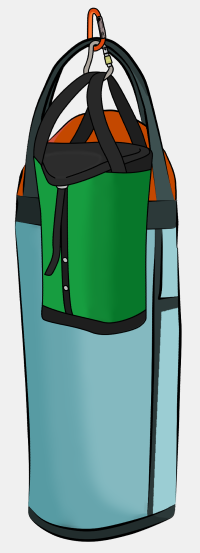
For day routes, a small haulbag will suffice. For two climbers on a shorter wall (two or three days) a medium or full-size bag is good. For long walls (a week or more) you’ll need a full-size haulbag for each climber. Many haulbags feature full strength clip in points underneath, so you can carry a durable stuff sack, portaledge or haul bucket without it taking up space in the haulbag.
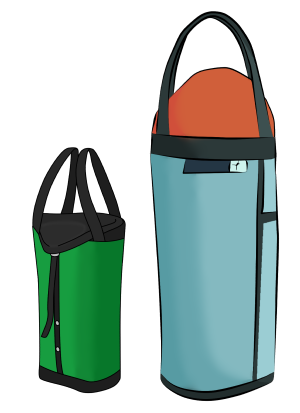
haul bag

Food
You’ll burn 3,000-6000 calories per day on a wall – twice as much as a day spent sat in the office. The best wall food:
- Has a high calorie per weight ratio
- Is in a durable container
- Doesn’t rely on a stove to be edible
- Is convenient to eat
- Is nutritious and tastes great

What food you bring largely depends on your style of ascent and what you normally like to eat. You can save time and weight with ready-made, plastic-wrapped food. Or go luxury with a cooked breakfast and fresh coffee every morning, and a warm meal with a selection of aged cheeses and fine wine in the evenings.

Organise your food into day-bags so you can keep track of your supplies. Cans weigh more than plastic wrapped food, but are much more durable. A mix of both is generally preferred with the less durable food being consumed first. If you choose to bring a stove, try not to bring food that requires cooking. You can eat cold canned food if your stove breaks, but chomping on bits of dried pasta or uncooked rice is miserable. Similarly for caffeine addicts, instant coffee can easily be hydrated in cold water, but tea bags or fresh coffee just doesn’t work.

Freeze dried food is lighter but requires water, thus negating any weight saving benefits. Once hydrated, the food itself weighs the same as food in a can. It is only the packaging which makes it lighter. However, if you are collecting water (i.e: melting snow) during the wall, freeze dried meals will save you a lot of weight.

Stoves
It’s nice to chill out in the mornings with a coffee and eat warm food in the evenings, if you’re not in a rush. A propane stove with a screw-type canister (e.g: Jetboil Flash) is simple and reliable. For faster walls, you may choose to forego this luxury. A good quality stove is essential for winter walls where you’ll use it to melt snow. Propane canisters don’t work so well in very cold climates or high altitude, so a multi-fuel type (e.g: MSR XGK) running on white gas may be better. If you bring a stove, it’s recommended to buy/make a reliable hanging kit to reduce the chances of burning a huge hole in your portaledge.

Water
Water is the heaviest item you will take on a wall. It can be tempting to skimp on hydration to save weight, but by doing so you risk putting yourself in a serious situation. Dehydration causes fatigue and poor decision making, which leads onto other problems. You can survive for days without food, but not without water. In cold temperatures, 1.5-2 litres per person per day can be plenty. In hot and sunny climates (e.g: El Capitan in summer), you may need 5-6 litres a day to stay hydrated. Keep track of how much is used each day so you know to ration water if you’re running low (or have a shower if there’s too much!).

Store your water in durable plastic bottles and compress them after use to save space in the haulbag. 1 and 2-litre plastic soda bottles work well for the main storage. A weak plastic bottle or one with a poor quality lid will likely explode in your haulbag, saturating your spare clothes and sleeping bag. It’s also useful to have a durable 0.5 litre bottle (Nalgene bottles are good) for passing up to the leader for a midpitch swig or carrying on the back of your harness during long leads.

jetboil hanging stove

You can create water bottle clip-in points in a variety of ways using duck tape and cord. A simple way using 3mm cord is to tie an overhand loop in one end as a clip-in point, and a self-tightening barrel knot in the other.

This cinches itself tight around the bottle’s neck. Make a few of these and swap them over to new bottles as you use up your water supply.
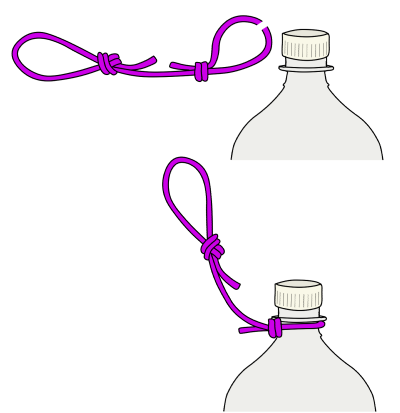
big wall water bottles

First Aid Kit
As a minimum, you should bring:
- Pain relief tablets
- Anti-diarrhoea tablets
- Anti-septic cream
- Oral rehydration salts
- A small selection of bandages
- Adhesive tape
- Sterile pads for cleaning wounds
- Tweezers

Stuff Sacks
Stuff sacks are excellent for combining many small items together, such as food and clothes. Get some with durable clip-in loops – Metolius make good ones.

Hygiene Products
To keep your personal hygiene at a socially acceptable level, you should bring:
- Toilet paper
- Hand sanitizer
- Moist paper towels (for having a ‘shower’ in the evenings)
- Toothbrush and toothpaste
- Hand moisturiser (Climb On or similar is great for skin repair)
- Sun protection – sunscreen, sunglasses, lip balm
- Any other hygiene or medical products that you would normally use in daily life (contact lens fluid, etc..)

Headlamp
Headlamps are essential on the wall. Finishing a pitch, or trying to descend in the dark can be incredibly difficult and dangerous. They’re also pretty useful to have in the evenings or if you need to get up in the night. Tape your spare batteries together in the correct orientation, so you can just plug the whole block in at once. This also means you won’t have random batteries floating around your bag and no idea if they are full or empty.

Topo
A topo is a handy illustration of the route which tells you where each pitch goes, how difficult it is, pitch lengths and sizes of gear needed. Print out a few pocket-sized copies, laminate them and keep one in your pocket for the duration of the wall. Take descriptions from adjoining routes too, as this will help you navigate. You can take photos of the topo on your phone as a back up. Don’t rely purely on your phone though – it’s better to save your battery for emergencies.

Communication
Having a phone is useful but can detract from the wall experience if you use it every day to post photos on Instagram. Consider taking an emergency communication device, such as a Garmin inReach, if you are climbing in a remote area.

Other Essential Small Items
- Small sewing/repair kit
- A roll of duck tape (this fixes everything on a wall)
- Athletic tape (finger tape)
- Pocket knife (make sure it has a folding blade which is impossible to accidentally open when attached to your harness)
- Lighter
- Spoon
- Can opener (if applicable)

Belay Seat
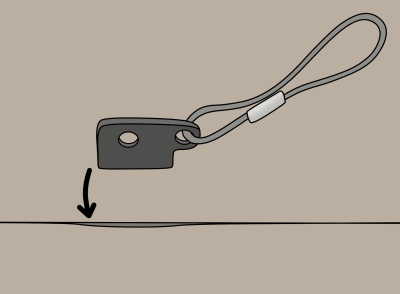
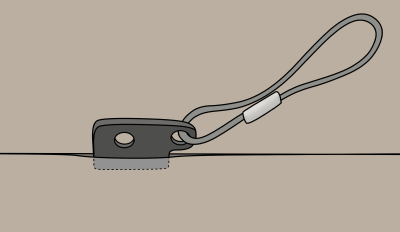
Aid leads can take hours, and belays are often on featureless rock. Having somewhere to sit is a saviour. You can buy a belay seat or easily make your own out of a piece of plywood and some cord.

Knot Protector
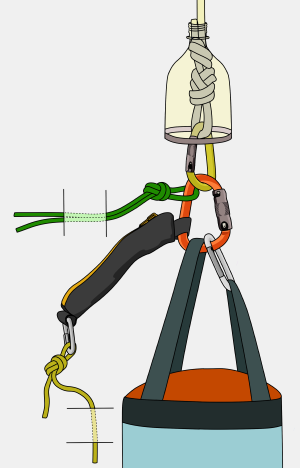
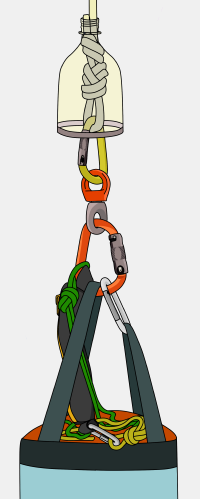
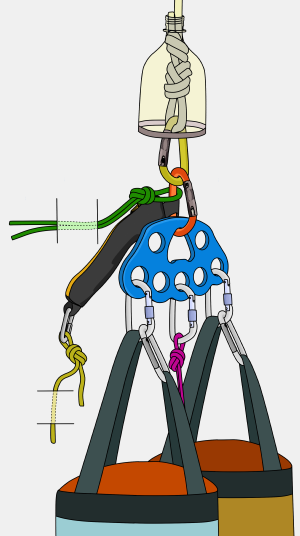
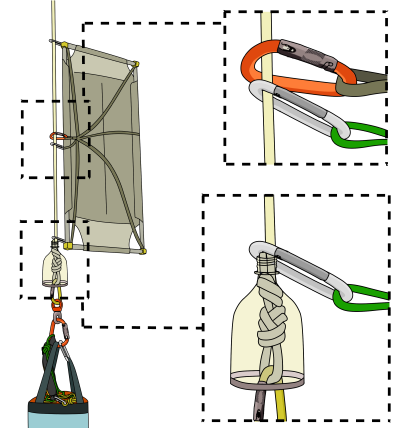
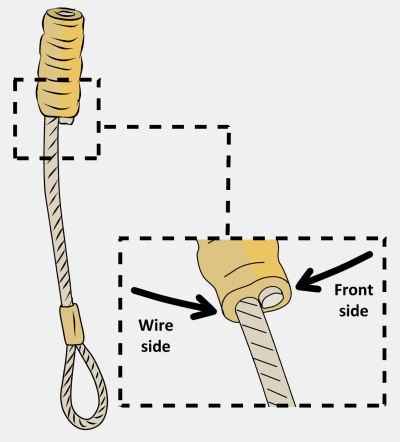
When a haulbag is dragged up blocky ground, over roofs or any other nonuniform feature, the knot will rub against the rock and damage your rope.

Adding a knot protector significantly helps to increase your haul rope’s lifespan. Simply cut a small plastic bottle in half and smooth the edges with duck tape.

Poop Tubes
With big wall destinations seeing a rise in popularity, it is no longer acceptable to drop a ‘mud falcon’ off the side of your portaledge. To be a civilized wall climber, you must use a poop tube. You can buy them or make your own out of hardware store supplies. To make your own, glue a PVC cap onto one end of a 6-inch diameter PVC pipe. Make sure the pipe is long enough to account for the length of time you’ll be on the wall. Use a second cap as a removable lid. Line the tube with a plastic bag. Collect your waste in durable plastic sealable bags (wag bags are good) and store your used bags inside the poop tube. Add a handful of kitty litter between each bag to keep it smelling fresh and fasten the lid tight. Take the whole thing down from the summit and dispose of it responsibly.
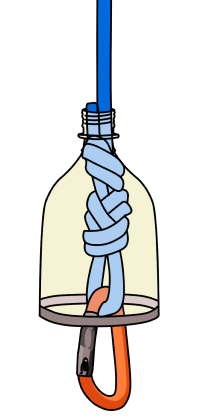
knot protector

VDiff big wall aid climbing book

Portaledges
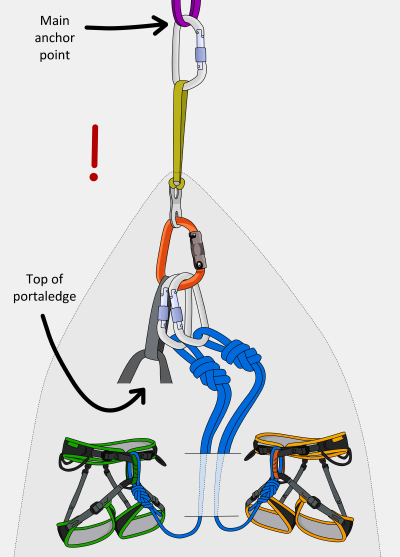
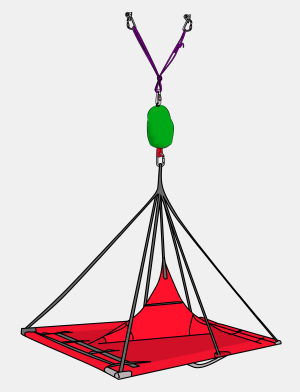
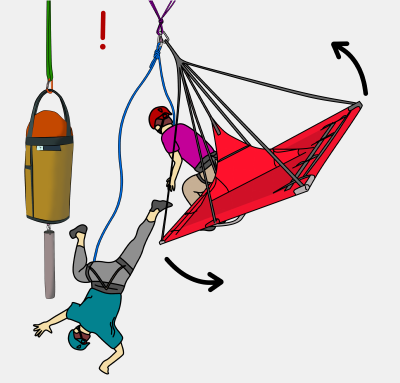
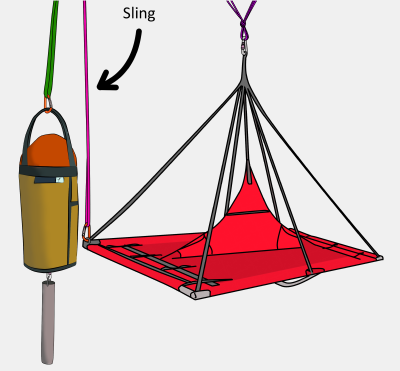
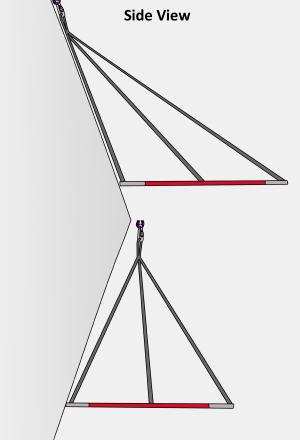
A portaledge offers a luxurious island of comfort in an otherwise uninhabitable vertical world. A portaledge is comprised of a ripstop nylon bed which is stretched around a collapsible metal frame with six straps that join together to form a single clip-in point. They are available in a range of sizes, weights and levels of durability.

Single ledges are easier to set up than doubles, but are half the size, and so are really only useful for one person. You can fit two people on a single ledge in an emergency, but it’s a rubbish night’s sleep. Unless you’re planning to exclusively solo walls, it’s better to get a double ledge. Inflatable ledges are now available. They are lightweight, compact and excellent for fast alpine walls. Some routes have convenient natural ledges which are big enough to sleep on, but the majority will require a portaledge.
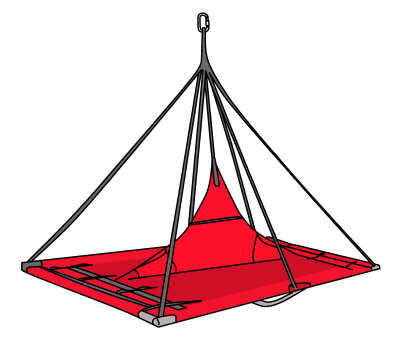
portaledge

Portaledge Fly
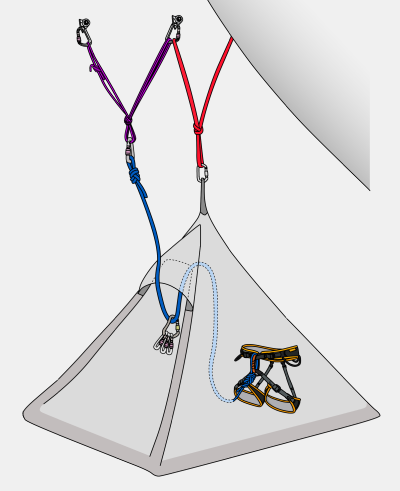
A waterproof fly can be deployed from the clip-in point to cover the ledge like a tent. Having a fly is critical if there is any chance of rain or high winds. Basic designs cover the ledge and have a drawstring to cinch it tight underneath. These are simple to use and are comparatively cheap. Deluxe models fully enclose the portaledge and have one or two zip operated doors. These fully stormproof designs are excellent for cold walls in remote environments. Both types have a removable tent pole which pushes the fly out. This creates more living space and keeps the condensation-prone material away from your sleeping bag. In general, always expect a storm and practice setting up your portaledge and fly while hanging from a tree.

Portaledge Costs
Unfortunately, portaledges are very expensive. Before spending your life savings, consider what you will use it for most. If you plan to climb short routes in places with stable weather (e.g: Yosemite or Zion), a secondhand simple ledge will be a cheaper option. If you want to go for long adventures or explore remote walls, you’ll want a durable ledge with a fully enclosing storm-proof fly and a door.

Hammocks
Wall hammocks are cheaper and lighter than portaledges, but are much less comfortable and totally useless in a storm. Most designs can be suspended from a single point. Hammocks are best employed as an emergency bivi for single day walls so you have the option of spending the night on the wall without taking the extra weight and cluster of a portaledge.

Clip-in Loops
Everything you take on the wall will need some kind of clip-in point. Having a pile of stuff balanced on your knees while digging around in the haulbag is a guaranteed way of dropping something. However you do this, make sure the clip-in points are reliable.

Weight
Big wall gear is heavy. If possible, use the lightest gear you can, as long as it doesn’t compromise on safety. Carabiners and gear slings are good places to trim weight. Lead ropes and harnesses are not.

Used Gear
Pieces of equipment which your life depends on (e.g: ropes, harness, carabiners), should be bought new. You can save money on other gear (e.g: portaledge, shoes, stuff sacks), by getting it used or by making it yourself (e.g: poop tubes, wall gloves). The best place to get used wall gear is from people who have bought brand-new everything, then bailed off their first wall, claiming that ‘big wall climbing is shit’. These folks usually sell high-quality gear for cheap.

Looking After Your Gear
It’s important to inspect your climbing gear frequently and replace anything which shows significant signs of wear. Frayed or faded slings, or any metal gear which has been dropped off the wall should be replaced. Nylon gear (ropes, slings and harnesses) degrades over time and should be replaced every five years, even if you’ve barely used it. UV radiation from direct sunlight will speed this time up. Exposure to battery acid or acid fumes will significantly reduce the strength of nylon. Keep your rope out of the dirt. Grains of rock and sand can cut tiny fibres inside it. Wash your rope occasionally in lukewarm water and allow it to dry in the shade. Store your climbing gear in a cool, dry place out of direct sunlight. If any gear gets wet, let it dry completely before you store it away.
How To Climb a Big Wall – Leading

Check out the full big wall video course, or download the e-book.

Step 1 – On Belay
Before you leave the belay (or ground), you’ll need to get set up for the lead. Both climbers tie into the rope and the leader is put on belay, just the same as for any other climb.

The figure-8 is widely recognised as being the safest knot to tie in with. An assisted-braking belay device (e.g: a GriGri) is highly recommended for belaying.

grigri belaying

Step 2 – Attach Daisies and Aiders to Harness
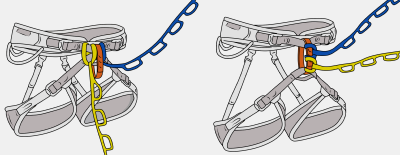
Girth hitch one end of each daisy through your harness tie-in points, or your belay loop. Going through your tie-in points means you can get closer to each aid placement, but it cinches your waist belt and leg loops together.

Going through the belay loop puts you further away but can be more comfortable. Try it both ways to see which suits you.

daisy chains climbing

Clip the other end of your daisies to your aiders with a carabiner.

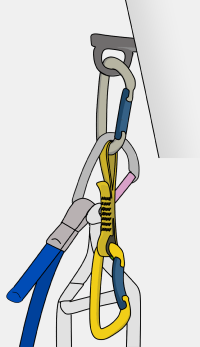
Put your aiders on the 'gate' side of the carabiner, so the daisy is free to move up the back bar when top-stepping. If your daisy is on the gate side, it could get stuck in the gate or unclip (not good!) when you top-step.

dasiy chains and aiders

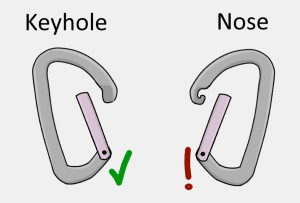
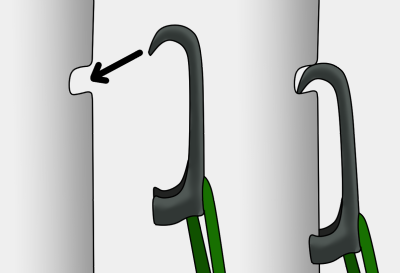
It's better to use a 'keyhole' style snapgate carabiner for your aiders/daisies, as it will be less likely to get stuck on slings and nut wires than a 'nose' style carabiner.


Step 3 – Rack Up
Fill your gear loops with enough rack to get going. You don’t need the whole rack – some things can be passed up later.

keyhole carabiner

Step 4 – Attach Haul Rope
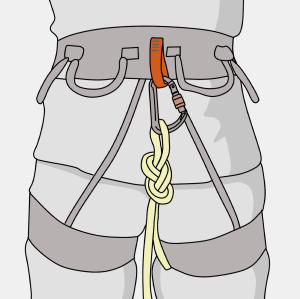
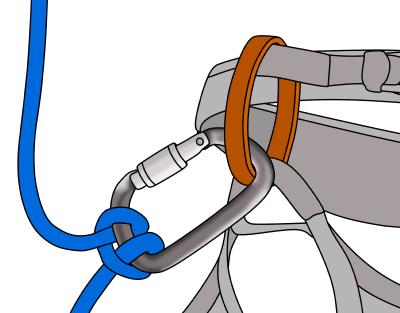
Clip the haul rope to the haul loop on the back of your harness. If you don't have a haul loop, you can make one by tying a short piece of webbing around the back of your waist belt.

Don't clip the haul rope to a gear loop – they're not strong enough.

climbing harness haul loop

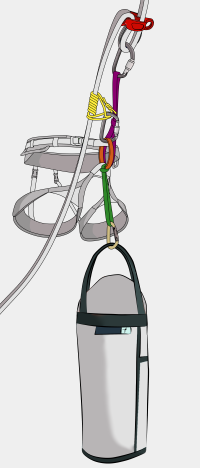
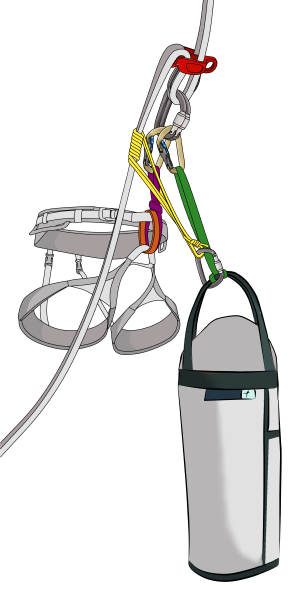
Another method is to trail the haul rope with the hauling device pre-attached as shown.

After leading a pitch, the device can be attached to the anchor before removing the rope from your harness. This means that you can’t drop either the device or the rope while setting up the haul.

harness haul loop

Step 5 – Prepare For Blast Off
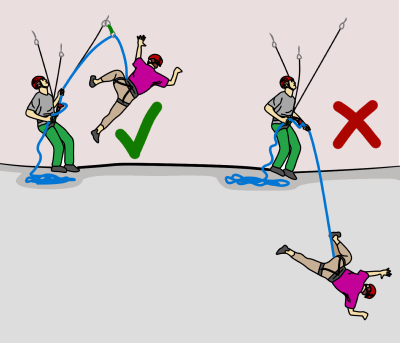
Clip the lead rope to a high point of the anchor (just like you would on a trad multi-pitch) so you won't take a factor two fall onto your belayer if you fall on the first move.

After a final safety check, remove your attachment point to the anchor itself and you are ready to go.

big wall belay

big wall aid climbing

The Basic Aid Climbing Lead System

The basic system of leading an aid pitch is:

1) Place a piece of gear
2) Test the gear
3) Transfer your weight on to it
4) Clip the rope into your previous piece of gear
5) Get as high as you can
6) Repeat

These steps are described in more detail below.

Step 1 - Place Gear

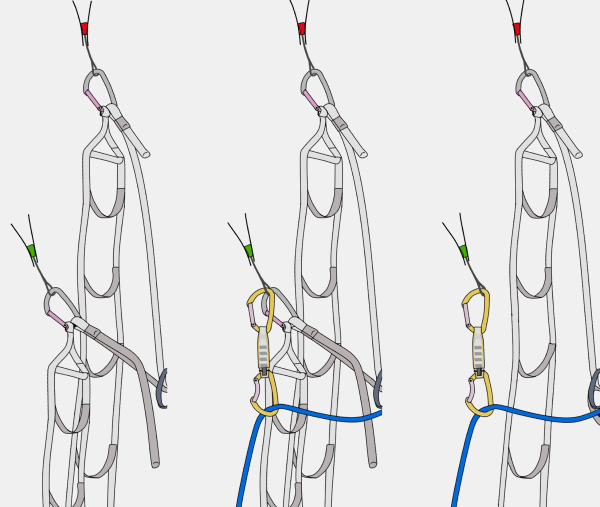
Place a piece of gear and attach yourself to it with your free aider (the one you're not standing in).

Clip as high on the piece as possible (e.g; in the plastic thumb-loop of a cam, rather than the sling). This gives you more height, meaning less moves to the top.

how to climb a big wall

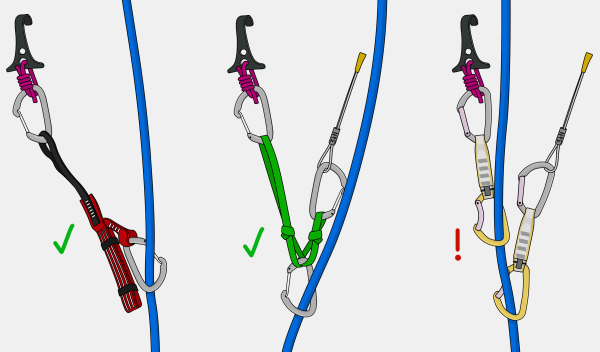
When clipping gear which only has a big enough hole for one carabiner (such as a rivet hanger or a piton), you can clip a quickdraw to it first and then clip your aider onto that.

This way you will be able to clip it as protection before removing your aider, therefore never being detached from the piece. It will, however, mean that you're a carabiner-length lower, so it may be harder to reach the next piece.

how to big wall climb

Step 2 - Test Gear

How you test gear depends on what it is and what the consequences of it failing are. A visual test may be all that is needed – if it looks bomber, just get straight on it. If you’re not sure, give it a ‘bounce test'. The point of bounce testing is to generate a little more force than your bodyweight alone. This determines whether or not the piece will continue to hold your weight while you are gently moving up your aiders and making the following move. It does not determine if the piece can withstand the higher force of a leader fall.

How you test depends on what the gear is. Burly gear (such as nuts, slings and pitons) can be bounced aggressively whereas more easily damaged or low-strength gear, (such as cams or micro nuts) should only be very gently bounced.

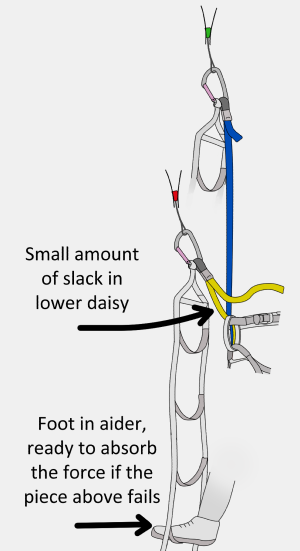
If you choose to test the piece, you should adjust your daisies so that you won't shock load your previous piece if it fails. Your position here is important. If the pieces fails, your goal is to transfer your weight as gently as possible onto your lower piece.

how to haul on a big wall

Adjust your daisies correctly, hold onto your lower daisy and leave one foot in your lower aider so you are ready to absorb the force if your top piece fails.

First, ease your weight onto the piece until it holds the majority of your body weight. Then bounce your weight on it by stamping in your top etrier with a slightly increased force each time (you could also bounce by sitting your weight onto your top daisy, but this is generally not as good). Essentially, you are shock-loading the gear. If it fails, you'll swing gently onto the lower piece, which should be strong enough to hold because you bounce tested it – right? Try not to look directly at the piece you are testing – if it fails, it'll hit you in the face!

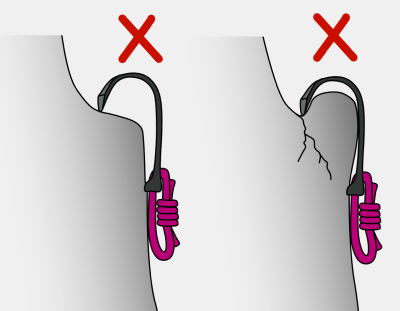
Cam hooks or skyhooks shouldn't be bounce tested, as they would be damaged over time. To test these, weight the piece, press your body away from the wall and move side-to-side. This generates a little more force than bodyweight without the harsh impact of a bounce and simulates the direction you might pull the piece when you're higher up on it.

Bounce testing is the secret to hard aid climbing. With proper technique (which takes many climbs to develop), you will be able to move up whole pitches of marginal gear relatively securely. This still doesn’t mean that anything would hold a fall, but it does mean you are much less likely to fall.

Step 3 - Commit

Once you're happy that your upper piece will at least hold your weight, it's time to commit. Shift all your weight on to the top piece.

Step 4 - Reset

Reach down and clip your lead rope into your lower piece before removing your aider from it. If you're using adjustable daisies, fully extend it out at this point, then clip it to a gear loop, ready for the next placement.

aid climbing setup

Step 5 - Get High

Getting as high on your top piece as you can means less moves to the top.

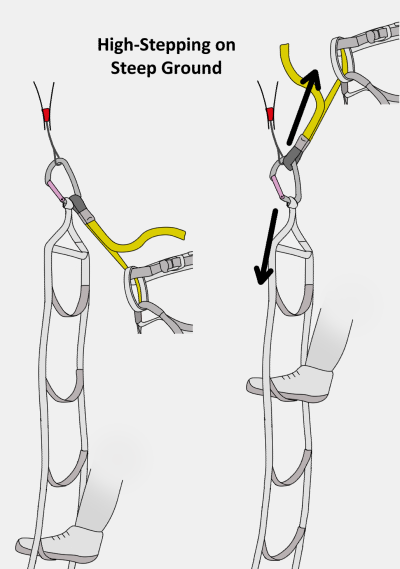
On slabby terrain, use the steps of your aider to walk upwards. With practise you should be able to stand in the top step easily. Hold onto rock features for balance if possible. As you move up, your daisy will slide up the back bar of its carabiner. Adjust your daisy tight to give you some downwards tension for balance. This also means that if you lose balance you won't fall the full length of the daisy.

Vertical or overhanging terrain is more strenuous. Move up your aiders and cinch your daisy tight to create downwards tension. By pushing down with your legs and pulling upwards with your daisy, you will create a strange feeling of opposition which provides balance.

Once you are as high up as you can get, it's time to find another placement and repeat step one.

how to go aid climbing

How To Aid Climb - Leading Overhangs and Traverses

The system for leading a roof or a traverse is very similar to the standard method. Just place a piece, reach as far sideways as you can, and place your next piece. It may be difficult to bounce test from this position – try stamping in your aider instead of weighting your daisy. Remember that the follower will have to clip from piece to piece to clean the pitch, so try not to back-clean (remove) them.

How To Aid Climb - Leading Pendulums and Tension Traverses


king swing nose

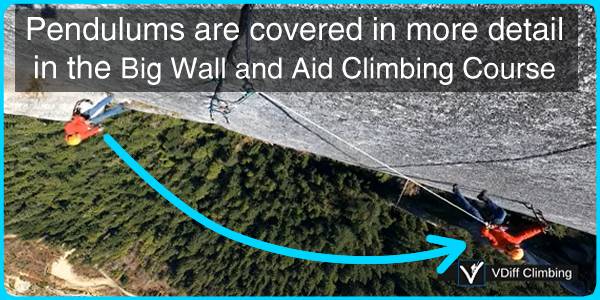
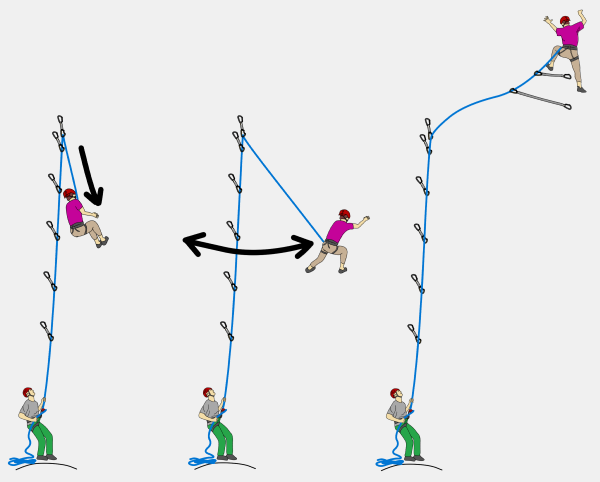
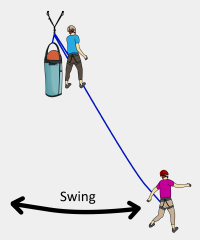
A pendulum is a great technique for moving sideways across a blank section. Essentially, you rope-swing across the blank section to features where you can begin climbing again. An alternative to swinging is to semi free climb across with some of your weight on the rope. This is known as a tension traverse.

Step 1 – Clip Gear
Place a piece of gear which can hold a downwards and a sideways pull (you may want to equalize a couple together). This gear should be bomber, and you probably won’t be able to retrieve it later. This is normally a bolt or rivet on popular routes. Clip your rope into the gear and ask your belayer to take you tight on the rope.

Step 2 – Lower
Get your belayer to lower you. If you plan to pendulum, you can start swinging as you are being lowered. Do this by running sideways across the wall. Communicate with your belayer so you don't get lowered too far – make sure you know where you're trying to swing to!

Step 3 – Swing
Keep your momentum and swing a little higher each time. Often, you'll need to grab a hold, hook an edge or clip a fixed piece at the pinnacle of your swing, so be ready for this.

Step 4 – Continue Up
Once you've stuck the pendulum, continue climbing as normal, making sure to extend the next few pieces of gear after this to reduce rope drag. Depending on the size of pendulum, difficulty of climbing and consequences of a fall, it may be better to back-clean gear until level with the pendulum point to further reduce rope drag.

how to do a swing aid climbing

Pendulums with Two Lead Ropes
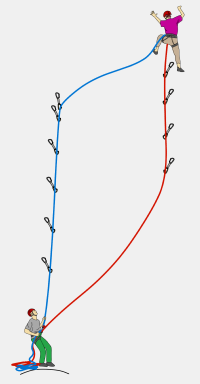
For big pendulums in the middle of a pitch, it is wise to use two lead ropes. Use one rope for clipping gear up to the pendulum point, and the other rope for gear after the pendulum.

It is recommended that the belayer uses two GriGri’s for belaying.

aid climbing pendulum

Switching Between Aid and Free Climbing

Sometimes it is necessary to switch from aid to free climbing in the middle of a pitch. To make this transition easier:

- Clip your aiders, daisies and other long tanglies away on the back of your harness so you won't trip over them in the middle of a free move.

- Attach a sling to your top piece. This will be your final foot step before you free climb.

- Ask your belayer to pass up your free climbing shoes if needed. You could also pass down your wall shoes and any other unnecessary heavy gear to your belayer.

French-Free

On some pitches it may be easier to french-free. This means mostly free climbing while holding onto the occasional piece of gear to avoid difficult moves and therefore speed the climb up.

You can clip gear directly into your belay loop, or attach slings to some pieces to use as foot loops. Get your belayer to take you tight whenever you need a rest. There are no rules really – just do whatever you can to cheat your way up quickly. French-free avoids the clunkiness of a full aid setup and is great on pitches that you can mostly free.

Routing the Rope

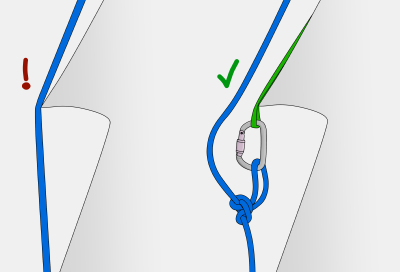
As with trad climbing, you should route your rope away from sharp edges, flakes and loose rock. Make skillful use of quickdraws and long slings to allow the rope to avoid these hazards and run in a straight line.

Remember that the rope will be taut when your partner is cleaning the pitch, which means it will cut faster on sharp edges.

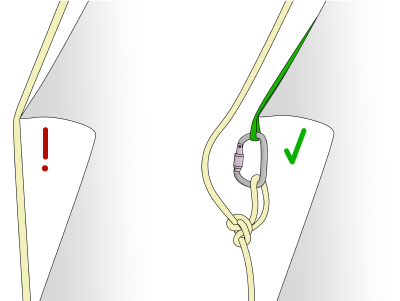
Sometimes you may need to add a re-belay for pitches that end above a roof or on a ledge. Attach a sling down from the anchor so the rock abrades the sling, not the rope. Add a rope protector or duck-tape the edge too, if needed.

climbing rope on sharp rock

Back Cleaning

Sometimes, you'll need to use a piece of gear which you've already placed. Obviously, it's better to leave it there as protection, but this won't always be possible. If you remove your previous piece be aware that this can mean a big fall if your current piece fails.

A safer way is to place two or three good pieces in a row, then lower down to retrieve earlier pieces of gear. Make sure your top ones are bomber before committing to this. Once you've retrieved some gear, you can either aid back up the pieces to your high point (on top rope) or ascend the rope.

If ascending the rope, it is easier to attach your jumars to the rope which is running through the gear (rather than the rope coming straight from your harness). Retrieving gear from a traverse or overhang is more difficult. You will need to clip across your gear in reverse (known as back-aiding) to get to it, and then re-aid back up to your high point.

Passing Gear to the Leader

You don't need to take your entire aid rack on every pitch. If you need something from the belay, your belayer can clip it to a loop in the haul/tag rope and then you simply pull it up.

A common method is to only take enough gear to lead the first half of a pitch, then get resupplied when your rack is running low. This keeps some weight off your harness and is also useful for passing water, jackets or food on those long leads. Remember to pass the rope back once you’ve finished (if you just drop the rope, it’ll probably get stuck on faraway flakes).

However, once you are over half of the rope length up a pitch (e.g; you are over 30 meters up the pitch with a 60 meter haul rope), the belayer will need to attach an extra rope to the end of the haul rope so they can get it back again.

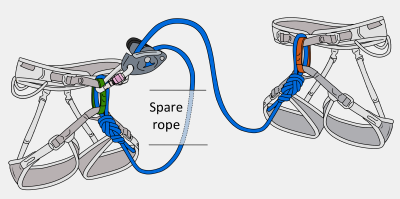
A quick solution which provides a short amount of extra rope is to clip the end of the haul rope to the loop of spare lead rope. If you regularly need to pass gear late in the pitch, a much better setup is to use a tag and haul rope.

how to lead aid climbs

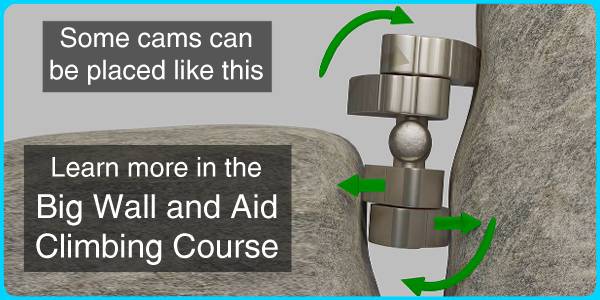
totem cams two lobes aid climbing

Passing Gear to the Belayer

A quick way to pass gear from leader to belayer is to simply clip it to the haul rope and let it slide down.

The belayer will need to wiggle the rope to slow the item’s descent so it doesn’t slam into their face at full speed.

how to aid climb

Regaining Your High Point After Falling

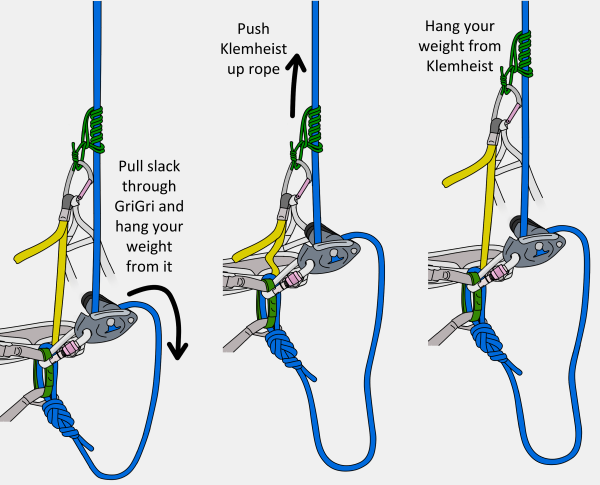
If you fall and are left dangling in space, you could jumar back up to your high point to continue the lead. But how secure is the piece that held you? If it blows while you are jumaring up, you’ll fall farther, but with the spiky toothed cams of your 5kN-rated jumars cutting into the rope – not good.

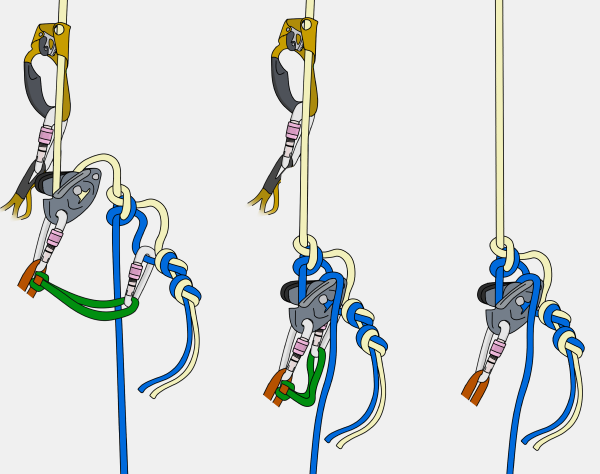
A better alternative is to ascend with a klemheist prusik and a GriGri as shown below. This way, if the piece above blows, you will fall on the GriGri and prusik instead.

how to prusik a rope

Racking Gear

It’s better to rack gear the same as you would for trad climbing so you are already familiar with where things are, though it can be nice to spread things out on a chest harness too. It’s good to keep hooks, beaks and heads separate from nylon so they don’t stick to your slings.

Cheater Sticks

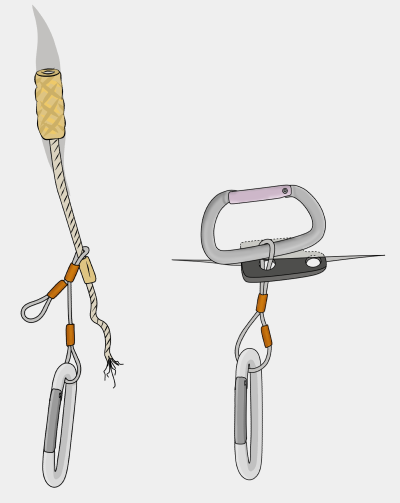
Cheater sticks allow you to bypass a difficult/impossible section by clipping a distant piece of fixed gear. Simply clip a carabiner to a long sling and tape it to some kind of stick/ avalanche probe/ portaledge fly pole as shown. Tie offset overhand knots in the sling so you can easily aid up it.

Cheater sticks are useful when abseiling down a steep wall but present problems when used on lead. First, having a cheater stick relatively handy makes it very tempting to clip past moves that you could do but are too scared to try. This prevents you from progressing at harder aid. It’s a bit like pulling on quickdraws when sport climbing, or standing on the bolt hangers. If you get into the habit of reaching for the cheat stick when things get scary, what will you do next time when there’s nothing to clip?

It’s also very difficult to test a far away piece of gear, which means you might end up falling anyway, even farther than you would have and with a giant stick in the equation.

aid climbing cheat stick

How To Climb a Big Wall – The Belay

Check out the full big wall video course, or download the e-book.

Setting up a big wall belay is more complicated than a standard trad belay but follows some of the same principles. Belays are bolted on most popular routes which makes this process much quicker.

If you're building a big wall belay from trad gear, you’ll need two or three points which are EACH as strong as a bolt. Three medium sized cams or nuts (well placed in good rock) equalized together are about as strong as one bolt (approximately 25kN).

Depending on your setup, the whole thing may contain many pieces of gear. Remember that much more force is applied to a big wall belay (with hauling and jumaring happening at the same time) than a trad belay.

big wall belay

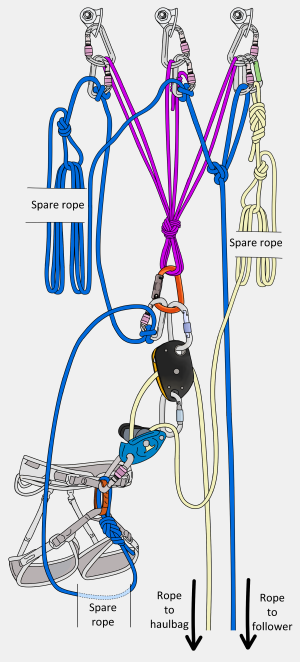
To set up a big wall belay station, you will need to:
1) Create a central point
2) Tie yourself in
3) Fix the lead rope
4) Set up a hauling system

Each of these are described on the following pages.

Top Tip
It is good to get into the habit of fixing the lead rope before setting up the haul. If communication is difficult, the belayer will know that the lead rope is fixed when the leader starts to haul.

Note
Unless you're standing on a ledge, you'll use your aiders to move around the belay while you set it up. These are omitted from the following diagrams for clarity.

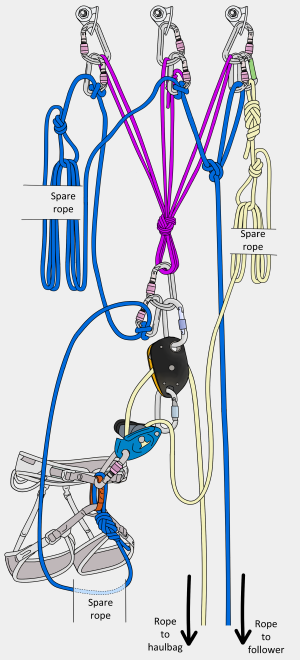
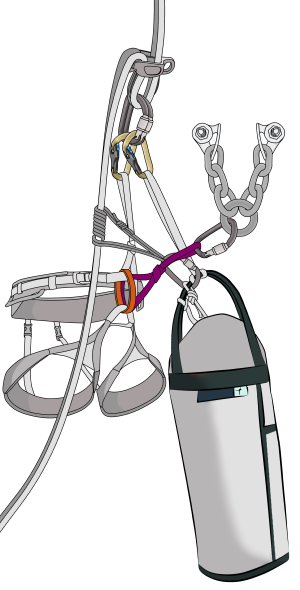
Big Wall Belay - Creating a Central Point

Step 1
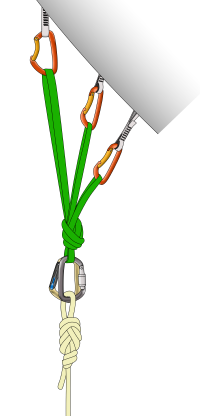
Clip a screwgate carabiner into each bolt.


Step 2
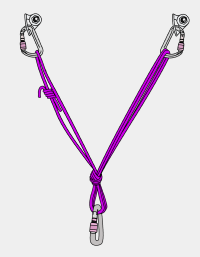
Clip a cordelette (a seven meter length of 8mm cord tied with a double fisherman’s bend works well) into each carabiner.

big wall anchor

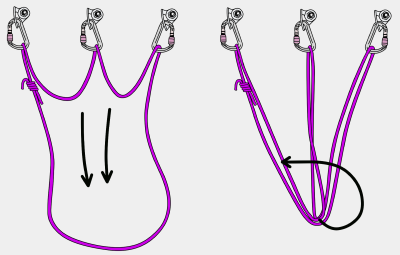
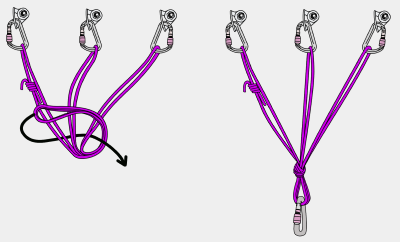
Step 3
Pull the loops of the cordelette down and equalize it with an overhand knot. Clip a large screwgate into this central point and fasten all four screwgates.

These carabiners will stay locked for the whole time you have the belay set up. You will clip other carabiners into these rather than tying knots directly onto them.

This way, you won't end up with something stuck behind something else (e.g: the leader unable to leave the belay because the haulbag is weighted on their tie-in point).

big wall belay

You'll also never weaken the belay by opening one of the main screwgates (when heavily weighted, some screwgates will open but not close).

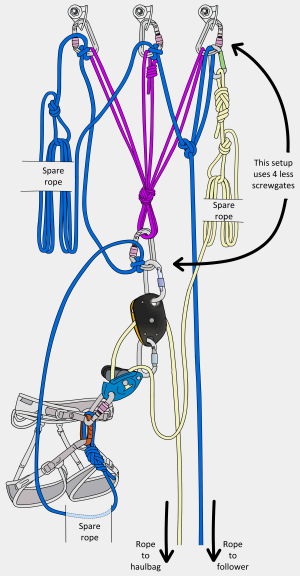
You could set up a simpler belay which involves less screwgate carabiners if you are confident that you won’t encounter any problems doing so.

how to clip carabiners

Central Point Tips

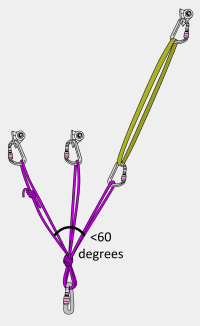
* Make sure your V-angle is less than 60 degrees. With widely spaced bolts, you may have to extend one of them with a sling.

setting up belay on a big wall

* If there are only two bolts, you can 'double up' your cordelette on one of them to keep your central point within reach of the bolts.

big wall belay setup

* It's better to position your screwgates with the wider side down, so you can fit more carabiners onto it later.

how to clip belay bolts

big wall aid climbing

Big Wall Belay - Tying In

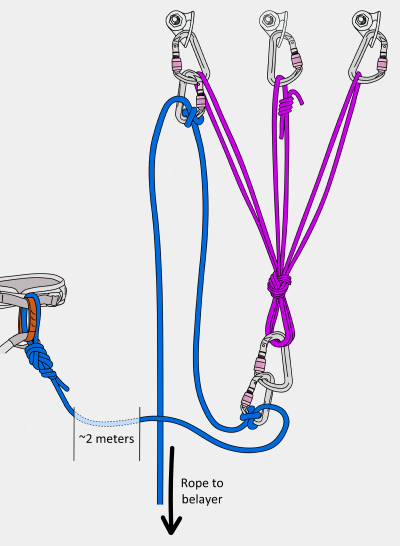
You need to tie into your central point as you would on a normal belay, but leaving enough slack to haul with (approximately 2 meters). Your weight will be taken by your daisies or the haul rope while you're hauling, not on your tie in – this is there as your full-strength back-up.

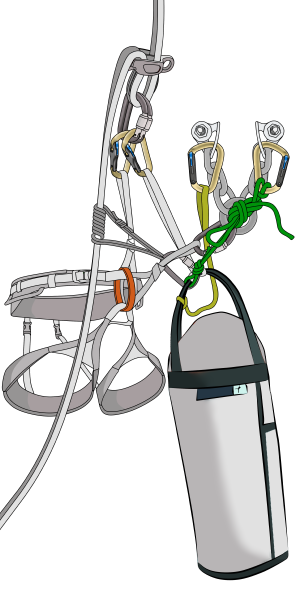
Clovehitch the lead rope to the central point on a separate screwgate and back it up by clove-hitching the lead rope, with a little slack, to one of the bolts (with another screwgate).

To keep the belay de-clustered, do this on the opposite side to where you will fix the lead rope for your partner.

You can use other knots, such as an alpine butterfly, but clovehitches are super easy to adjust. At this point you can tell your belayer that you are ‘off belay’.

big wall anchor building

Big Wall Belay - Fixing the Lead Rope

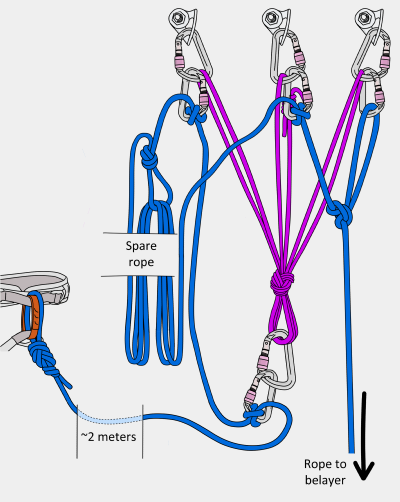
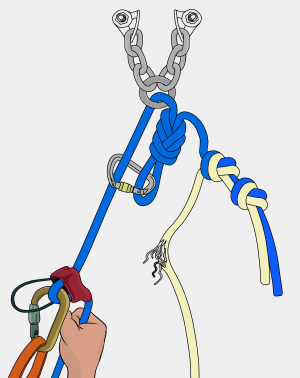
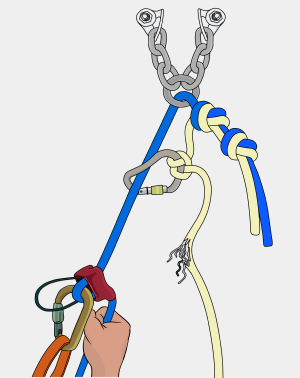
Your partner will jumar up the lead rope – you don't belay them as you normally would on a multi-pitch. This rope needs to be 'fixed' so it doesn’t move while they jumar up.

Step 1
Pull up the extra lead rope until it's tight-ish on your partner and stack it away on a sling or a rope loop. This makes it easier for your partner by removing clutter from the lower belay, but puts it at the upper belay. In some cases, you may choose to skip this step. For example, if your partner needs to lower-out at the start of the pitch, they will need the extra rope to do so.

Step 2
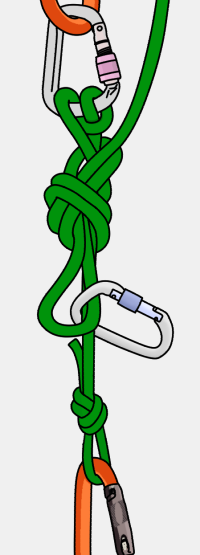
Fix the lead rope by tying a large-looped alpine butterfly to one bolt and a clove hitch to another bolt so that the rope is equalized. Make sure this is in the correct direction for the pull they will put on the rope while jumaring. An alternative is to fix the lead rope to the central point and back it up to one of the bolts. However, having a weighted rope at the central point can interfere with the hauling system.

Step 3
Now you can tell your partner that the 'lead rope is fixed'. At this point they can attach to the rope with their GriGri and jumars.

how to make a big wall belay

Big Wall Belay - Setting up the Hauling System

Step 1
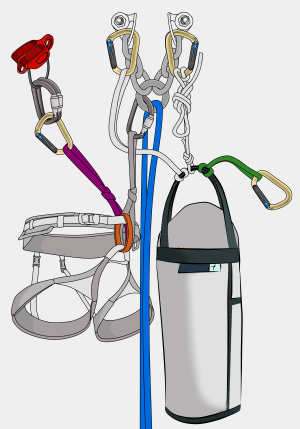
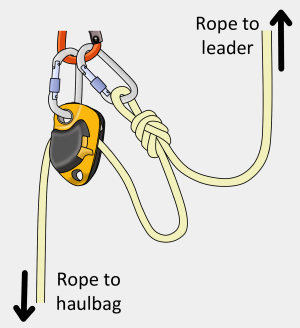
Clip your hauling pulley to the central point with a screwgate.


Step 2
Slot the haul rope through the hauling pulley and close it.

how to use hauling device

Step 3
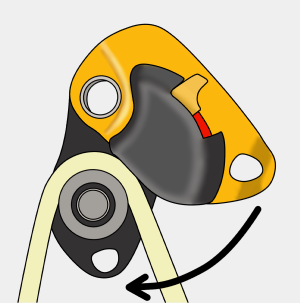
Push down the catch, so the teeth bite into the rope.

Check that you have attached it the correct way around. Keep the end of the haul rope connected to your harness while you do this, so there's no chance of dropping it.

petzl pro traxion climbing

Warning!
It is important to make sure the device is locked.

how to use petzl pro traxion climbing

Step 4
Remove the end of the haul rope from your harness and clip it away to the side of the belay.


Step 5
Pull the slack rope through the hauling pulley until the rope is tight on the haul bags, stacking it away in a sling or loop of rope.


Step 6
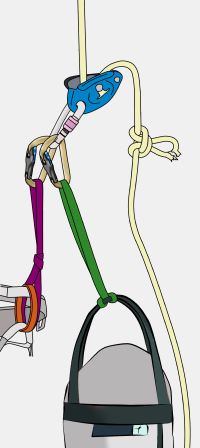
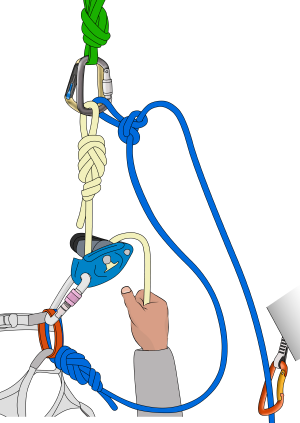
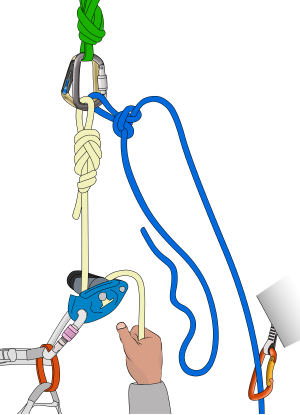
Put the slack end of the haul rope through your GriGri and attach it to your belay loop. Sit back to pull extra slack out of the rope. After a final check of your hauling setup, you can tell your partner that the 'haul rope is ready'. At this point, they can release the haul bags and leave the lower belay.

big wall climbng belay

Alternative Setup
The setup described on the previous pages keeps the belay neatly organized but uses a lot of screwgates.

You could set up a simpler belay with less carabiners if you are confident that you won’t encounter any problems doing so.

how to set up a big wall belay

Note
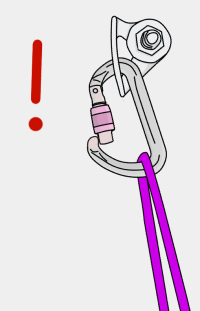
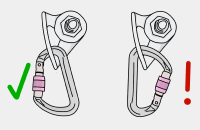
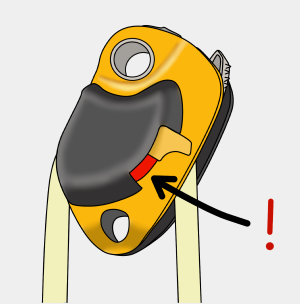
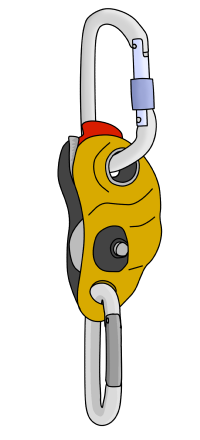
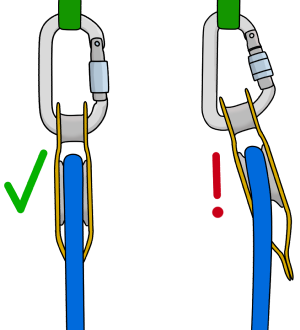
Some hauling pulleys (such as the older style Petzl Pro Traxion) must have a carabiner clipped through their base to stop them from potentially opening mid-haul.

Read the instructions with your pulley to see if this is needed. If you’re not sure, then clip one through anyway.

petzl pro traxion

belaying grigri

Big Wall Belay - Rope Management

Having random loops of rope hanging down from the belay will create all manner of problems when they get tangled around flakes and poop tubes. Keep them tamed in a rope bag (best option) or by stacking them neatly.

However you do it, make sure that all rope ends are clipped to the belay when not in use (e.g: clip the end of the haul rope to the belay overnight). This is so the whole rope can’t blow out of reach or zip off the wall completely.


Stacking Ropes
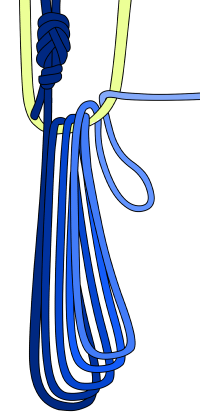
Stack them in a sling or rope loop. Making smaller loops each time reduces the tangle factor when they feed out. Don’t allow loops of rope to get long enough to tangle underneath the haulbags – always keep the loops within reach.

If belaying from a portaledge or natural ledge, you could simply stack them on the ledge in a neat pile, if you are confident they won’t slide off.

how to stack a climbing rope

Stuffing Ropes
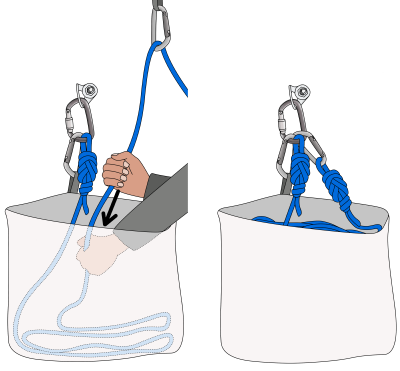
Stuffing ropes into a rope bag is the ultimate way of taming ropes on a windy wall.

Step 1
Clip one end to the belay.

Step 2
Run the rope through a high-point carabiner. Then stuff the rope into its bag, going hand-over-hand. This is much faster than picking up bundles of rope and dropping them in.

Step 3
Clip the top end of the rope on top of the other, so you know which end is which.

climbing rope bags

Keeping the Belay Organized

A well organized belay will help to speed things up. Tie-off your belay device while completing any of the suggested tasks below, or doing anything that requires you to let go of the brake rope (GriGri’s are not hands-free!). Watch the leader carefully and be ready to give slack quickly when needed. Remember that belaying is your priority – the other things are secondary. As well as enjoying the view while belaying, consider doing the following:

Get Food and Water Accessible
It’s useful to have a small water bottle (around 500ml) to pass up to the leader during those long pitches. A small bag with a good clip-in point is also useful for passing snacks, jackets, headlamps, cameras or other items which are difficult to clip in. Get these things accessible.

Organise the Rack
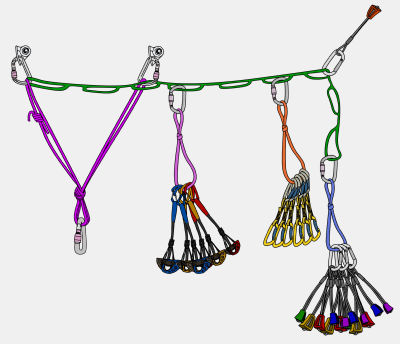
Having the whole rack organised and accessible makes it quick and easy to pass gear to the leader when they need it. For large racks, it’s useful to organise by type on racking slings. Attach a loop-style daisy chain between the belay bolts to provide plenty of clip-in points for the rack and any other things you might need during a long belay.

Eat Your Lunch
During belay duty is a good time to eat, hydrate, re-apply sunscreen (be careful not to get it on your rope or gear) and deal with other personal hygiene issues, without slowing down the ascent.

big wall anchor

Prepare to Pack the Haulbag
As the leader is approaching the end of the pitch, you can begin re-packing the haulbag. The rack can be packed away once the leader has enough to finish the pitch. It’s nice to have a water bottle and a few snacks on the very top because finding these is usually the priority after hauling. Aim to have the haulbag packed so you can lower it out as soon as the leader has the haul rope ready at the upper belay.


Belay Transitions
Ideally, the leader will have completed the haul, stacked the haul rope and organised the remaining rack by the time the follower has cleaned the pitch. Upon arriving at the belay, the follower will remove excess rack from their harness and immediately be put on belay, ready to lead the next pitch. The new leader will have a quick snack while the belayer stacks the lead rope. The leader will leave the belay within a few minutes of arriving at it.

A streamlined transition like this can happen, but it’s often slowed down by something such as a stuck haulbag, poor rope management or if the leader hasn’t finished hauling. Work together to solve any problems. There is always something you can be doing. If the haul isn’t complete, both climbers can haul together to speed it up. Make it a priority to finish the haul and then get the leader started on the next pitch. Things like organising the rack and adjusting your belay seat can wait until the leader is moving up the next pitch.


VDiff big wall aid climbing book

Big Wall Communication

Communication on the wall is best kept to a minimum to avoid confusion. Keep commands simple and practise them with your partner before the climb. Trying to shout 60 meters into the wind about some complicated rope setup to your partner who you can’t see could result in disaster. Standard commands are:

Off Belay
The leader is safely attached to the upper anchor and no longer needs a belay.

Lead Rope Fixed
The leader has fixed the lead rope. It is now safe for the follower to attach to the lead rope to clean the pitch.

Haul Rope Ready
The leader has set up the hauling system, pulled through the slack rope and is ready to haul.

Releasing Haulbag
The belayer is about to release the haulbag from the lower belay. This is used as a final check before lowering out the haulbag and informs the leader to begin hauling.

Each of these commands can be followed with ‘OK’ by the other climber to confirm that the message was understood.


Communication Breakdown
It’s important to have a plan for what to do when you can’t see or hear each other. For example, if the leader is out of sight above and the haulbag starts moving up the wall, it means the leader is off belay, the lead rope is fixed and the haulbag can be released. You know this because it wouldn’t be possible for the leader to be hauling if they’re still climbing the pitch!


Radios
Two-way radios can be useful in some situations. For example, on an obscure route or first-ascent when the leader frequently needs to ask for many different types of gear to finish a long pitch or make an intricate gear belay. To save batteries, keep your radios turned off until you need them. Have a signal for switching them on, such as a loud ‘monkey call’ or a series of tugs on the rope.

How To Climb a Big Wall – Following

Check out the full big wall video course, or download the e-book.

Cleaning an aid pitch is different than cleaning a trad pitch. Instead of climbing the rock, you will use jumars to ascend the rope. There are two reasons for this:

1) It is much quicker and less strenuous to remove gear when ascending the rope than it is to clip your way up each piece of gear.

2) The leader is freed from the responsibilities of belaying. This enables them to do other things like haul the bags and organise the belay.


To follow an aid pitch, you will need:
- Two jumars
- A GriGri
- Your double set of daisies and aiders

Following an Aid Pitch – Leaving the Belay

Step 1
When the leader confirms that the lead rope is fixed, you can attach yourself to it.

Attach your jumars to the carabiner with your aiders as shown.

aid climbing jumars

Step 2
Pull the catch back on each of your jumars, slot them onto the rope and close the catch.


Step 3
Adjust your upper daisy to about half of its full length.

petzl jumars

Step 4
Place your feet on appropriate steps of your aiders, so that when your jumars are close together your feet are level with each other. Generally this will be one foot in your third step, the other in your fourth. Step into your lower aider to pull some of the stretch out of the rope. As you do this, push your upper jumar up the rope.

Then sit back, weighting your upper daisy, while pushing your lower jumar up the rope. Your hands do not need to leave their position on the jumars (using two hands to push one jumar is inefficient). Do this a few times until you've pulled all the stretch out of the rope, so you are no longer weighting the belay. This sequence is the basic technique, known as jumaring, that you will use to ascend the rope.

jumaring a climbing rope

Step 5
Jumars are not full-strength attachment points, so you also need to use a GriGri (or similar) to attach yourself to the rope. Take the slack rope from underneath your jumars and put it through your GriGri as shown. Attach this to your belay loop.

Step 6
While you are attaching yourself to the lead rope, the leader will be setting up the hauling system. When they tell you that the 'haul rope is ready', you can reply with ‘releasing haulbag'. Release the haul bag from the belay as described here.

Step 7
Detach yourself from the belay (but stay tied into the end of the lead rope) and begin cleaning the pitch.

how to ascend a rope

Top Tip
Your top jumar will slide up the rope easily because the rope is tensioned below it (by your lower jumar), but your lower jumar won’t act the same.

To move your lower jumar, you’ll need to pull the catch back slightly with your thumb. This moves the teeth away from the rope without disengaging the catch completely, meaning that it will glide up the rope. When you let go, the catch springs back and locks on the rope. This is a subtle movement which takes a bit of practise to develop.

how to jumar a climbing rope

big wall aid climbing

Jumaring on Slightly Overhanging Terrain

Jumaring on steep ground is hard work, but gets easier with practise. The technique is basically the same as for vertical terrain, but you must synchronise your movements to be efficient. Weight your lower aider while simultaneously pushing your upper jumar up the rope (you'll need to unweight your foot on the upper one to do this). Then sit back on your upper daisy while pushing the lower jumar up, pulling the catch back slightly to help it slide up the rope. You may need to adjust your upper daisy to a shorter length if you are hanging too low.

You should alternate between resting your weight in your harness (when sitting back on your daisy) and having your weight on your legs (when standing up). You don’t need to pull yourself up with your arms. Make sure the rope feeds through your GriGri as you are jumaring up. Sometimes the weight of the rope will do this for you, but often you'll need to stop every few meters to pull it through. It's a good idea to clip the rope to your belay loop every 10 meters or so. This helps to keep the rope from getting stuck around distant flakes when it's windy, and also acts as an extra back-up.

Jumaring on Slabs

Jumaring on lower-angle terrain is easier. All your weight is on your legs – you don't need to weight your daisies. But if you need a rest, just sit back and hang on your top daisy. You'll need to adjust your daisies longer and put your feet one step lower in each aider than you would on steep ground.

Removing Gear when Jumaring

Cleaning Straight-Up Sections
On a perfectly straight-up pitch, you can simply unclip and remove gear.

Don’t slam your jumar right up into a knot or piece of gear as it needs to move up a few millimetres before it can be released.

how to follow an aid climb

Cleaning Almost Straight-Up Sections
In many cases the gear will be pulled tight by the rope, making it hard to unclip. In this situation:
- Weight your lower jumar
- Remove your upper jumar from the rope
- Re-attach this jumar to the rope above the gear and weight it
- Now you can more easily remove or unclip the gear

how to second an aid pitch

Diagonal Sections
If you use the previous method to remove gear on a diagonal pitch, your lower jumar will get ‘sucked in’ to the gear. To avoid this:

Step 1
Jumar close to the piece.

Step 2
Pull slack through your GriGri and weight it.

how to climb a rope with jumars

Step 3
Remove both jumars (one at a time) and reattach them above the piece.


Step 4
Release rope through your GriGri so that you are weighting the jumars again.

climb rope with ascenders

Step 5
Now you can remove the gear.

jumaring a rope

Traverses and Overhangs
To clean a traverse or a steep overhang, you'll need to take both of your jumars off the rope and clip your aiders into the gear that the leader placed. Effectively, you are 'leading on top rope', belaying yourself with your GriGri.

Simply clip across the pieces, removing the ones behind you as you go. Make sure to keep pulling the slack rope through your GriGri and tie back up knots as you go. If the piece held the leader, then it'll (probably) hold you too. If it doesn't hold, then you'll fall safely onto your GriGri and/or back up knots. If the leader did some hook moves on the traverse, you’ll need to bring some hooks with you to repeat those moves when cleaning.

how to follow an aid traverse

VDiff big wall aid climbing book

Cleaning Pendulums and Lowering Out

When you reach the piece which the leader pendulumed or tension traversed from, you can't remove it or else you'll swing uncontrollably across the wall. To avoid this, you'll need to do a lower-out.

You'll need plenty of slack rope for a lower-out (around three times the diagonal distance of the lower-out). This usually isn't a problem halfway up a pitch, but if there's a lower-out near the start of a pitch (or straight off the belay), make sure the leader fixes the rope with enough slack for you to do this.

The following method describes lowering out by passing a bight of rope through a fixed piece, therefore not needing to untie from the end of the rope. For very long lower outs, you may need to untie (described later in this article).


Step 1
Remove your jumars from the rope and clip one of your daisies directly into the lower-out piece. On well-travelled routes this will usually be a bolt or a collection of fixed gear. Your weight will be on this daisy while you're setting up the lower-out.

carabiner on bolt

Step 2
Pull all the slack rope through your GriGri so the rope is tight to the upper belay.


Step 3
Take the slack rope from below your GriGri and push a bight of it through the ring or carabiner at the lower-out point.

how to lower out on a big wall

Step 4
Attach the rope to another belay device (such as an ATC) on your belay loop as shown (if you don't have one, use a munter hitch).

big wall lower out

Step 5
Lean into the lower out point and take in all the slack rope through the ATC so that your weight is taken by it.


Step 6
Keeping hold of the brake rope, remove your daisy and any other gear from the lower-out point. Then lower yourself out by letting slack through your ATC.

follow pendulum on big wall

Step 7
When you have finished lowering, put your jumars back on the rope above you, remove your ATC and pull the bight of rope back through the lower out point. You can continue jumaring the now vertical rope.


Top Tip
If you don't quite have enough rope, you can jumar up a little after lowering as far as you can. This will give you extra rope to complete the lower-out.

how to do the king swing

follow traverse big wall aid climbing

Longer Lower-Outs

The following technique uses half the amount of rope but involves untying from the end. This is useful for very long lower-outs or for lower-outs near the start of a pitch.


Step 1
Follow steps 1 and 2 as described in the previous section and add a back-up knot as shown.

how to climb the king swing

Step 2
Untie from the end of the rope and feed it through the lower-out point.

how to do the king swing on the nose

Step 3
Attach the rope to an ATC (or munter hitch) on your belay loop and pull the slack through so your weight is taken by it.

how to follow the king swing el cap

Step 4
Remove your daisy and lower yourself out.


Step 5
When you’ve finished lowering out, remove your ATC, pull the rope through the lower-out point and tie back into the end.

how to clean a pendulum point

How To Climb a Big Wall – Packing the Haulbag

Check out the full big wall video course, or download the e-book.

A poorly packed haulbag is a nightmare on the wall. Small essential items will sneak their way to the very bottom, or you’ll be unable to get at your food unless you pull out all your water bottles and bivi gear, probably dropping most of it in the process.

Avoid this by packing properly at the base and re-packing in a logical order after a night's sleep on the wall. If you have more than one haulbag you can pack each one in the same way.


Step 1
Once you've carried all your stuff to the base of the route, position your haulbag where it will be hauled from. It will be difficult to drag it around the base once packed, so get it in the right position to start with.

Big wall haul bag

Step 2
Pack your loose equipment into 'stuff sacks'. Use stuff sacks (with a secure clip-in point) to group together food, clothes, toiletries and other small items.


Step 3
Remove the haulbag straps and drop them into the bottom of the haulbag. You won’t need these until you’re on the summit. Hauling with the straps on will probably break the straps, cause the haulbag to get stuck and dislodge rocks.

how to pack a haulbag

Step 4
Line the inside of your haulbag. Cardboard or old pieces of foam sleeping pads work well. This will help to prevent holes from wearing in the sides when you drag the bag up slabby ground. Don’t use your actual sleeping pad for this – it’ll be almost impossible to reposition back into a fully loaded haulbag.


Step 5
Haulbags like to be packed in layers, with the bottom layer providing structure. Without a tightly packed bottom layer, the haulbag will elongate and become narrower when hanging by its straps, which reduces overall useable space.

Pack the bottom layer tightly with stuff that you won’t need for the first half of the wall. Things like spare water, food and celebratory summit beers would be suitable items. Once you remove something from this layer when the haulbag is hanging by its straps, you probably won’t fit it back in. So factor this in when packing. Stack water bottles upright and cram your stuff sacks of food in between them.

how to pack a haul bag

Step 6
Fill the rest of your haulbag in a logical order. The second layer up should consist of things you don’t need until the following day (e.g: tomorrow’s food and water). The next layer will be things you won’t need until the evening (e.g: sleeping bag, stove).

Anything above this will be easily accessible. Fill it with stuff you might need during the day, making sure to keep a bottle of water and some food on the very top along with your first aid kit and some spare clothing.

packing a haul bag

Step 7
Streamline the haulbag. Fasten the straps and tuck away any loose pieces of cord to reduce the chances of it getting stuck.


Rack Bag
Spare rack could be packed in the top layer too. However, if you have a huge spare rack of obscure aid gear, it's worth taking an extra smaller haulbag (a rack bag) to de-cluster your main load. Attach the rack bag to the main hauling point so that it hangs alongside the main haulbag.

packing a haulbag

big wall aid climbing

If using a rack bag, group the same type of rack together on 'racking' slings. Use an internal clip-in system to clip your racking slings to.

packing haulbags

This way, you won't accidentally drop all your cams when pulling out your piton rack.

big wall haulbag

Portaledge
You can attach your portaledge to the straps underneath the haulbag, or to your main hauling point. The rainfly can hang on these straps underneath too (packed inside a durable bag) if there's no room inside the haulbag.

Be warned that if your rainfly is in a standard stuff sack, it’ll probably wear a hole in it if hauled like this.


Poop Tube
You could also attach your poop tube to these straps, but a better way is to attach it to a piece of cord (4 or 5 meters long) which is clipped to the main hauling point. This way, it hangs out of smell-range below everything else and can be pulled up quickly in an emergency!

big wall haul bag

Example Haulbag Setups

Which haulbag setup you choose depends on your personal preference, how many people are in your team and how much stuff you’re bringing. Here are some examples.


Lightweight
Suitable for 2 climbers spending 2 nights on the wall.

- Medium size haulbag (approx 100 litres)
- Poop tube

how to haul bags


Mid-weight
Suitable for 2 climbers spending 5-7 nights on the wall.

- Full size haulbag (approx 160 litres)
- Medium size haulbag (approx 100 litres)
- Poop tube
- Portaledge
- Portaledge fly

how to haul on a big wall


Heavyweight
Suitable for 2 climbers spending 2 weeks on the wall.

- Full size haulbag (approx 160 litres)
- 2 Medium size haulbags (approx 100 litres each)
- Poop tube
- Portaledge
- Portaledge fly

how to haul bags on a big wall

Preparing the Haulbag

Before you leave the ground, you'll need to attach the haul rope and a docking tether to the haulbag. The docking tether provides a releasable attachment point for the haulbag.


Step 1
Attach the docking tether to the main hauling carabiner (large auto-lockers are a good choice) by tying an overhand loop in the middle of it as shown. This provides you with two strands for docking.

Step 2
Along with a docking tether, you will need a back-up sling/cord. Incorporating a shock-absorber (screamer) with the sling is preferable. Attach this to the main hauling screwgate.

big wall hauling

Step 3
On most haulbags, one strap is shorter than the other. Clip the long one into the main hauling carabiner along with the docking tether and back-up sling.

how to haul on a big wall

When you fasten the main hauling carabiner, it'll remain closed for the duration of the climb. This carabiner will be constantly loaded until you reach the summit.

how to attach a haulbag

Step 4
Attach the shorter strap to the main hauling screwgate with another carabiner.

how to attach a haulbag to the rope

On heavy loads, it can be difficult to unclip this carabiner to access the haulbag’s contents. An alternative is to shorten the strap further by tying an overhand knot in it.

set up the haulbag on a big wall

Then attach it via a piece of 7mm cord tied with a releasable knot (such as a munter-mule-overhand) as shown. However you do it, make sure the haulbag’s weight hangs evenly on both straps.

how to set up haulbag on a big wall

Step 5
If using a knot protector (highly recommended), slide it onto the end of the haul rope at this point.


Step 6
Tie a figure-8 in the end of the haul rope and attach it to the main hauling carabiner with a separate screwgate.

haulbag docking tether

big wall aid climbing

Swivel
If your route is slabby with many traversing pitches, it is worth using a swivel. This will help to prevent kinks in the haul rope. Tuck the docking tether and back-up cord away to further reduce snags.

haul bag swivel

Rigging Plate
A rigging plate (such as the Petzl Paw) helps to spread things out at the main hauling point. This is most useful if taking several haulbags.

haul bag rigging plate petzl paw

How To Climb a Big Wall – Hauling (Part 1)

Check out the full big wall video course, or download the e-book.

There are different hauling systems you can use to get your equipment up the wall.

1:1 hauling is the simplest and most suitable for light loads. A 2:1 or 3:1 setup may be needed for heavy loads or hauling up slabby terrain. Space hauling can be used with any system to speed up the haul too.

It is easy to switch between systems once they are set up (e.g: You might start with a 3:1, and then switch to 1:1 space hauling once your partner has finished cleaning the pitch). All of these systems are described in detail in this chapter.

Big wall haulbag

Backing Up the Haul
Auto-locking hauling devices are very unlikely to break. The most likely cause of failure is the toothed catch becoming wedged open, causing the haulbag to plummet. This usually happens because something got stuck in it or there was a weighted rope pinching it into the rock.

Prevent this disaster by keeping the hauling device clear of anything else at the belay and add a back-up during the haul. With a 1:1 or a 3:1, this back-up will be your GriGri. With a 2:1, the back-up will be the cord. Neither of these are textbook ways to back something up – for added security, tie the haul line to the belay occasionally. If you need to remove a back-up, make sure to add another first (e.g: If switching from a 1:1 to a 2:1, attach yourself to the 2:1 before removing your GriGri).

Pulley Orientation
Hauling devices and pulleys should be used with compatible carabiners (ovals work best). This spreads the load evenly across the bearings.

Using an ill-fitting carabiner causes a sideways strain on the pulley and makes hauling even harder.

carabiner pulley orientation

Friction
On slabby terrain, the haulbag will drag up the wall, creating friction which makes the hauling more difficult. The same is true for blocky terrain where the tensioned haul rope rubs over rock features. The more the haulbag and rope contact the rock, the more friction is created and therefore the harder the hauling will be. The same weight hauled 1:1 on overhanging terrain may need a 2:1 on slabby terrain.

Some belays are conveniently situated above a nice ledge. This provides a great stance, but often creates unwanted friction when the haul rope rubs over the lip of the ledge. It is worth setting up the haul at the side of the ledge so this doesn’t happen, if the opportunity exists to do so.


Mechanical Advantage
The hauling systems in this section are described using their mechanical advantage. Adding mechanical advantage makes the hauling slower, but easier. Imagine you had to carry 75kg of equipment in a backpack along a trail (like when you are walking to the base of the route). Would you carry all 75kg in a single monster load (1:1)? Or would you split the load into 3 and carry a more manageable 25kg each time (3:1)?

With a 3:1 setup, three meters of rope must be hauled to move the load up one meter. This means you must haul three times the distance of the pitch. In theory, a 3:1 is three times easier than a 1:1. In reality, it’s more like 2.5 times easier. This difference between theoretical and actual mechanical advantage is primarily due to friction around pulleys and stretch in the rope.

Taking this lack of efficiency into consideration, it is still definitely worth adding mechanical advantage to a 1:1 if you’re finding it extremely difficult to haul. Which setup you use depends on the weight of the haulbag and the friction involved. Try a 1:1 first and go from there. It’s easy to switch between systems mid-haul if needed.

Hauling Systems – 1:1

A 1:1 is the foundation upon which all other hauling systems are built. Regardless of your chosen system, you will need to set this up first anyway.

Advantages
- Simple
- Requires little equipment
- Often the quickest way of hauling

Disadvantages
- Very difficult to haul more than your own bodyweight

Most suitable for:
- Light loads (less than your bodyweight) when the hauling is steep

You will need:
- a hauling device (e.g: Petzl Pro Traxion)
- an auto-locking belay device (e.g: Petzl GriGri)

Note
The leader’s tie-in knot has been removed from the following diagrams for clarity.


Step 1
After leading a pitch, attach yourself to the anchor, fix the lead rope and set up the hauling system.

Step 2
At this point, your belayer will release the haulbag.

hauling on big wall

Step 3
Now the hard work begins. Lean your weight back onto your GriGri so it locks, and push out and down from the wall. The lighter your bags, the easier this will be. Pulling on the ‘up’ rope with one hand will give you a little extra help. If your bags are super heavy, you could try bracing your feet against the wall at head-height and pushing out using your legs.

Step 4
Once you have pulled some rope through the hauling device, step into your aiders and 'reset' by pulling the slack rope through your GriGri, as if you are taking in a top rope. With practise, you will develop a smooth hauling action, keeping your feet in the same position throughout the haul.

how to haul a haulbag

Step 5
Stack the rope away neatly as you haul so that it won’t tangle into the hauling device. Stop hauling when you still have around 30cm of rope left – be careful not to jam the knot into the device.

Step 6
To complete the haul, you will need to dock the bag.

Top Tip
Pace yourself. Have a rest every 20 or so pulls and stack the rope or have a sip of water. Treat it like a marathon, not a sprint.


big wall hauling

Hauling Systems – 2:1

Advantages
- It’s much easier to haul the same weight on a 2:1 than a 1:1
- Enables you to haul more than your own bodyweight
- You can add or remove the 2:1 setup from a slack or tensioned haul rope, meaning it’s easy to switch between systems mid-haul

Disadvantages
- Requires more pulleys than a 1:1
- Must haul twice as much rope as a 1:1

Most suitable for
- Heavy loads (a little more than your bodyweight)
- Hauling light loads up high-friction terrain

You will need:
- a hauling device (e.g: Petzl Pro Traxion)
- an auto-locking belay device (e.g: Petzl GriGri)
- two non-locking pulleys
- a jumar (or similar)
- a 2 meter length of 8mm nylon cord (don’t use dyneema cord – this material weakens with repeated flexing and will suddenly snap mid-haul)

Step 1
Set up the cord, pulleys and jumar as shown. If you don’t need the pulleys for anything else, it is worth leaving this set up for the duration of the climb.

- 8mm cord permanently tied through pulley. This allows the pulley to twist itself into position when hauling.

- Clovehitch tied on two carabiners. This knot is easy to unfasten after being loaded – just wiggle the carabiners to loosen it.

how to haul on a big wall

Step 2
Attach the 2:1 to the 1:1 as shown, either to the bottom hole of your hauling device (if there is one) or to the main anchor point. Whichever you choose, it’s important to orientate it so the haul rope and cord can move freely without rubbing against each other or anything else.

Step 3
Clip the double carabiners to your belay loop and adjust the clovehitch to a comfortable length.

Step 4
Lean back in your harness to haul with the cord while simultaneously pulling slack haul rope through the hauling device.

Step 5
To reset the system, stand up and slide the jumar down the rope.

Fine-Tune
The 2:1 can be fairly clumsy at first. Adjust the clovehitch and try standing in different steps of your aiders until you fine-tune the position which allows you to haul with a smooth rhythmic action. This system is very efficient once you get used to it.

how to set up 2:1 hauling
2:1 hauling

Hauling Systems – 3:1

Advantages
- Even easier to haul than a 2:1
- You can add or remove the 3:1 setup from a slack or tensioned haul rope, meaning it’s easy to switch between systems mid-haul

Disadvantages
- Requires more pulleys than a 1:1
- Must haul three times as much rope as a 1:1
- Resetting the system can be awkward depending on the terrain

Most suitable for
- Monster loads (twice your bodyweight)

You will need:
- a hauling device (e.g: Petzl Pro Traxion)
- an auto-locking belay device (e.g: Petzl GriGri)
- a small locking pulley
- a non-locking pulley
- a jumar (or similar)


Step 1
Set up the pulleys and jumar as shown. You can set the lower jumar and pulley as far down as you have rope available. Wiggle the rope to move the jumar and pulley further down beyond your reach, making sure they remain orientated correctly.

3:1 hauling

Top Tip
A carabiner clipped to the jumar as shown helps it glide down the rope more smoothly – useful when setting it out of reach.


Step 2
Haul in the same way as a 1:1. Depending on how far down you set the jumar, it may take a couple of pulls to get the stretch out of the rope before the haulbag actually moves up.

big wall haul bags
big wall hauling

Step 3
When the lower pulley gets close to the small locking pulley, flip the catch on it to release the locking mechanism. The main hauling pulley will now take the weight – check that the catch on the main hauling pulley is correctly engaged before moving onto the next step.

Step 4
Pull slack through your GriGri and push the jumar down the tensioned rope.

Step 5
Once you have pushed it as far as you can reach, flip the catch back down on the small locking pulley and continuing hauling.

how to haul on big walls

big wall hauling

Space Hauling

Space hauling means using your partner as a counterweight to assist with the haul. It can be used with any mechanical advantage system, and doubles the efficiency (e.g: Two people hauling with a 3:1 setup gives a 6:1 advantage).

Advantages
- Because the hard work is shared, the hauling is easier and faster than the other methods
- For most of the haul, the lower climber will be within reach of the haulbag. This means they can guide it around features and prevent it from getting stuck

Disadvantages
- Must wait until your partner has cleaned some, or all, of the pitch
- Can be difficult on overhanging terrain – the lower climber will have to jumar a free-hanging rope

Most suitable for
- Loads which are too difficult to move on your own
- Hauling up fixed ropes on less than vertical terrain

How To Space Haul

The lower climber weights the haul rope while the top climber hauls. It is VERY IMPORTANT that the lower climber stays backed-up on the lead rope while they do this. This back-up will need to be adjusted as the haul progresses. The lower climber will move down while the upper climber hauls. The lower climber will, at some point, need to jumar back up the rope. To streamline this process, they can ascend the rope at the same time as the upper climber hauls.

space hauling

Space Hauling Tips
- There will often be a part of the pitch which is easier for the lower climber to jumar up (e.g: a lower-angle section). Once at this point, they can ‘jumar on the spot’ while the other climber hauls. This also means there is no need for the lower climber to keep adjusting their lead rope back-up.

- Space hauling while wearing all the rack you just cleaned from the pitch is difficult. It is often better to finish cleaning the pitch and deposit the rack at the belay before you help with the haul.

How To Climb a Big Wall – Hauling (Part 2)

Docking the Haulbag

Once the haulbag is at the belay, you'll need to 'dock' it. This means attaching the haulbag to the belay in such a way that it is secure and can also be released easily.

Step 1
Attach a screwgate to the main anchor point and fasten your docking tether to it with a munter hitch. Tie the knot so that it won’t flip when weighted.

Step 2
Wrap the loose strands neatly around the docking tether beneath the munter hitch and finish off with a reef knot. The friction of these wraps stops the rope sliding through the munter hitch.

munter hitch tie off

Single Strand Docking Tether
If you are using a single strand docking tether, you can dock the bag with a releasable knot such as the munter-mule-overhand.

munter mule overhand

Step 3
Attach your back-up cord to a bolt, making sure there's the right amount of slack in the cord. It will need to be slack enough that the haulbag's weight is fully on the docking tether, but not so slack as to cause shock-loading if the docking tether were to unfasten itself. It can be a little tricky to judge exactly how much the docking tether will stretch when loaded. If you prefer, you can attach the back-up cord after step 5. Just don’t forget to do it.

Step 4
Haul a few centimetres of rope through the hauling device whilst flipping up the catch. This releases the auto-lock on the pulley.

how to haul bags on a big wall

Step 5
Lower the haulbag using your GriGri until it is weighted on its docking tether. If your haulbag is super heavy, brace yourself so you don't get sucked in to the pulley. Check that:
- The docking tether is fastened tight (push the wraps of cord together neatly)
- The haulbag’s weight is completely on the docking tether
- The back-up cord has the correct amount of slack – adjust it now if not

how to attach haulbag to anchor

Step 6
The hauling pulley and GriGri can now be removed. The haul rope can be removed too if you:
- need to sort out a rope tangle.
- prefer to swap ends of the haul rope.
- need to tie the haulbag into a different part of the rope to haul the next pitch.

Otherwise, you can simply leave it attached where it is. If you remove the haul rope, make sure to attach the end of it securely to the belay so it cannot fall irretrievably out of reach.

how to attach haul bag to belay

Classic Mistake
Docking the haulbag over a tie-in knot. Manipulating this knot out of the carabiner will be a herculean task. Haul the bag up again and dock it somewhere better.

attach hauling bag to belay

Classic Mistake
Docking the haulbag on the back-up cord. You dock the haulbag, but the back-up cord takes some or all of the weight. This isn’t an immediate problem, but when it comes to hauling the next pitch you will have a great deal of difficulty releasing the haulbag.

To solve the problem:
1) Flip the catch back down on the hauling device
2) Mini-haul a short distance to unweight the back-up cord
3) Adjust the back-up cord appropriately
4) Lower the haulbag onto the docking tether

how to put the haulbag on the belay

VDiff big wall aid climbing book

Releasing the Haulbag

When the leader has set up the hauling system at the upper belay, the belayer will need to release the haulbag from the lower belay. If communication is difficult, wait for the bags to be hauled up a bit to confirm that the leader has actually got the hauling device setup and ready. Visualize where the haulbag will go when you release it.

The haulbag will need to be lowered out slowly to avoid damaging its contents. Having a gallon of gatorade explode into your sleeping bag is not fun. On straight-up pitches, you can simply unfasten the docking tether. To lower the haulbag on a traversing pitch (most pitches traverse a little), you’ll need to use the remaining haul rope as a lower-out. Both methods are described on the following pages.

Releasing Haulbags on a Straight-Up Pitch

Step 1
Once the leader confirms that the hauling system is set up, you can make your final checks and then remove the back-up sling.

Step 2
Tell your partner you are ‘releasing the haulbag’, so they know to begin hauling. Begin unfastening the docking tether so you are just left with the munter hitch. Keep a firm grip on the docking tether as you do this.

hauling how to use docking tether on haulbags

Single Strand Docking Tether
If using a single strand docking tether with a munter-mule-overhand, release the knot as shown so you are left with a munter hitch.

munter mule overhand knot

Step 3
Release the munter hitch slowly until the haulbag’s weight is transferred to the haul rope (the haulbag may already be weighting the rope if your partner has begun hauling). The haulbag is now free from the lower belay and ready to haul.


Top Tip
If you can reach, tuck the docking tether and back-up sling away into the top part of the haulbag to help prevent them being abraded during the haul.

lower out haulbag

Releasing Haulbags on a Traversing Pitch

If your docking tether isn’t long enough to lower out the haulbag, you can utilize the haul rope too.

Step 1
Allow the leader to pull up a few meters of haul rope (so they have enough to begin hauling) and then tie the haulbag in with an alpine butterfly. Remember to slide the knot protector above this.

Step 2
Use the loose end of the haul rope to tie a munter hitch to the belay. Tie this to the side of the belay so the taught haul line does not rub across you and the belay as you lower it out.

how to lower out a haul bag

Step 3
Stack the haul rope so it will feed out smoothly and remove any knots (including the figure-8 from the end). Knots will get stuck in the munter hitch and probably also get stuck in cracks when you haul.

Step 4
Keep a firm grip on the haul rope and release the docking tether as described on the previous pages. The haulbag will then be weighted on the haul rope's munter hitch.

hauling a bag

Step 5
Lower the haulbag out slowly on this munter hitch. When you reach the end of the rope, just let it drop.

how do climbers use haulbags

Hauling Low-Angled Terrain

Hauling up slabby ground (e.g: the final pitch) is much more difficult due to the added friction. To make it easier:

Space Haul
Follow these steps and make sure to be backed up with the lead rope. The lower climber should stay with the bags to guide them around obstacles and loose rock.

Split the Load
Divide your stuff into two or three more manageable loads and haul them separately. For example, haul the portaledge, rack bag and poop tube as the first load. Then abseil down and attach the main haulbag as the second load.

how to haul a haulbag

Shuttle Gear
On low-angled loose ground, you can reduce the chances of dislodging rocks by fixing the pitch and jumaring up with a bag on your back, or with stuff clipped to your harness. You’ll probably have to make several trips but it may be the easiest way, depending on the terrain.

Tag Lines

A tag line can be used to help reduce weight on the back of your harness while leading (essential for free climbing). Tag lines are full length static ropes which are typically 5.5-8mm in diameter. Trailing a 5.5mm tag line (~ 1kg) is much easier than trailing a fat single rope (~ 5.5kg) – you’ll notice the difference towards the top of the pitch. While being very light, tag lines are fairly redundant – they cannot be used for jumaring, leading or heavy hauling.

Step 1
Trail the tag line instead of a haul rope while leading.

Step 2
Once you have finished leading the pitch, the belayer attaches the haul rope and anchor kit to the tag line. For long heavy hauls it’s nice to pass up water and snacks at this point too.

Step 3
The leader pulls up the tag line to retrieve the haul rope and gear. This can be pulled up hand-over-hand if you’re confident that you won’t drop it, or by using a locking pulley such as the Petzl Micro Traxion (only works with thicker tag lines). If using a rack bag, you could pass this up now too to reduce cluster and weight when hauling the main load.

how to haul when climbing a big wall

Stuck Haulbags

If your haulbags get stuck (which they probably will), stop hauling and see what the problem is (if you can see them). Don’t force it – this might make the situation worse as your haulbag wedges itself farther up into a chimney or loose flake. If you can’t see what the problem is, first try wiggling and pushing out on the tensioned haul rope. The slight change in rope angle might be all that’s needed to release it. If that doesn’t work, lower them a short amount and try again.


Step 1
Open the catch.

hauling bags on a big wall

Step 2
Lower the haulbag.

how to haul on a big wall

Step 3
Close the catch.


If that doesn’t work, someone will need to go down and manhandle them. In most cases, your partner will be close by and able to swing over. If not (e.g: because it’s a traverse), you’re better off waiting until they’ve finished cleaning the pitch. They can then descend on the lead rope to sort it out.

how to haul

big wall hauling past a knot

Hauling Past a Knot

Times when you may need to haul past a knot include:
- If you fix a few pitches with two or more ropes tied together.
- If you fasten a knot (alpine butterfly works best) to isolate a damaged section of the haul rope.

The following method works for 1:1, 2:1 or 3:1 haul setups.


Step 1
Haul the load until the knot is just below the hauling device.

how to haul past a knot in the rope

Step 2
Attach an inverted jumar approximately 60cm below the knot and add a back-up as shown.

hauling past knots

Step 3
Release the hauling device so the weight is transferred to the jumar.

hauling past a knot in the rope

Step 4
Extend the hauling setup with a sling and reassemble it so the knot is past the device.

haul past a knot

Step 5
Check the system. Then remove the back-up and jumar, and continue hauling.

how to haul past a knot

Flagging the Portaledge

For harder routes with time-consuming pitches, it is much more pleasant to belay from the comfort of a portaledge than to be crunched up on a belay seat. When it is time to haul, you can leave the portaledge fully set up and ‘flag’ it as shown.

Simply clip the corners and middle of your portaledge around the haul rope, making sure to clip the portaledge’s main point around the rope too. By clipping around the haul rope (not to the haulbag) the portaledge is free to spin around independently of the haulbag, and is therefore less likely to cause problems during the haul, especially if it’s windy. Tie pieces of 6mm cord to the corners of your portaledge to create clip-in points, if it doesn’t already have them.

Flagging works best on vertical or overhanging terrain. On slabby ground, your portaledge will likely get stuck, damaged and could dislodge loose rock.

flagging a portaledge

Un-flagging the Portaledge at the Top Anchor
In high winds, a flagged ledge will behave perfectly… until the moment you remove it from the haul line. Attach a back-up sling so you can’t drop your portaledge and have a plan of where you will put it while you complete the final part of the haul. If it’s super windy, slide it behind the tensioned haul rope to tame it until the haulbags are docked.

Big Wall Hauling- Summary

Hauling is hard work, but it gets much easier with practise. Practise at your local crag, climbing wall or large tree. Line your haulbag with cardboard or foam mats and fill it with rocks and water bottles. Start with a light weight first (20-30kg) to get used to the different systems and then add more weight to simulate what you will take on your chosen climb. Figure out exactly where to position yourself for each system and focus on developing a smooth rhythm that you can sustain for quite a while. Haul with your bodyweight, not by pulling with your arms. Practise makes perfect.

How To Climb a Big Wall – Descending

Check out the full big wall video course, or download the e-book.

The same principles are used when descending from a big wall as when descending from a multi-pitch trad route. The only real difference is the added weight you need to take down.

Some walls have a walk-off descent, some have sections of fixed ropes and some require you to abseil the route you climbed, which may involve overhanging or traversing terrain. Descending from a big wall can take a whole day (or longer) depending on where you are and how involved the descent is. Before you go up, it’s important to know how to get down.

If retreating, it is usually better to descend the route you climbed, rather than follow mystery anchors. This way, you’ll know the anchors are good and will be familiar with what is coming next. If you have topos of nearby climbs (which you should), you may find an easier descent. However, be aware of descending an old route which rarely gets climbed – the anchors may be poor or non-existent.

Organise your haulbag so you have the necessary items handy – spare rack, warm clothes, food, water, headlamps and a first aid kit should be kept near the top. Pour out surplus water, but obviously save enough for the way down. Pack everything inside your haulbags (poop tube, rack bag, portaledge) so you have less stuff to tangle with your ropes.

squamish aid climbing

Descending from a Big Wall with a Heavy Load

Step 1 – Divide the Weight
The first person down should take a light load – swinging across the wall to reach the next anchor, or re-ascending is much easier with a lighter load. Having the means to ascend the ropes will be essential if you abseil the wrong way, or go past the next anchor.

Both climbers should keep the following gear with them during the descent:
- Two full strength daisy chains or slings
- Two aiders
- Two jumars
- Two prusik cords
- A couple of spare slings
- Knife
- Spare screwgates and snapgates (about 4 of each is useful)

The first person down should also take:
- Hauling device
- Enough rack to down-aid sections and set up the next anchor
- Cheater stick (if you have one)


Step 2 – First Climber Descends
The first climber abseils down using an ATC and prusik on both ropes, just like a normal abseil. You may have to swing around or cheater-stick to reach the next anchor. You should clip the ends of the ropes to yourself so you can’t abseil off the ends and also to keep the rope under control in the wind.

On overhangs, kick out from the wall so that you bounce outwards as you descend. If you don’t kick out hard enough each time, you’ll end up dangling in space, and will have to re-ascend.

On traverses, keep a sideways swing as you descend, making sure your rope stays away from sharp edges. On very steep/traversing pitches, you’ll have to down-aid (place directionals). Place gear and clip it to your abseil ropes.

how to attach a haulbag for rappeling

Use gear that is easy to clean, and place the minimum amount needed to reach the next anchor. The aim is for the second climber to abseil with the haulbags as easily as possible. However, for pitches like this it may be easier for the second person to lower the haulbags, rather than abseil with them.

If directionals have been placed, the ropes should be fixed tight to the next anchor (use a releasable knot such as the munter mule). Allow the second climber to attach their belay device before you pull the ropes tight.

A releasable knot is preferred so you can adjust it as the second climber descends – there will be extra slack when they remove directionals and pull stretch out of the rope lower in the abseil.

how to attach a haulbag for abseiling

Step 3 – Second Climber Setup
The second climber needs to attach the haulbag to themselves and to their belay device. Two ways of doing this are shown.


Light Loads
Hanging the haulbag from your belay loop is simple, but is uncomfortable with a heavy load.

Descending from a big wall how to rappel with a heavy bag

Heavy Loads
This setup keeps the weight of the haulbag off your harness and allows you to escape from the haulbag easily.

Having two carabiners through your ATC adds friction and more control.

Alternatively, set up your ropes for a single-strand pull-down and abseil with a GriGri.

how to abseil with a heavy bag

Step 4 – Second Climber Descends
If no directionals have been placed, the second climber abseils down, being very careful not to go below the level of the next anchor. When almost level with the anchor, use your jumars to pull yourself in, or get your partner to haul you in. Make sure not to descend too far or the difficulty of this task will be greatly increased.

If directionals have been placed, they will need to be removed on the way down. Because the ropes are fixed tight to the lower anchor, it is possible to pull across to retrieve them. Make sure not to descend below the level of the gear.

You may have to un-weight the rope for a moment in order to remove gear. This is done by swinging, holding onto nearby features or temporarily weighting a hook while you clean the piece. Be ready to swing out a little when doing this. If it is too difficult to remove the gear, you’ll have to unclip the rope, swing out and leave the gear behind.

Descending from a big wall

Step 5 – Attach Yourself
When you reach the anchor, attach yourself to it.

abseiling with a haul bag

Step 6 – Attach Haulbag
For heavy loads, you’ll need some kind of releasable system so you can easily transfer the haulbag to the next abseil by yourself.

When approaching the belay, dock the haulbag as normal (with a releasable knot and a back-up sling), then continue down a little further until the weight is on the docking tether.

Descending from a big wall with a heavy bag

Step 7 – Pull Ropes
Remove your ATC and prusik. Thread your ropes through the anchor and pull them down.

abseiling with a heavy bag

When Leaving the Belay
Get everything else ready and then release the docking tether.

Alternatively, some types of adjustable daisy can be used instead of a docking tether.

Descending from a big wall

Descending from a Big Wall - Abseiling with a Damaged Rope

Step 1
Attach the rope through the anchor. Two methods are shown here, but many other knots could be used. The point is to have a knot which physically cannot pull through or get stuck in the main anchor point. The important part of this setup is to clip the rope back to itself with a screwgate carabiner to make a closed loop around the main anchor point. This way, the system wouldn’t fail completely if the knot slipped through. You would, however, have to jumar back up to solve the problem.

Step 2
Attach your abseil device to the good strand of rope. Follow the same safety precautions as you would when abseiling at any other time: tie a knot in the bottom end of the rope, use a prusik and weight the rope to check the system before you commit to it.

rappel with damaged rope

Step 3
Abseil down the good strand while keeping hold of the pull-down cord. It’s a good idea to keep the end of the pull-down cord clipped to you.

Watch the setup as the first climber descends. If the knot gets jammed or slips through, you’ll need to tie a bigger knot or change the main anchor point to something smaller (small maillons/ quick-links are good for this).


Step 4
Pull your ropes down.

On a multi-pitch descent, remember that you will have to thread the same rope through each anchor.

abseil with damaged rope

Top Tips

- Add slings and cordelettes to the end of the pull-down cord if you need a little extra distance on your abseils.

- If both of your ropes are damaged, the best option may be to salvage the longest section of undamaged rope as the ‘good’ rope and join the rest together as the pull-down cord. You won’t be able to abseil as far but this may be better than not being able to abseil at all.

- Another option is to fix one end of the rope to the anchor and abseil on a single strand, passing knots (see below) on the way. You will not be able to retrieve your ropes, so this only works if your ropes reach to the ground.


how to big wall rappel

Abseiling Past a Knot with a Heavy Load

If you climb enough walls, you will at some point end up abseiling down a fixed rope with a heavy haulbag only to discover a knot in the rope, or a core-shot that requires isolating with a knot. Or maybe you have tied all your ropes together and are retreating to the ground in an emergency. Either way, you’ll need to pass a knot in the rope.


Step 1 – Stop
Stop about 30cm above the knot. Don’t abseil into it!

how to abseil past a knot with a heavy bag

Step 2 – Back-up
Tie a back-up knot in the rope and attach it to your belay loop. This ensures that you can’t become detached from the rope even if your jumars and daisies disintegrate in the following steps.

abseil past a knot with haulbag

Step 3 – Transfer Haulbag
Attach a jumar to the rope just above your GriGri. Clip the haulbag to the jumar with an adjustable daisy or a docking tether (or both for extra safety) and cinch it tight so the weight of the haulbag is taken by the jumar.

how to abseil past a knot

Step 4 – Transfer Yourself
Repeat this for yourself. For added redundancy, use a separate jumar. The weight of you and your haulbag should now be taken by the jumar(s).

rappel past a knot with haulbag

Step 5 – Move GriGri
Remove your GriGri and position it immediately below the knot. Check that you and your haulbag are still attached to the GriGri correctly.

rappel past a knot in the rope

Step 6 – Transfer to GriGri
Slowly release the haulbag’s adjustable daisy so the weight is transferred back to the GriGri.

If the adjustable daisy is too short, remove it first and use the docking tether to lower the haulbag onto the GriGri. Repeat this step for yourself (easier if you have an aider to stand in).


Step 7 – Check the System
Do a mini test-abseil to check the system, then remove the jumars.

Once you are certain you have passed the knot correctly, remove the back-up knot and continue your descent.

how to rappel past a knot

how to big wall rappel

Descending from a Big Wall - Lowering Haulbags

Sometimes it is better to lower the haulbags instead of abseiling with them. This may be because:
- They are too heavy
- The next anchor is through a roof or across a big traverse
- You are close enough to lower them all the way to the ground


Step 1
The first climber abseils on one rope which is fixed to the anchor.

Step 2
This rope is then fixed tight to the lower anchor (with a releasable knot) to create a taut zip line between belays.

rappel with haulbag

Step 3
The haulbag is clipped to the tensioned rope with two screwgates and lowered down using the second rope. Lower the haulbag with a munter hitch (or a monster munter for extra friction) directly off the belay to keep the weight off your harness.

abseil with haulbag Descending from a big wall

Step 4
The first climber docks the haulbag and fixes the ropes to the lower anchor with enough slack for the second climber to descend.


Step 5
The second climber re-ties the ropes at the upper anchor so they can be pulled, and then abseils on both ropes as normal.

how to rappel with a haulbag

If Placing Directionals
The previous technique won’t work if you had to place directionals on the rope to get to the lower anchor – the haulbag will get stuck at the directional piece and cause a helluva problem.

If you need to place directionals, you can use a third rope. The system is the same, except the first climber abseils with two ropes fixed to the upper anchor. One rope is used for directionals, the other is used as the zip line.

how to abseil with a haulbag

Descending from a Big Wall - Lowering Haulbags Past a Knot

Times when you might need to lower haulbags past a knot include:

If your lowering rope is damaged
Tie a knot over the damaged section and use the following technique to lower the haulbag down the zip line.

If you are close to the ground
It may be easier to tie 2 or 3 ropes together and lower your haulbags all the way to the ground. This should only be done on overhanging terrain where the haulbags cannot possibly get stuck on their way down.


Step 1
Tie your ropes together with overhand knots with 30cm tails. Make sure the knots are neat and tight. Stack them into rope bags so they feed out without tangles when lowering.

Step 2
Tie a munter hitch directly on the anchor, and make it into a monster munter as shown below. This adds a lot more friction, which will be needed for a heavy load.

Step 3
Attach the haulbags to the end of the rope and begin lowering. When the overhand knot reaches the monster munter, it will manipulate itself through. If it gets stuck, encourage it around with a carabiner. Be careful to keep your fingers away from the knot – you could sever your finger if it gets dragged in.

monster munter hitch

VDiff big wall aid climbing book

Descending from a Big Wall - Retreating Mid-Pitch

The following technique allows you to bail when mid-way through leading a pitch without leaving all your gear behind.

Note
If you (or your partner) plan to return to this high-point to continue leading, then use the fixing mid-pitch technique instead.

Step 1
Clip the middle of the haul rope (white in this diagram) into a good piece of gear. Equalize a bunch of gear if necessary.

how to bail from a climb

Step 2
Abseil on the haul rope while getting belayed down on the lead rope. If the top piece fails, you will be protected by the gear you placed on the lead rope. Remove this protection as you descend.

Step 3
This technique allows you to descend up to half the length of the haul rope. At this point, you will need to create an anchor and repeat the process.

how to retreat from a climb

Descending Low-Angled Terrain

You can carry a light haulbag on your back if doing a short abseil on loose ground, where you are trying to minimize dislodging rocks. To reduce the possibility of being flipped upside-down, clip an upper haulbag strap around the ropes above you.

On anything steeper than a low-angled slab, or with a monster load, the weight of the bag will cause you to invert and create further problems. In this case, hang it from your harness as described here.

how to rappel with a bag

Walking Off

You won’t actually have walked anywhere for a few days or weeks and so your leg muscles won’t be happy when faced with a long downhill hike loaded down with a huge bag.

If you have a heavy load, consider taking half of it down, have a day off, then come back for the rest. Take valuables (wallet, car keys) and scented items first so you don’t attract wildlife into your unattended stuff.

How To Climb a Big Wall – Living on the Wall

Check out the full big wall video course, or download the e-book.

Portaledge Setups

You should position your portaledge in such a way that it is easy to access things from inside your haulbags. The main challenge is usually making the belay wide enough so the portaledge can hang next to the haulbags.

Some belays have 3 or 4 widely spaced bolts, which makes the task easy, whereas others only have 2 bolts close together. Some can be spread wide apart by adding gear at the sides and others cannot.

Visualize where your portaledge and haulbags will be while you are making the anchor, so you don’t have to re-make the anchor later.

squamish chief aid climbing

Example Portaledge Setups

- Haulbag docked on left bolt, backed up to main point

- Portaledge hanging from right bolt, backed up to center bolt

portaledge and haulbag

- Haulbags docked on left bolt, backed up to main point

- Portaledge hanging from trad gear, backed up to right bolt

portaledge

- Haulbags docked and backed up on main point

- Both portaledges hanging from trad gear, backed up to a bolt

big wall portaledge

- Haulbags docked on left bolt, backed up to main point

- Portaledge hanging from right bolt, backed up to main point

how to camp on a big wall

If you have a narrow 2-bolt anchor with no gear to spread things out, you can set up the bivi as shown here.

This keeps everything within reach and works well if you don’t need to access the haulbag’s bottom layer.

how to sleep on a big wall

Tying In on a Big Wall

You should keep your harness on and remain tied in with the rope throughout the night. Tie into the main point, making your rope long enough so you can move around the bivi and get in your sleeping bag. An excessively long tie-in is obviously dangerous.

Never untie any knot from the anchor unless you are certain what it is – the random knot you unfasten might be your partner’s tie-in!

set up portaledge

Tying in when the Portaledge Fly is on

Have your tie-in rope entering through the top of a door. The rope is weighted down with a few bunches of carabiners or pitons as shown. Rain water will soak down your rope, but not up it.

If you have a taught tie-in rope, rain will soak all the way down it into your sleeping bag.

how to set up portaledge

Some portaledge manufacturers recommend that you tie in as shown to offer the best protection during a storm. However, this means that you, your partner, the portaledge and everything inside it is hanging on a single carabiner and sling which are out of sight on the outside of the fly.

Also, unless you bring a full rope inside the ledge with you (which may not be available if you’ve fixed pitches above), you won’t have a dynamic tie-in.

set up haulbags big wall climbing

Pre-Attaching the Portaledge Fly

Unless you are certain of good weather, it’s highly advisable to set your portaledge up with the fly pre-attached above. Keep the fly stuffed away inside its bag, and attached as shown.

If it gets cold, windy or stormy in the night, you can quickly deploy the fly. Remember that your portaledge will hang approx 60cm lower when the fly is attached.

big wall climbing

Stabilizing the Portaledge

Aim to get the wall-side corners of your portaledge to touch the wall.

A corner which doesn’t contact the rock is less stable.

how to sleep on the wall

Portaledges can be fairly unstable when weighted only on one side. This tends to be a problem at the most inconvenient times – when you are leaning over to get things out of the haulbag, or standing on the side of the ledge to have a pee.

how to sleep on a big wall

To stabilize your setup, attach a sling from the wall-side corner of the portaledge to the anchor as shown. This allows you to stand on the very corner of your portaledge without fear of it suddenly inverting.

how to camp on a vertical wall

Portaledges will hang differently on slabs than on steep ground.

Adjust the straps as necessary to create a flat living space.

set up portaledge

VDiff big wall aid climbing book

Where To Clip Stuff on a Big Wall Bivi

When it’s time to delve into the haulbags, get 10-15 spare carabiners (bivi biners) ready for clipping things. Avoid clipping random stuff to the main point of the anchor or portaledge. Keep these areas clear for important things like your tie-in knots. A good solution is to clip an aider to a belay bolt and use its steps to clip various things (e.g: shoes, helmets, stuff from your harness) that you probably won’t need overnight.

Stuff that you’ll need during the evening (e.g: stove, food, music) can be clipped on to portaledge straps so you don’t need to move from your seated position until its time to sleep. At which point, all this stuff can either be put in the top of a haulbag or clipped high on the portaledge so it doesn’t dangle around your face all night. Keep breakfast stuff within reach, so in the morning you can wake up and eat without getting out of your sleeping bag.

Natural Big Wall Bivi Ledges

Natural bivi ledges are an island of luxury on a big wall. Many climbers plan their ascent so they can spend the night on natural ledges.

It’s also much easier to reorganise haulbags (e.g: move empty water bottles to the bottom and retrieve spare food) when they’re sitting on a rock ledge.

washington column yosemite climbing

Cooking on a Big Wall

Having a warm meal or coffee is an excellent luxury on the wall. If you choose to take a stove, make sure you understand the drawbacks of using them because they can be quite serious. Without care you could burn a hole through a portaledge, rope or sling, scald yourself on boiling water or get carbon monoxide poisoning. To avoid this:

Vent
Open the door of your portaledge fly to ventilate the cooking area. Carbon monoxide builds up quickly in a closed portaledge and can kill.

Be Ready
Get everything ready and within reach before firing up the stove so there is no movement when it’s running.

Hang
Hang the stove somewhere so that it can’t possibly burn through anything. Give it a lot of space. Remember that heat travels through carabiners.

Stove Operator
Have one person as the stove operator and one as doing everything else (opening packets etc..).

Protect
Pull a sleeping bag over yourself when cooking – a wet sleeping bag is better than a first degree burn.

jetboil hanging stove

How To Poo on a Big Wall

It’s good to have a routine where all climbers have one poo at the same time each day. The simul-poo will ideally take place in the morning or evening when the portaledge is set up and the poop tube is handy. Keep your harness on during the whole event. Unclipping the rear risers enables you to pull your pants down more easily. Tuck them away so they don’t swing around in the poo bag.

Keep the portaledge stable so you don’t end up with poo stuck to your sleeping bag, pants, ropes, rack, hands, unhappy partner, in the gates of carabiners or missing the bag entirely (all of these things have happened to me...).

A sleeping bag hanging down the middle of your portaledge acts as an excellent barrier so you don’t have to watch your partner wiping her arse while you’re eating a chocolate spread bagel. Some climbers prefer to take Imodium tablets every day to eliminate this whole ordeal, and instead just deposit one monster load on the summit. There are obvious drawbacks with this strategy and it’s perhaps healthier to just have your daily dump as normal.

Dealing with urine is easier for men than women. Simply aim out from the wall, keeping urine away from cracks, ledges and climbers below. Shewee’s make this task easier for women, but they apparently take some practise to use successfully. On popular routes, it’s worth having a pee bottle (wide-mouthed Nalgene bottles work for women). Pour it out when appropriate. Make sure to label any water bottle that has been used for this purpose. Pee bottles are useful at night and also to separate liquids from solids during your morning routine.

Big Wall Weather

It’s recommended to check the weather forecast before your ascent and bring a device with you so that you can check the weather again on the wall. Some big wall destinations have long periods of stable weather (e.g: Yosemite), while others have unpredictable and notoriously bad weather (e.g: Patagonia). Keep your storm gear accessible if poor weather is predicted.


Sun
Often the main weather-related challenge in warm climates is the intense sun. On a sun-facing wall (e.g: El Capitan), the sun is hot, bright and inescapable for most of the day. Cover up your skin, use plenty of sunscreen and make sure to drink enough water. On long belays you could make some kind of shady shelter behind a jacket or portaledge fly.

big wall climbing patagonia

Wind
Strong winds are common on warm afternoons, especially higher up on south-facing Yosemite walls. This is due to convection currents created in the valley. As the sun heats up the ground, warm air rises and can generate quite strong updraughts. These are excellent at removing ropes from rope bags, causing chaos with portaledges and making pee go in an unexpected direction. In serious wind-storms (common in Patagonia), you’ll need to anchor your equipment down from underneath to avoid upturned haulbags and ‘surfing’ your portaledge around the wall.

Storms
Thunderstorms can instantly turn friendly granite into a freezing cold torrential waterfall, even in Yosemite. The difference in temperature is dramatic and can be very serious if you’re not prepared. If you choose to climb during a storm, water will find its way up your sleeves, under your hood, inside your shoes and everywhere in between. If you choose to abseil, rain will collect at your belay device and pour into your crotch and down your legs. Not even the best waterproofs will stop you from getting soaked.

The danger increases exponentially with every minute that you are exposed to the elements. As you get colder you lose mobility in your hands. Carabiners will be harder to operate and you will be more likely to drop gear. Being too cold leads onto making poor decisions and is a slippery slope into a much worse situation. Avoid a disaster from the start by bringing the right gear and setting up shelter before the storm hits.

If a storm is rolling in, first focus on getting to the closest place which will be sheltered from a waterfall, if you have time. Black mossy streaks on the wall are a good indicator of where waterfalls form during storms. Belays beneath roofs are great shelters. Bivying in a storm is undesirable, but bivying underneath a waterfall is a whole new level of misery. Small rocks and general wall-debris also tend to get washed down within the waterfall.

If you have proper bivi gear (which you should), it is much better to wait out a storm, than to continue up (or down) during it. Proper bivi gear includes a synthetic sleeping bag, synthetic layers, water-proof jacket, gloves, water-proof bivi bag and a portaledge rain-fly. With the right gear, waiting out a storm can actually be pretty fun, especially if you have a radio and some beers. For extra warmth, fill a Nalgene bottle with hot water and keep it between your thighs in your sleeping bag. If you are running low on water, take advantage of the situation and fill up your bottles with rain.

Aid Climbing Gear – Skyhooks

Check out the full big wall video course, or download the e-book.

Skyhooks come in many different sizes, with each brand being shaped slightly differently. However, for most aid routes, you'll only need the three common types:
- Bat/talon (small)
- Cliffhanger (medium)
- Grappling (large)

Having two of each is recommended so that you can make consecutive moves with the same sized hook.

aid climbing hooks

Giant Aid Climbing Hooks

On harder routes, it is worth supplementing your hook rack with some giant hooks (such as the Pika Meat Hook) and pointed hooks of various sizes to fit in drilled holes.

sky hooks aid climb

Pointed Skyhooks

To make your hook pointed, simply file the end to a blunt point at around 60 degrees.

skyhook

Slinging Skyhooks

Tie your hooks with a loop of cord or webbing which is stronger than the hook itself. 9/16" (14mm) webbing tied with a water knot or 6mm cord tied with a double fisherman’s bend are good choices.

Make the loop small so you get the optimum reach out of it.

sky hook

An alternative method is to tie an overhand knot in a short length of thick webbing and feed it through the hole in the back of the skyhook.

Make sure the knot is big enough so that it won't slip through the hole.

climbing sky hook

aid climbing hook

Skyhooks - The Placement

Hooks work best on flakes or incut edges of solid rock. Feel the edge of rock with your fingertips to find the sweet spot – the slightest depression makes a difference.

On popular routes, look for scratch marks on the rock to see where others have hooked before.

skyhooks aid climbing

Sometimes, a very light tap with your hammer sets the hook into position nicely.

If you hit a hook too hard, it will probably bend, break the rock or spring out suddenly.

sky hooks aid climbing

The Over-Reacher

If a flake is just out of reach, you could use the ‘over-reacher’:

1) Extend your daisy chain with a quickdraw.

2) Clip the hook to it.

3) Tape the hook to your hammer.

4) Slide the hook up the wall.

5) Once the hook bites, give it a very gentle bounce test and creep upwards.

skyhooks for aid climbing

Leaving Hooks as Protection

The average skyhook has a breaking strength of around 2-3kN; the same as a tiny micro nut. This is enough to hold your bodyweight or an extremely short fall.

To make your hooks more likely to hold a fall, you can equalize them with other marginal pieces (using a sliding-X), or add a fall arrester (such as the Yates Scream-Aid), or both.

skyhook belay
aid climbing hook

When you climb above your hook, it is fairly likely to get flicked by movements in the rope and tumble off the rock. This can be reduced by:

- Weighting the hook down with something heavy, like an enormous hex.

use aid climbing hooks

- Using standard office stationary such as duck-tape or blu-tac.

yosemite aid climbing skyhooks

- Using an upwards-pulling piece of gear to hold the hook in place.


It may seem like a lot of trouble for a marginal piece of protection, but if it's the only thing stopping you from hitting a ledge, it'll be worth the effort, at least psychologically.

how to use skyhooks climbing

Racking Skyhooks

Rack one of each type on the same carabiner. On harder routes, it can be useful to keep a commonly used hook (usually a pointed grappling) on each aider to save time.

If you are storing a lot of hooks with the main rack, keep them in a stuff sack (Fish Beef Bags are good) to stop them tangling into everything.

how to use skyhooks

Aid Climbing Gear – Cam Hooks

Check out the full big wall video course, or download the e-book.

Available in four common sizes, cam hooks greatly reduce the need to hammer a piton. They fit into small cracks from the size of a thin lost arrow to a #1 Camalot, and work by simply camming against the sides of a crack under bodyweight.

Like cams, they do not require a constriction to work. Cam hooks can be placed in vertical, diagonal or horizontal cracks, or inverted in roofs.

cam hooks aid climbing

Slinging Cam Hooks
Cam hooks normally come with a sewn sling pre-attached. If yours doesn’t, you can tie a loop of 6mm cord through it with a double fisherman’s bend.

types of cam hook

Cam Hooks - The Placement

Step 1 – Clip
Clip the cam hook to your aider.

cam hook climbing

Step 2 – Place
Place it deep in the crack.

cam hooks for aid climbing

A textbook placement is in a slot-like widening (e.g: a pin scar) of a parallel sided crack. A flared placement is less secure.

aid climbing cam hooks

Step 3 – Weight
Carefully weight it. The leverage of a cam hook exerts a high force on the sides of the crack, which locks it in place.


Step 4 – Test
Test the cam hook’s stability by applying a little extra force than bodyweight in any conceivable direction of pull. Do not bounce test it – this will most likely break the rock or cause your cam hook to fold flat.

how to use cam hooks climbing

Step 5 – Move Up
Once you’re happy, commit to it and continue up slowly and gently. Be careful if bounce-testing the next piece – this will momentarily unweight the cam hook and may cause it to fall out.

how to use cam hooks

VDiff big wall aid climbing book

Cam Hooking Roof Cracks

Cam hooks can be placed in roof cracks as shown.

clean aid climbing

They will flex a lot in this position, so be very gentle.

how to use cam hooks aid climbing

Cam Hook Tips

- Cam hooks are not appropriate for soft rock (such as Zion sandstone), as they tend to blow out the edges of the crack. Use ballnuts or offset nuts instead.

- Sometimes, a very gentle hammer tap can make a cam hook much more secure. Be careful though – if you hit it too hard, it’ll cause damage to the rock and be difficult to clean.

- You can leave them behind as gear, but they are not very strong (especially when inverted) and are often unstable. Like skyhooks, they are designed to only hold bodyweight. Even in a short fall, they will most likely bend, break and fall out.

- Do not use the smallest size for inverted placements as it is very weak.

- Cam hooks are useful on expanding flakes, since they absorb the flex of the flake. The largest size puts less force on the rock than the others and is designed for fragile flakes.

Racking Cam Hooks

Rack them together on a carabiner, or with your skyhooks if you seldom use them. If using them regularly, keep a medium sized cam hook on each aider to save time.

Aid Climbing Gear – Pitons

Check out the full big wall video course, or download the e-book.

The dart art of smashing pitons into rock with a hammer has been frowned upon by climbers since the 1970’s when less destructive protection (cams and nuts) was developed. Advancements in modern aid climbing gear have completely removed the need for hammering on most easier routes. Many old aid lines can now be aided (or free climbed) with clean gear by using the piton scars created from hundreds of early ascents. Even moderate aid routes (A2-A3) are often climbed clean or with only a few hammered placements.

However, if your chosen route relies on fixed pitons or copperheads to go ‘clean’, you should be prepared to replace them if they are missing or useless. If you plan to climb harder aid or modern routes with few ascents, you’ll need to know all the tricks of the trade. Remember – there is a big difference between gently tapping a piton into a crack, and smashing it in so hard that the whole feature turns to dust or the piton is stuck there forever. Practise placing and removing them on a worthless non-climbable boulder before you weld them into an established aid route.

aid climbing fisher towers

Types of Piton

Pitons are available in many shapes and sizes. Common types are shown here. You may find many other obscure shapes and sizes of piton. They all work in the same basic way.


Material
Pitons are typically made of hardened steel, meaning they can stand up to the abuse of repeated placements.

Pitons are also available in softer steel and other malleable metals. These are designed to deform into cracks for a more secure placement, however they are harder to clean and don’t last for as many placements as the harder steel versions.

File down any burrs on your pitons as these can damage your rope or slings.

types of piton

Spectres
Spectres are basically a cross between a fat beak and an ice axe.

Originally designed for hammering into icy cracks or frozen turf on winter routes, these pitons can be useful on hard aid too.

spectre piton

Sawed Angles
These are angle pitons which have been sawed in half so they can fit into shallow but wide pods and scars.

To make your own, saw a regular angle in half (approximately) with a hacksaw. Then make the edges smooth with a metal file.

sawed angle piton

Big Wall Hammers

You will need a hammer to place and remove pitons. A good wall hammer has a:

- Square head for hammering in corners
- Hole in the head which is big enough to clip a carabiner
- Rounded point (opposite side from the square head) for precise placements and copperheading
- Head weight of at least 500 grams
- Good weight distribution between the handle and head
- Wooden handle, or a fibreglass handle wrapped in rubber, to reduce vibrations on the hand
- Good grip at the bottom of the handle (finger tape works well on wooden handles)
- Sling to wear it over the shoulder
- Clip-in point in the sling

big wall hammer

Wearing a Hammer
Put the hammer’s sling over your shoulder and then wear your chest harness over the top. If using it frequently (for almost every placement), just let it hang down, making sure it stays clear of the lead rope.

aid climbing hammer

When not using it, clip it away to your harness (head-side up). If your harness doesn’t have a holster, use a Petzl Caritool carabiner to store it away. This allows easy clipping and unclipping with one hand.

how to use a big wall hammer

Big Wall Funkness Device

As a nut tool is used to remove clean gear, a funkness device is used to remove pitons. This is a length of thick wire with a swaged loop at either end. It’s better to use a screwgate for the end which attaches to your hammer because this carabiner has a tendency to unclip itself.

Use old carabiners for your funkness – they will get battered so don’t use them for anything else.

funkness device

VDiff big wall aid climbing book

Pitons - Rurps

The rurp (Realised Ultimate Reality Piton) was originally designed to be hammered into hairline cracks. Since beaks were invented, the rurp has become fairly redundant. However, rurps do have an advantage over beaks in horizontals or roof cracks.

rurp piton

The Placement
The ideal rurp placement is an incut horizontal crack which is too shallow for a knifeblade.

Place the thin end of the rurp into the slot. It should go in about half way by hand.

use rurp pitons

Then tap it so the thick end wedges into the slot.

If it bottoms out (hits the back of the placement without being fully driven) you’ll probably be better trying a circlehead instead. If it can easily be hammered up to the cable, you may need to stack another rurp with it or try a stubby arrow instead.

how to place rurps

Removal
Lift the cable out of the way and give it a gentle tap back and forth to unseat it. You can now gently funk it out with your funkness device.

If the rurp is buried up to the cable, you’ll have to funk it fairly hard. Be careful though – this can damage the cable.

how to place rurp pitons

Pitons - Blades, Arrows and Angles

Knifeblades, lost arrows and angles are the original types of piton. They are less useful nowadays since the introduction of larger sized beaks and offset cams. However, they are often way stronger and more secure than anything else that will fit in a weird placement, particularly in horizontal slots.

The Placement
Slide the piton approx 2/3 of it’s useable length into the crack, then hammer it in to the eye. In most cases, you’ll need to hit them fairly hard to make the placement good. Essentially, the piton acts as a wedge and relies on outward pressure from the sides of the crack to remain in place.

how to use pitons for aid climbing

The piton should make a higher-pitched ring with each firm hammer blow. When you hear the same pitched ring twice in a row, the piton has reached it’s optimum depth. Hammering more will probably make it difficult to remove.

The ideal piton reaches its optimal depth just before the eye contacts the rock. If the piton goes in up to the eye easily, you’ll need to remove it and try a bigger size. If you hear a dull thud, the piton has probably bottomed out. In this case more hammering will not help. Try stacking another piton with it or remove it and try something else.

how to use pitons

Roof Cracks
You’ll need to go against clean climbing ethics to get an upwards driven piton of any kind to hold your weight.

Weld it in with your hammer as hard as you can. The harder you hit, the better it will be. Then apologize to the rock for your destructive behaviour.

Horizontal Cracks
In horizontals, the back of the piton is pushed up when the eye is weighted down. This helps to lock it in place.

Pitons can be excellent in incut cracks. In these placements, you may not even need to hammer them.

how to place pitons

Vertical Cracks
In vertical cracks, the piton torques into place when weighted (like a cam hook, but with less leverage). Make sure to clip the perpendicular eye on blades.

how to hammer a piton

Removing Pitons

To remove a piton, you will first need to unseat it and then pull it out the way which it went in. Depending on how driven the piton is, this can sometimes be done by hand, sometimes with a hammer and sometimes using a funkness device.

Step 1
Unseat the piton by tapping it side-to-side (in horizontals) or up and down (in vertical cracks) a few times. This loosens the pitons grip in the crack.

how to remove pitons

Step 2
Clip your funkness device to the piton and also to your hammer. Swing your hammer outwards to shock-load the piton out of the crack.

Lean to one side so you don’t hit yourself in the face with the piton. If this doesn’t work, repeat step 1 and try again.

how to use a funkness device

Piton Racking

Rack blades in groups of 3-5, facing the same way so they spoon each other. Arrows and angles can be racked as a group of 3, facing in alternate directions.

Use oval carabiners for racking pitons – other shapes cause pitons to sit awkwardly and be more fiddly to remove.

how to use pitons aid climbing

Piton Stacking

Stacking means having two or more pitons side by side in the same slot. Stacking is useful when a placement is too shallow for a large piton and too wide for a smaller one. Any piton can be stacked with another to make a more secure placement – be creative.

Step 1
Place the first piton.

knifeblade piton

Step 2
Tap a second immediately next to it. The idea is to wedge them in tightly together.

stacking pitons aid climbing

Step 3
Once you’ve created your iron artwork, loop a sling over it with a slip knot, pushing it as close to the rock as possible to reduce leverage.

aid climbing piton stacking

Step 4
Attach a keeper cord to the pitons so you won’t lose them if they fall out.

Make sure the keeper cord isn’t weighted.

how to stack pitons

Aid Climbing Gear – Beaks

Check out the full big wall video course, or download the e-book.

Beaks are an ingenious type of piton which offer protection in super thin cracks, where even micro nuts are too big to fit. They are available in three common sizes.

beak piton aid climbing

Beaks - The Placement

Beaks are most often placed with a hammer, but they can also be hand-placed.

If possible, always clip a quickdraw directly to the hole on the beak, rather than the cable. Eliminating the cable gives you a few extra inches of aiding height, and also results in a stronger piece of gear (the 3kN cable on Black Diamond Peckers is the weakest part).

To place beaks well, you must first understand the physics that cause them to lock into a placement - taper, hooking power and outward force. Each of these are described below.

how to aid climb with pitons

Beak Physics – Taper

Most beaks have a tapered tip, being smaller underneath than on top. This allows them to be placed similarly to a nut.

Look for tiny constrictions in the crack and slot the beak in just above. Then gently tap it a couple of times with your hammer to seat it in position.

If you hit it too hard, you’ll damage your beak tip or the rock which is holding it in place, or it will be really difficult to remove.

how to place beak pitons aid climbing

Beak Physics – Hooking Power

Similar to an ice tool, the tip of a beak is angled downwards. This allows the beak to ‘hook’ over constrictions far back in a crack.

how to place beaks

Beaks can also be used to hook over flakes or dead-heads (copperheads with broken cables) where a standard skyhook is too wide to fit.

how to place pitons

Beak Physics – Outward Force

If the crack has no constrictions or undulations, a beak will rely on the outward pressure from the sides of the crack to remain in place. Think of the beak as a wedge. You’ll need to hammer it in fairly hard for it to be good.

The beak’s tip should slide half of the way in the crack initially, and then go close to the eye when hammered. If it can be hammered all the way in, you’ll need a bigger size. Over time you’ll be able to judge this before you hammer it.

Unlike most other pitons, beaks do not torque into uniform vertical cracks. So unless there is a slight narrowing or constriction, you’ll probably be better off placing a knifeblade or arrow instead.

how to use moses tomahawks

VDiff big wall aid climbing book

Beaks – Diagonal, Horizontal and Roof Cracks

When a beak is weighted in a diagonal crack, the tip twists into the crack. This offers a little more security on slightly diagonal cracks.

However, on steep diagonals or horizontals, the beak tip is likely to bend or break, especially in the smaller sizes.

how to use black diamond peckers

To combat this, you can clip your aiders to the upper hole (via a loop of 5mm cord). This reduces the leverage on the beak’s tip, making it less likely to break.

Rurps or knifeblades are often a better choice in these situations, since they are stronger when weighted this way.

aid climbing peckers

If you place a beak (or any other piton) at the base of a roof or small overlap, it may become ‘geometrically fixed’.

To be removed, it must be tapped upwards, but this will be impossible if there is a roof in the way. Think about how you would remove the beak before you hammer it in.

how to use peckers climbing

Removing Beaks

To be removed, beaks will need to reverse the way they went in. This is usually done by tapping them upwards.

Hit them from the bottom (be careful not to hit the cable) or underneath the head. You may need to tap them back down and up a few times to unseat them.

how to use beaks

They can also be removed with a funkness device. Clip one end of your funkness device to the beak’s upper hole and the other end to your hammer. Give it a gentle tug upwards. You may need to tap it back into position and then tug it again a few times to loosen it.

You can also clip your funkness to the lower hole on the beak for a more outwards (rather than upwards) pull. You can clip the cable too but it tends to weaken it.

how to use beak pitons aid climbing

For stubborn beaks, you may have to hit the beak upwards until you can slide something between the stem and the rock. This creates a pivot point.

Hit the stem back into the rock to pivot the beak out.

using beak pitons for aid climbing

Racking Beaks

Rack beaks in groups of 3-6 per carabiner.

It’s better to clip the upper holes (if they have them) so the beak tips all point in the same direction – downwards and facing out from your harness. This reduces how much they get stuck on your pants and leg loops.

When storing beaks with the main rack, keep them in a stuff sack (Fish Beef Bags are good) to stop them tangling into everything.

using beaks aid climbing

Stacking Beaks

Clip both beaks, either weighting both of them, or just the one which reaches furthest back.

how to use beaks

For hard aid routes, it is worth taking some ground-down beaks (sawed-off halfway along the blade) for features like this. Don’t bother sawing your new beaks though – your old ones will snap at this point anyway if you use them enough.

Small spectres are sometimes useful in placements like this too, since they are the same thickness as a few stacked beaks.

sawed off beaks pitons

Aid Climbing Gear – Copperheads

Check out the full big wall video course, or download the e-book.

Heads are single-use malleable lumps of copper (copperheads) or aluminium (alumi-heads) that can be shaped with a hammer and chisel for a custom fit into a weird slot where nothing else will go.

Due to their super low strength (body weight only) and difficulty to place, they are only useful for aid climbing. Every aid climber should know how to place copperheads, even if it's just to replace the occasional one which has ripped out on a popular route.

copperheads aid climbing

Heads are commonly available in four sizes (#1 to #4) from matchstick thin to the thickness of your little finger.

They can be made in a variety of styles, including double-heads, circleheads or lead-heads.

types of copperhead

Copperheads - The Placement

Heads work best in small pods, flared constrictions, or shallow grooves where pitons or offset cams and nuts won't quite fit. Try to get a beak or a small brass nut to fit in first. If this doesn't work, bring out your 'heading kit'.

Attach your heading kit together with a piece of cord and clip it to your aiders so it cannot be dropped when in use.

copperhead kit

Step 1 – Clean Up
Use a wire brush to scrub away loose rock fragments. Then use a toothbrush to 'dust' the placement. For a head to stick, the placement must be clean and dry. A layer of water, dust or slime between the head and rock will prevent the head from sticking.


Step 2 – Measure Up
Measure your rack of heads against the slot and select the correct size. It'll need to be the same size as the slot and no bigger.

how to use copperheads

Step 3 – Shape It
Hold the head against a flat and clean section of rock away from the placement and hit it with the square end of your hammer to make it the same shape as the slot.

Make sure to have the wire side of the head at the back of the placement. This means your body weight will pull down from the rear (and more secure part) of the placement. It also means that you can punch more metal into the placement, therefore having more head-to-rock surface contact.

how to place copperheads

Top View

how to place copperheads aid climbing

Step 4 – Place It
Place the head into the slot and set it in position with the pointed end of your hammer (use a chisel on tiny heads for a more precise aim).

how to use copperheads aid climbing

It should stick with just a couple of hammer taps. If it won't stay, dust the placement, re-shape the head and try again.

Be careful not to hit the rock with your hammer when you do this; it'll ruin the placement.

how to place heads aid climbing

Step 5 – Chisel It
Use your blunt chisel to cross-hatch the head into place. Start in the middle and work outwards. Make sure your chisel is blunt, otherwise you'll chop the head into pieces. You can also use a large punch (similar to a chisel, but with a rounded point) to do this.

how to use copper heads aid climbing

Imagine the head is a tiny climber facing outwards in a flared chimney. In order to stay wedged in place the tiny climber needs to press itself into the chimney using as much surface contact as possible.

Hit the head hard enough to push it into the placement, but not too hard that you chisel down to the wire. The aim is to push the head so it makes as much surface contact with the back of the placement as possible. Obviously you can't see this, but if you shaped the head correctly it'll conform to the placement fairly quickly. Make sure to chisel and punch to the very top and bottom edges, being careful not to ding the cable as you do so. If the head moves when you hit its top or bottom, take it out and try again.

To fine tune the head, use a small punch to smear as much copper as possible into every useable grain of rock. Start in the head's centre and work outwards. The aim of this is to add a little extra head-to-rock surface contact. Finally, clip your aiders to your copper artwork and give it a test.

how to place aid climbing copper heads

VDiff big wall aid climbing book

Removing Copperheads

It is possible to remove and re-use a head (depending on how much you chiselled it the first time), but it'll be weaker the second time around. Trying to remove a well-placed head usually results in damage to the rock or the head staying in place while the cable pulls out, thus making the task of removing the 'dead-head' difficult for the next climber. Therefore, it is common courtesy amongst aid climbers to leave good heads 'fixed' in the rock for the next climber to use. However, never trust a fixed head. Be prepared to replace them.

To remove a head (or a dead-head), position your small punch underneath the head and tap it with your hammer. Do the same on the top to lever it out, being very careful not to damage the rock.

copperheads aid climbing

Dead-Heads

An alternative with dead-heads is to use them as aid placements.

Gently tap a small beak or a pointed hook into the top of it. Just one or two soft taps will set it in place.

copper heads aid climbing

Copperhead Lengths

Heads are available in different lengths. Long-wired copperheads can be wedged deep into 'expando' slots, or be bent over an edge. Short-wired heads are better for most other situations, simply because they'll put you higher up the wall.

Circleheads

Circleheads are designed to fit in small horizontal flares or underneath roofs. In these places, a regular head will pull from one side, meaning that it'll probably be levered out.

A circlehead pulls evenly from both sides and therefore is more stable.

aid climbing circlehead

Copper or Aluminum Heads?

Copper is a stronger metal but aluminium is more malleable. This means that a copperhead will take longer to place and it'll be more difficult to get it to stick. But a well-placed copperhead will be a stronger piece of gear than an alumi-head of the same size.

Generally, if the placement is a good nut-like slot and the head doesn’t need much chiselling, use copper for a stronger piece of gear. If the placement is a flared pod, use aluminium so it is quicker to shape and more likely to stick.

Copperheads on Overhangs

Heads are more secure when placed in slots which are less than vertical. This is because of the direction of loading. An 'overhanging' head is more likely to be plucked out when weighted, just like a nut would.

#0 Copperheads

#0 heads are made of the same cable diameter as cam triggers. These will break under the force of a gentle bounce test. There’s really no point using #0 heads because you can always flatten a #1 head and use that instead.

Making Your Own Copperheads

If you plan to place hundreds of heads, it’s worth investing in a good quality bench-mount swager to make your own. Nicopress is a good brand. Cheaper Chinese-made brands tend to have compatibility issues with sleeves and cables.

For the strongest heads, use galvanised aircraft cable and zinc-plated copper sleeves for all points which are not pasted (i.e: not the mashable head part of the head).

Having your own swager also means you can fix cam trigger cables, re-swage beak and rurp cables and make your own wire rivet hangers and funkness devices. If you can borrow a tensile-testing machine, it is wise to measure the strength of your swages before you trust your life to them.

how to make copperheads aid climbing

Aid Climbing Gear – Rivets

Check out the full big wall video course, or download the e-book.

A rivet is basically a smaller, weaker version of a bolt. It’s common for first ascentionists to place rivets to bypass blank sections when establishing a new route.

You’ll find them in different shapes, diameters, lengths and strengths, some with hangers and some without. Some are almost flush to the rock and others protrude an alarming way out.

Due to their indeterminate depth and strength, they should not be relied upon as good gear.

types of rivets aid climbing

To climb rivets, you’ll need rivet hangers. Three main types are shown here. Each of these come in different thicknesses. Plate hangers are the strongest, most secure and give you the most reach. Thin wire and cinch hangers are much weaker, but will fit on almost any rivet.

If choosing a route which has a lot of rivets, you should bring a selection and choose the strongest and most secure hanger that will fit for each rivet.

rivet hangers

Plate Rivet Hangers

Ideally, you would use a plate hanger on every rivet. However, rivets do not always protrude enough from the wall for a plate hanger to fit, or have a large enough head to keep a plate hanger on. There are two common sizes which accommodate rivets with thicknesses from 1/4” to 3/8”.

Simply slide the hanger over the rivet and clip a carabiner to it. The hanger will now be locked onto the rivet.

A 3/8” hanger will not always lock on a 1/4” rivet. Make sure to choose the right size.

rivet hangers climbing

Wire Rivet Hangers

These are the most useful hangers, since they will fit on almost every rivet. They are weaker than plate hangers but twice as strong as the cinch style. Choose the thickest size that will fit for a stronger piece of gear.

Clip your aiders to the swaged side of the hanger and loop the other side over the rivet. Sliding the loose swage up and duck-taping it in place makes the hanger a more secure piece of gear.

how to use rivets aid climbing

Cinch Rivet Hangers

These hangers cinch around the rivet when weighted, making them much more secure on rivets that are:
- Missing a stud
- Pointing downwards
- In overhanging rock
- Protruding a lot from the wall (cinch them close to the wall to reduce leverage)

Clip your aider to one end-loop and slip the middle over the rivet. This cinches tight when weighted.

how to aid climb rivets

To release, clip your aider into the other end-loop.

how to climb rivets

VDiff big wall aid climbing book

Improvised Rivet Hangers

Some nuts can be used as improvised rivet hangers. However, they are less secure and will give you less reach.

Slide the nut down the wire as shown.

how to climb rivet ladders

Racking Rivet Hangers

Rack one or two of each type together on a carabiner, so you will always have something that will fit any rivet.

how to aid climb

Other Uses of Rivets

An imaginative use rivet hangers can enable you to use unclippable fixed gear.

how to aid climb rivets

Placing Rivets

Learn how to place rivets in this article.

how to place climbing bolts

How To Climb a Big Wall – Fixing Pitches

Check out the full big wall video course, or download the e-book.

When to Fix Pitches on a Big Wall

It is common to fix ropes on a big wall. Often this is because you’ve climbed the first few pitches and want to have a final night of luxury on the ground before committing to the wall. This also means less food and water is needed on the route.

Fixing isn’t always the best strategy. If you fix a few pitches of overhanging rock, you’ll have to jumar a seemingly endless free-hanging rope which will probably be more effort than just taking the extra water and staying on the wall. Figure this out before you begin.

eiger north face climbing

You will fix ropes during the climb too if going capsule-style, or maybe you have time in the evening to lead a pitch, but not clean or haul it. You can leave it fixed and return to your portaledge for the night. Simply fix both ropes and abseil down the haul line. In the morning, jumar up the haul line and continue as normal. Ropes can also be fixed to avoid hauling over difficult/traversing terrain. For example, it may be better to fix a few wandering pitches and then do one long haul in a straight line, rather than two or three shorter more problematic ones.


Protecting the Rope
It is crucial that ropes are protected from sharp edges when left fixed. This can be achieved in a variety of ways:

- Stick duck-tape over sharp edges. Remove it when you’re finished.
- Place directionals to re-route the rope away from cracks and edges.
- Wrap a rope-protector around the rope at high friction zones.
- Use re-belays.
- Use good technique. Abseil and jumar smoothly to prevent the rope from sawing across the rock. Never bounce on the rope.

Re-Belays
Jumaring a long line of fixed rope which stretches out of sight above can be unnerving and dangerous. If you can’t see the full length of rope to the next anchor, you can’t be certain that the rope isn’t caught behind a flake or loose block somewhere.

70 meters of dynamic rope stretches a lot when jumarred on, which increases the amount that it rubs against potential sharp edges. This danger can be reduced by adding re-belays where needed.

Tie the rope to a few appropriate pieces on your way down, creating mini-belays. When done correctly, this prevents the rope from coming tight over potential danger areas and also means you don’t have to wait as long for your partner to finish jumaring before you can start up.

climbing ropes on sharp rock

Belay Points
When attaching ropes to belays, try to use the ends of the ropes so you don’t have to pass knots mid pitch (this probably won’t be possible if you’re stretching your ropes up the wall). At belays, make sure to tie excess rope away so there is no confusion about which rope to attach to next. Accidents have happened when climbers have abseiled off the end of a short tail of rope, mistaking it for the fixed line. Tie the ends of all ropes into the anchor so this cannot happen.

Rope Tension
The ropes will need to be slack enough allow a climber to tie a knot (e.g: a back-up knot when passing re-belays or if isolating a damaged section) and to jumar and abseil on. But don’t make them so slack that they blow around in the wind and get stuck behind flakes. If your rope is wet, allow extra slack because ropes shrink as they dry. On the ground, attach your rope to a solid anchor out from the base of the wall to keep it away from the rock and stop it blowing up onto the wall.

Joining Ropes
Ropes can be connected together with a variety of knots. The one shown here offers a handy clip-in point so you don’t need to tie an additional back-up knot when passing through. Start by tying two overhand knots, then isolate them inside an alpine butterfly.

If you tie your ropes together with standard overhand knots, make sure to add a back-up knot of some kind when jumaring or abseiling past the knot.

alpine butterfly knot

VDiff big wall aid climbing book

Abseiling Past a Knot on Fixed Ropes

Step 1
Stop abseiling just before the knot and clip into the back-up point.

Step 2
Attach a jumar to the rope above you and weight it.

Step 3
Remove your belay device and re-attach it below the knot. If you can’t reach, attach your other jumar and ‘reverse ascend’ one move so you are weighting your belay device.

Step 4
Check the system, then remove your jumars and back-up point.

how to rappel past a knot

Ascending Fixed Ropes

Technique
Ascend fixed ropes as normal using two jumars and a GriGri. For added security, clip carabiners through the top holes in your jumars so they can’t pop off the rope. The tension of the rope from below should auto-feed your GriGri. Move smoothly to reduce the amount that the rope rubs across the rock. Always check each rope before you commit your life to it.

Don’t jumar up a rope which is stuck behind a flake or appears to be damaged. If you don’t trust the fixed rope, you can re-lead the pitch.

Alternatively, jumar the rope while being belayed on another rope, placing gear as you ascend in case the rope snaps.

jumar ascender on rope

Passing Belays
Always add a back-up when passing knots, anchors or re-belays. A simple method is to clovehitch the rope to your belay loop.

At the anchor, take the stretch out of the next rope by using your jumars to pull the rope tight. Then unclip from the anchor and continue up.

clove hitch

Fixing Mid-Pitch

If you can’t complete a pitch (e.g: because of darkness, fear or bad weather), you may choose to lower down and finish it off later. If you’re less than half a rope length up a pitch, you can simply lower down from your top pieces to the belay. However, this method puts twice as much weight on your lower-off point (the weight of you and your partner) and pulls all your gear at a weird angle when the rope is tensioned. For these reasons it’s better to use the following method. Also, if you’re more than half a rope length up, you’ll have to use this method.

Step 1
Equalize the top few pieces to make a good lower-off point.

Step 2
Clip the end of the haul rope to this point with two screwgates.

rock climbing anchor

Step 3
Attach the lead rope to the screwgates with an alpine butterfly knot.

Step 4
Attach your GriGri to the haul rope and get ready to abseil.

fixing half a pitch

Step 5
Check the system. Then untie from the lead rope and abseil down. Your partner keeps you on belay until you’re back at the anchor and safely tied in. If the lower-off point fails, you’ll fall and be backed up by the protection you placed during the pitch. Falling mid-abseil like this isn’t ideal, so make sure your lower-off point is good.

Step 6
If leaving the ropes overnight, tie them to the belay under a bit of tension to keep them in position.

fixing pitches

Fixing Mid-Pitch - Ascending To Your High Point

Step 1
Get put on belay in the same spot on the rope that you were previously taken off belay.

Step 2
Ascend to your high point using a klemheist prusik and a GriGri. This way, if your lower-off point fails, you will shock-load your GriGri and prusik, not the sharp teeth of your jumars. Use your jumars to ascend only if you’re certain the lower-off point is bomber.

Step 3
Tie back into the lead rope, clip the haul rope away on the back of your harness and continue climbing, leaving the equalized gear as a bomber piece.

ascend rope with prusik

How To Climb a Big Wall – Teams of Three

Check out the full big wall video course, or download the e-book.

Climbing as a three can be more social (with someone to chat to at the belays), faster (with someone always leading) and easier (with an extra person to help with the hauling and share the harder leads). There are many different rope systems for a three person team. A few of these are described below.

Big Wall Teams of Three (Two Rope Technique)

Step 1

- The haul rope is fixed so the 2nd climber can jumar up quickly.

- Leader pulls up the remaining lead rope before fixing it for the 3rd climber. This will provide enough rope to start leading the next pitch.

- 2nd climber lowers out from the belay and jumars to the upper belay on the haul rope.

how do you climb a big wall with three people

Step 2

- Leader short-fixes or is belayed by the 2nd climber using the remaining section of lead rope (the same climber can lead again or swap).

- 2nd climber reaches the upper belay and sets up the haul.

- 3rd climber releases the haulbag.

big wall climbing three people

Step 3

- The leader climbs while the 2nd climber hauls and the 3rd climber cleans (hauling could wait until the 3rd climber has finished cleaning to make belaying safer).

- Keeping a tag line between the leader and cleaner means gear can be passed up to the leader sooner.

how to climb in a team of three

VDiff big wall aid climbing book

Big Wall Teams of Three (Three Rope Technique)

Step 1

- Leader pulls up two ropes using the tag line.

- One of these ropes is fixed for the 2nd climber to jumar up. The other rope is set up for hauling.

Having 2 dynamic ropes and 1 static means you can haul with the static rope and still have a spare lead rope (static ropes are more durable than dynamic ropes when used for hauling).

big wall climbing with three climbers

Step 2

- Leader hauls and/or gets ready for the next lead

- 2nd climber ascends to help with the haul and/or belay the leader

- 3rd climber releases the haulbag and cleans the pitch

how to climb a big wall with threee people

How To Climb a Big Wall – Short-Fixing

Check out the full big wall video course, or download the e-book.

To speed up the ascent, some climbers prefer to lead in blocks (the same person leads several consecutive pitches), with the leader short-fixing (self-belaying the first section of each pitch). Short-fixing can be very dangerous if not performed correctly and is not recommended for beginners.

Advantages
- Faster
- A faster ascent means a lighter haulbag

Disadvantages
- Self-belaying is more difficult and dangerous
- More difficult to deal with a stuck haulbag

Short Fixing - How it Works

The leader will be able to climb as far as they have rope (and rack) available. For example, if the previous pitch was 40m, and the lead rope is 60m, the leader will be able to climb 20m (minus rope used up in various knots). Ideally, the leader will have climbed this extra distance by the time the follower has cleaned the pitch. There are a few different ways to set up the anchor for short-fixing. One is described below.


Step 1
When the leader finishes a pitch, they fix the lead rope and set up the haul, just the same as normal. The follower then releases the haulbag.

big wall short fixing

Step 2
The leader adds a backup to the haul rope. This backup will remain while the haul is unattended.

The leader continues to trail the haul rope on the next pitch.

how to short fix climbing

Step 3
The leader self-belays by attaching their GriGri to the rope, and attaching the rope to the anchor as shown. The backup knot is important because GriGri’s do not always auto-lock.

This backup knot will need to be re-tied as the leader climbs – always tie a new backup before removing the old one. If the leader falls, the GriGri (or the backup knot) will hold the fall.

how to short fix big wall climbing

VDiff big wall aid climbing book

Step 4
When the follower arrives at the anchor, they put the leader on belay and pass up gear using the haul rope (if there is enough rope – the follower may need to haul a bit first). Be aware that there might be a lot of spare lead rope in the system at this point. To keep this danger to a minimum, the leader can belay the rope through at the same time as the belayer takes it in.

Step 5
The leader removes their GriGri and backup knot and continues climbing as normal. The belayer can then re-sort the lead rope so the full length is available. The belayer hauls and belays while the leader climbs.

Note
On terrain where the haulbag is likely to get stuck, it is recommended that the leader hauls the bag before short-fixing the next pitch.

speed climbing short fixing

How To Climb a Big Wall – Bolting

Big Wall Climbing - Bolting Ethics

Belays
Some first ascentionists choose to create bomber bolted belays (making a quick and relieving end to the pitch for future ascentionists), while others prefer natural belays (believing that creating an intricate belay is part of the climb). There is no right or wrong here. When repeating a route with natural belays, it is expected that you respect the adventure of the route and do not add bolts.

Blank Sections
When a climber reaches a blank section on a first ascent, should they drill a rivet and continue climbing, or claim the route to be too difficult and retreat to the ground? Again, there is no right or wrong answer. The commonly agreed ethic is that rivets and bolts should only be placed when there is absolutely no other way to climb the rock, and the number of drilled holes should be kept to a minimum.

Bat Hooks
Bat hook holes are shallow holes which have been drilled in a blank section of rock to accommodate a small pointy ‘bat hook’.When encountering a blank section, some first ascentionists choose to drill a bat hook hole instead of place a rivet or bolt. This may be because they’re running low on time, low on rivets or because they want their route to remain more dangerous.

Whatever the motive, it is commonly agreed amongst modern aid climbers that choosing to make a bat hook hole on a first ascent is poor style, and that a rivet should be placed instead. Drilling a rivet makes the route more ‘repeatable’ for future ascentionists. This is because bat hook holes are often hard to see and can blow out with very few uses, meaning that a rivet must inevitably be placed anyway.
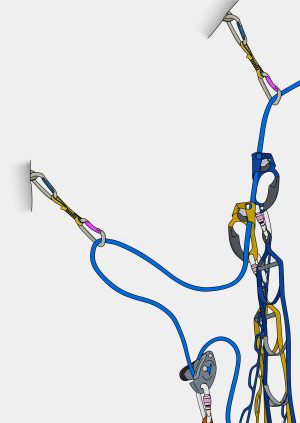
bat hooks aid climbing

Adding Rivets and Bolts
It is not acceptable to add bolts, rivets or bat hook holes to an established route in a place where there wasn’t one previously (‘replacing’ them is different). This would be roughly equivalent to gluing a massive plastic hold at the crux of a crimpy free climb in order to downgrade it to your level – not cool. The only exception to this rule is if part of the aid route has fallen off, creating a new blank section. With permission from the first ascentionists or local climbers, you may repair the route with the sensible addition of rivets/bolts where needed.

Replacing Rivets and Bolts
If you plan to climb a seldom travelled route, it’s a good idea to bring a bolt kit to replace old/broken bolts and rivets. The common ethic is to only replace hardware if it needs replacing, and to replace it with the same type of hardware as the original (e.g: replace a 1/4” rivet with a 1/4” rivet). An exception to this rule is to replace substandard belay bolts with a full-strength alternative (e.g: replace an old 1/4” belay bolt with a 3/8” bolt).

Big Wall Bolts – Material and Strength

The breaking strength of a new, well placed bolt is at least 22kN (very strong). Whereas the strength of a rivet is much less and quite variable. Even a new rivet should not be expected to hold a big fall. You should only use high-quality bolts, rivets, nuts, washers and hangers which are made of stainless steel by a reputable brand. This material lasts a long time before it rusts.

Rivets should be at least 1.5” long in solid granite. In softer rock (e.g: sandstone), use 3/8” bolts instead which are least 2” long. Belay bolts should be 3/8” in diameter and at least 2.25” long in solid granite. In softer rock, it’s recommended to use 1/2” bolts which are at least 3.5" long.

Bolts should be used for all steep overhangs and roofs (rivets on steep ground are difficult/impossible to climb). Always leave the hangers on bolts so future teams can use them easily.


VDiff big wall aid climbing book

Removing Old Climbing Bolts

To remove an old bolt, you will need:

- Tuning fork (#4 lost arrow with its center cut out)
- Long thin knifeblade
- Epoxy glue

how to replace old rock climbing bolts

Step 1
Gently hammer a long, thin knifeblade under the bolt hanger to begin the process of prying the bolt out. Tap the knifeblade in from all sides. You may need to switch to a fatter knifeblade before the tuning fork will slip behind the hanger.

how to remove old bolts climbing

Step 2
Slide the tuning fork behind the hanger and tap it until it is driven all the way. If the bolt hasn’t already popped out, clip the tuning fork and gently weight it to lever it out.
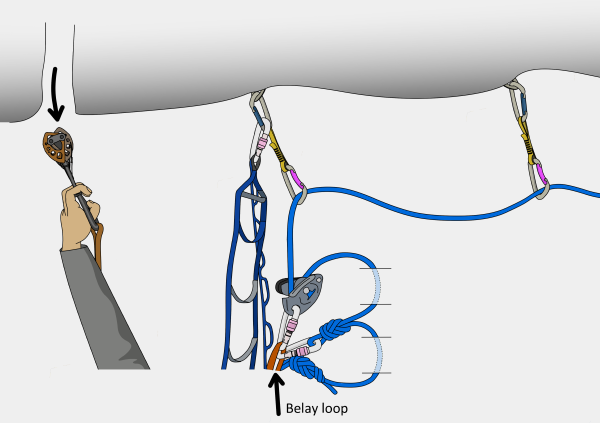

Step 3
It is theoretically possible to re-use this hole for the new bolt. However, this is not recommended because the old bolt may have moved position over time and created an uneven hole from repeated use. You can’t be certain that the original hole is smooth enough for the new bolt to function correctly. Instead, fill this hole with epoxy glue and cover the top with rock dust to camouflage it. Then drill a new hole next to it (at least 6” away).
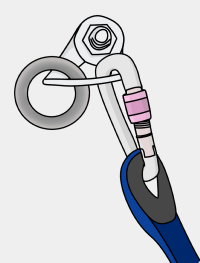
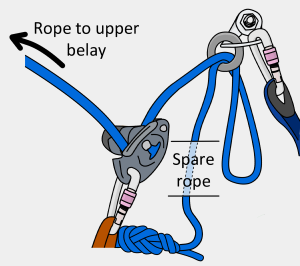
If the bolt breaks off while you are prying it out, fill the remainder of the hole with epoxy and rock dust for a smooth finish. Once you have started removing a bolt, it is important to continue until the bolt either pops out or breaks. Leaving a half-removed bolt for the next climber is extremely dangerous!

how to remove old climbing bolts

How To Place Climbing Bolts

This section describes how to place expansion bolts. Other types exist (e.g: glue-in bolts) but are not commonly used on big walls.

You Will Need
- Hammer
- SDS compatible drill with a drill bit
- Bolt hanger, washer and nut
- Torque wrench
- Blow tube
- Bolt which matches the diameter of the drill bit

climbing bolt kit

Step 1
Assess the rock. Visually inspect the area and tap it with your hammer to check that the whole area of rock surrounding the bolt is solid. Never place bolts in loose rock.

Step 2
Choose the precise area where the bolt will go. The hanger will need to be flush against a flat part of the wall when the process is complete. Visualize where the hanger will be (or place it there) to confirm exactly where to drill the hole. Use your hammer to gently remove any loose crystals or micro flakes which would stop the hanger from being flush against the wall.

Step 3
Attach the correct sized drill bit to your drill and loop the keeper sling around your wrist or clip it to something so you can’t drop it. Hold the drill 90 degrees to the rock and hit it a few times to create a small depression. It’s important to hit the rock in the exact same place when starting the hole so as not to create a ‘rounded off’ hole.

Step 4
Now the hard work begins. Keeping the drill perfectly perpendicular to the rock, hit it with steady, precise blows, rotating the drill 1/8 to 1/4 of a turn between each hit. Develop a steady rhythm and keep concentrating or else you’ll drill a wiggly hole or hit your thumb. Remove the drill every 50 or so hits and blow out the dust using your blow tube. Close your eyes when doing this, wear glasses or both.

placing climbing bolts

Step 5
Once the hole is deep enough (this may take 20-30 minutes depending on the depth of the hole and rock type), carefully blow all the remaining dust out.

Measure the depth of the hole using the drill bit. It needs to be almost the same length as the bolt. If you’re not sure, it’s better to drill the hole a bit deeper, than too shallow.

place climbing bolts

Step 6
Put the hanger, washer and nut on the bolt and tap it into the hole. It should go all the way in with a few gentle taps. Adjust the nut so the bolt can go inside the hole as far as possible.

placing rock climbing bolts

Step 7
Tighten the nut with a torque wrench, making sure the hanger stays in position. The bolt will rotate slightly initially, but then it should stay in position as you continue tightening the nut.

how to place rock climbing bolts

Check the torque recommendation for your bolt and be careful not to over-tighten. As you tighten the nut, the back of the bolt expands and locks the whole thing in place. The bolt is now complete.

how to place bolts rock climbing

How To Place Big Wall Rivets

Rivets are available in different types. Some are basically small expansion bolts. Simply place them in the same way as a bolt (see above), but using a 1/4” drill bit.

Other types of rivet work by compression. As they are hammered in, the rivet compresses and deforms. This compression holds the rivet in place. Because rivets are smaller than bolts, it is much faster to drill the hole for them (typically 5 minutes).

Step 1
Drill a hole as described above.

place aid climbing rivets

Step 2
With a plate hanger over the rivet, tap it into the hole, being very careful not to overdrive it.

how to place rivets aid climbing

The rivet should go in as far as possible while allowing the hanger to be removed and replaced easily.

aid climbing rivets

Ideally, you would drill the hole the exact depth so that when the rivet is hammered in as far as possible, it protrudes out from the rock the correct amount. But this can be difficult to get right on your first few tries.

how to use rivet hangers

Why I Climb Big Rocks > Part 1 – Virginity

Northern England has some of the world’s best rock climbing.

VDiff Climbing why i climb big rocks

But I always wondered what it would be like to climb in other places.


My friend Callum came up with an idea one day:

VDiff Climbing why i climb big rocks

Fresh out of university, I was supposed to start a career. With a long-term girlfriend, I was supposed to get married and have babies.

I couldn’t just leave everything behind and go climbing.

At a pivotal point in life, I decided to get my priorities straight.

VDiff Climbing why i climb big rocks

So I quit my job, left my girlfriend and went to California.

VDiff Climbing why i climb big rocks

After climbing those big rocks, this is what I thought would happen.

VDiff Climbing why i climb big rocks

But in reality, it was more like this.

VDiff Climbing why i climb big rocks

Climbing my first big wall was an incredibly powerful experience. It was like losing my virginity to a supermodel.

I wanted more. I wanted to stay in America forever and climb big rocks. But, by law, I couldn’t.

Climbing Washington Column Yosemite aid climbing

So I stayed anyway as an illegal immigrant.

Back then, in my mid-twenties, life was simple. I worked temporary jobs, I lived in a van, I had no real commitments.

Climbing was just a fun thing to do.

Or at least, that’s how it all began.


Abseiling > How To Abseil On Two Ropes With a GriGri

Sometimes you may want both hands free while abseiling to do things like clean a route, free a stuck rope or swing under an overhang. Using a GriGri is a safe way to do this. Or maybe you have a damaged rope and still need to abseil. Here's how to abseil on two ropes with a GriGri:

You can also use bigger knots such as the figure-9 or figure-8 double loop. Either way, make sure the knot is big enough so that it can't be pulled through the chain or carabiner at your main anchor point. To be extra safe, use two opposite and opposed screwgate carabiners.

How to abseil rappel with a gri gri on damaged ropes

You can also abseil in the same way using two ropes.

Instead of joining your ropes with a double fisherman’s, you could also use a bigger knot such as the re-threaded figure-8. Just make sure the knot is big enough so that it can't be pulled through the chain or carabiner at your main anchor point.

abseil on two ropes with a grigri

In the unlikely event that the knot slips through the chain at the main anchor point, you won't be able to pull your ropes down. To solve this problem, tie a prusik knot (klemheist works well) around your descent rope with a long piece of cord. Use this as a foot-loop. Stand in the foot loop and pull the rope through your GriGri. Then rest on your GriGri and slide the klemheist up the rope.

It's a good idea to back up your GriGri by tying a clovehitch to your belay loop with a screwgate carabiner as you go up. It'll be hard work, especially on overhanging terrain, but if you need your ropes to do another abseil, it'll probably be your only option. Make sure to ascend the same rope that you descended!

How to abseil on two ropes with a grigri

VDiff climbing self rescue book

How To Abseil on Two Ropes with a GriGri - Top Tips

- Avoid using this technique on low angled terrain: The extra bulk of a carabiner and bigger knot is more likely to get stuck on something when you retrieve your ropes.
- Make sure you attach your GriGri to the correct side of the rope.
- Always make sure you test the system before you detach yourself from the main anchor point.

Fall Factors and kN Ratings: What They Actually Mean

'Fall Factors and kN Ratings: What They Actually Mean' is part of the book - Trad Climbing Basics.

VDiff learn to trad climb e-book book

kN Ratings

kN ratings are shown on all your climbing gear: nuts, cams, slings and carabiners. kN stands for kilo Newtons. 1kN is about 100kg (220lbs for the Americans). So this nut will hold around 900kg.

Climbing nut with kilo newton kN ratings

This is Nelly. She weighs 850kg, so the 9kN nut would hold her weight – just.

But if Nelly climbed above the nut and then fell, she would put more force on the gear. This force would certainly exceed 900kg, causing the nut to break.

Every fall exerts a force greater than body weight – often many times more than your actual weight.

Elephant rock climbing with rope

Your goal as a leader is to reduce the potential force on gear, therefore keeping the climb safe.

The exact force generated depends on:
- The distance fallen
- The climber’s weight
- The length of rope in the system
- Friction through gear in the system
- How dynamic the belay is
- How dynamic the rope is

Elephant rock climbing

Fall Factors

The fall factor is the distance fallen divided by the length of rope in the system.

The higher the fall factor, the more force is applied to protection. This is why a bigger fall puts more force on gear.

If a climber falls 3 meters, when 10 meters up a pitch, the fall factor is 0.3.

If a climber falls 7 meters, when 10 meters up a pitch, the fall factor is 0.7.

rock climbing fall factors

Similarly, a fall taken close to the belay puts a much larger force on protection than the same length of fall taken higher up the pitch.

If a climber falls 2 meters, when 20 meters up a pitch, the fall factor is 0.1.

If a climber falls 2 meters, when 3 meters up a pitch, the fall factor is 0.66.

fall factor climbing

Warning - Factor 2 Falls
If a climber falls 2 meters, when 1 meter up the pitch (falling directly onto the anchor), the fall factor is 2. This puts a large force directly on the belay device which makes it hard to hold the fall.

It is important to eliminate the chance of a factor 2 fall by placing gear immediately off the belay.

factor 2 fall climbing

VDiff trad climbing book

kN Ratings - Top Rope Vs Leader Fall Forces

Most lead falls have a fall factor of 0.2-0.7 and generate 2-5kN of force on the top piece of gear.

When top-roping, the distance fallen is minimal, therefore the fall factor is near zero. The force on the anchor will be the weight of the climber plus part of the weight of the belayer (around 1kN of force).

If there is slack in the system, the force will be a little higher, but still significantly less than the typical forces on gear during a leader fall.

Kilo newton kN ratings and fall factors explained for rock climbing

kN Ratings - Forces on Climbing Gear

Most medium/large sized trad gear is rated to about 10-14kN. This is strong enough to hold the most enormous fall you'll ever take. In most cases, the gear itself won’t break.

The weakest link in the system is usually the quality of the placement or the rock it is in (e.g: a 14kN nut in a suboptimal placement may be plucked out with a 2kN force).

Warning - Micro Gear
Tiny 'micro' cams and nuts have low strength ratings and will only hold small falls. If you take a massive whipper onto a 3kN nut, it'll probably break.

If your route is protected by small gear, make sure to place plenty of pieces and consider equalizing them to make a stronger point of protection.

Micro nut kilo newton kN rating

Heavy Climbers

The heavier you are, the more force you apply to gear when you fall.

Heavier climbers should consider thicker ropes with low impact-force ratings, which can take more abuse than thinner ropes.

Heavyweights should beef up all anchors, place protection more often and make sure the belayer is able to take the load.

belaying a heavy climber

kN Ratings and Fall Factors Summary

It’s important for a leader to understand when potential forces may be high, and to place gear appropriately to reduce this. High forces can break micro gear, break the rock that holds bigger gear in place or pluck out poorly placed gear.

Extend gear when necessary to avoid rope drag. Rope drag reduces the effective amount of rope available to absorb the impact, which increases the fall factor. Never rely on a single piece of gear, especially if it has a low strength rating. If you're 'cruxing out' above unreliable gear, it's usually safer to down-climb to a place where you can rest and re-think your options.

The belayer’s role is to assist the leader in making these decisions. Often the belayer has a better perspective of the potential forces on gear. Let your partner know if they are creating a dangerous fall potential. You can also help by being ready to give an appropriate dynamic belay.

The Alpine Butterfly Knot

This 'Alpine Butterfly' article is part of the book - The Trad Climber's Guide To Problem Solving.

VDiff trad climbing self rescue book

The alpine butterfly knot is used for:

- Equalizing a two-bolt belay.
- Isolating a damaged section of rope.
- Forming a fixed loop in the middle of a rope. This provides a clip-in point which can be loaded in 2 or 3 directions.

Alpine butterfly knot for climbing

How To Tie an Alpine Butterfly Knot

Step 1
Form a loop in the rope.

How to tie a butterfly knot for climbing

Step 2
Twist the loop so it becomes two loops. Then pull the top of the upper loop behind and underneath the line of the rope.

Tying a butterfly knot for climbing

Step 3
Push the now lower loop through the original first loop.

How to tie an alpine butterfly knot

Step 4
Pull it tight.

Tying alpine butterfly knot

You should end up with this:

Alpine butterfly knot front and back

An alternative way to tie the alpine butterfly is to wrap it around your hand three times as shown below. Pull the top wrap down over the other two, then back up behind them.

How to tie the butterfly knot over hand

VDiff climbing self rescue book

Using the Alpine Butterfly Knot

Equalizing a Two-Bolt Belay
Tie a large-looped alpine butterfly to one screwgate and a clovehitch to the other.

You can adjust the size of the loop once the alpine butterfly is tied. Then adjust the clovehitch to fine tune the equalization.

This is useful for fixing ropes, such as on a big wall.

Equalize belay with alpine butterfly knot

Isolating a Damaged Section
This is useful when using your rope as a fixed line or in a situation where the rope will not pass through any carabiners.

Obviously, you will not be able to lead climb with a knot in your rope!

Alpine butterfly knot tied over core shot damaged rope