How To Climb a Big Wall > Descending
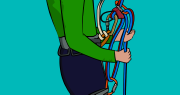
How to Climb a Big Wall: Descending The same principles are used when descending from a big wall as when descending from a multi-pitch trad route. The only real difference is the added weight you…
How to Climb a Big Wall: Descending The same principles are used when descending from a big wall as when descending from a multi-pitch trad route. The only real difference is the added weight you…
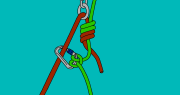
Prusik Knots: Different Types Explained A prusik (also known as a friction hitch) is a short piece of cord which can be wrapped around your climbing rope to add friction. They can slide up and…
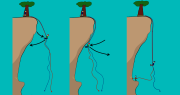
Abseiling: Bad Anchors and Loose Rock Poor abseil anchors are often found on seldom travelled multi-pitch descents or alpine ridge traverses. Sometimes there is no anchor where you need one, or the existing anchor is…
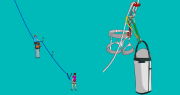
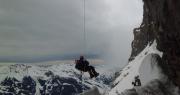
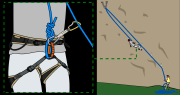
Abseiling: Pendulums What is a Pendulum Abseil? Multi-pitch descents are not always straightforward. The next abseil station may be far to the side of the previous one (they often are when descending loose ground). Or…
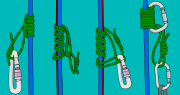
Abseiling: How to Increase Friction Whether you’re abseiling down a skinny rope at the sport crag, or retreating down a multipitch with rain-slicked ropes and a heavy pack, the following techniques will help you increase…
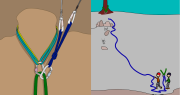
Abseiling: How to Deal with Stuck Ropes You try to retrieve your ropes after abseiling and they get stuck. What do you do? Preventing Stuck Ropes If you are about to abseil down complex terrain,…
The Carabiner Brake – How to Abseil Without a Device Dropping your belay device at the top of a ten-pitch abseil descent isn’t recommended. But if you do, knowing how to use the carabiner brake…

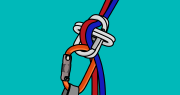
Abseiling Past a Knot Times when you might need to abseil past a knot:– When descending a single strand ‘fixed’ rope, where a knot has been tied to isolate a damaged section– Passing a knot…
How to Abseil with a Damaged Rope If you climb long enough, you will inevitably end up having to abseil with a damaged rope at some point. Unfortunately, getting a core-shot (when the white core…
The Munter Hitch: How to Belay without a Belay Device Uses:– Belaying without a belay device– Abseiling without a belay device– Creating a releasable knot when escaping the belay The munter (Italian) hitch tends to…
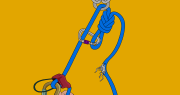
Self Rescue: Prusiking Up a Rope Knowing how to prusik up a rope transforms a potential epic into a mere inconvenience. This article explains how to ascend a rope using prusiks, assuming that you already…
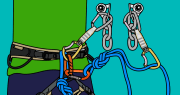
Self Rescue: Tandem Abseiling Tandem abseiling means two people descending with the same device. It is most useful when descending with an injured climber. A simple tandem abseil setup:– ‘Lead’ abseiler is attached to the…
Extending a belay device can be a lifesaver on tricky multi-pitch abseils. This article explains how to extend a belay device.

Abseiling (or rappelling) is a technique used to descend climbing ropes. This article explains how to attach yourself to the anchor, and abseil with an ATC.
How to Abseil on Two Ropes with a GriGri Sometimes you may want both hands free while abseiling to do things like clean a route, free a stuck rope or swing under an overhang. Using a…
Sport Climbing – How to Descend Lower, Abseil or Walk Off? There are basically three ways to descend; walk off, lower or abseil (rappel). You will either lower or abseil to get down from most…
Cleaning a Sport Climbing Anchor ‘Cleaning’ a sport anchor means removing all of your gear from it. Three of the main ways to do this are described below. Which you choose depends on the type…