Advanced Trad Anchors > The Quad Anchor
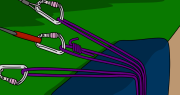
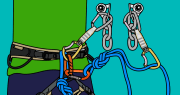
Advanced Trad Anchors: The Quad Anchor What is a Quad Anchor? The ‘Quad Anchor’ is an anchor system which self-adjusts to keep an equal force on each anchor point. It can be better than other…
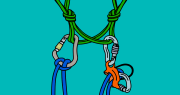
Advanced Trad Anchors: The Quad Anchor What is a Quad Anchor? The ‘Quad Anchor’ is an anchor system which self-adjusts to keep an equal force on each anchor point. It can be better than other…
Leading Trad: When to Place Gear Trad gear is normally placed in cracks, behind flakes and around blocks. The important thing to remember is that these features are weaknesses in the rock. Some of these…
Trad Anchors: Setting Up a Top Rope With the security of an anchored rope above, top-roping is the safest way to climb. A top-roped climber can rest on the rope whenever they are too tired…
Cleaning a Sport Climbing Anchor ‘Cleaning’ a sport anchor means removing all of your gear from it. Three of the main ways to do this are described below. Which you choose depends on the type…
How To Belay with a GriGri Belaying at the crag is more difficult than belaying indoors. Uneven ground, falling rocks, strong sunlight, wind, insects, stray children and dogs are just some of the factors which…

Top Rope Climbing: How to Belay Top Rope Belaying Techniques Using a belay device makes it possible for the belayer’s limited grip strength to control the large forces generated in a fall. How easy this…
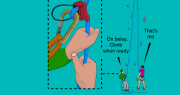
Top Rope Climbing Calls What are Climbing Calls? Climbing calls are certain words that climbers use so everyone knows exactly what is happening. These calls may seem a bit excessive when you’re standing next to…
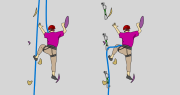
The Difference Between Top Rope and Lead Climbing There are two main types of climbing system; top roping and leading. Both of these use the rope and gear to catch a fall, but in different…
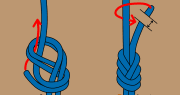
The Figure-8: How to Tie In to a Climbing Rope Unless you are bouldering, you’ll need to tie the end of the rope to your harness before you climb. The best way to do this…