Leading Trad > When To Place Gear
Leading Trad > When To Place Gear Trad gear is normally placed in cracks, behind flakes and around blocks. The important thing to remember is that these features are weaknesses in the rock. Some of…
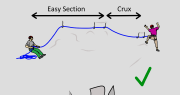
Leading Trad > When To Place Gear Trad gear is normally placed in cracks, behind flakes and around blocks. The important thing to remember is that these features are weaknesses in the rock. Some of…

Climbing Helmets A climbing helmet is the first thing you should buy when you start trad climbing. They protect your head from things falling on you (rocks, equipment, etc..) and also from your head hitting…
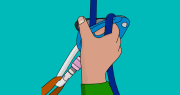
How To Belay with a GriGri Belaying at the crag is more difficult than belaying indoors. Uneven ground, falling rocks, strong sunlight, wind, insects, stray children and dogs are just some of the factors which…
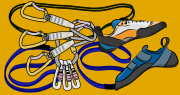
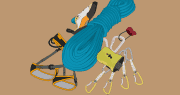
Sport Climbing Gear – What Do You Need? Sport Climbing Gear: Rope You’ll need a ‘single-rated’ rope for sport climbing. They are marked with a ‘1’ symbol at the end of the rope. A 70m…
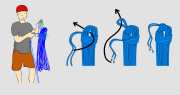
How To Coil a Climbing Rope If you are storing your rope for a while or stuffing it away in a back pack, coiling a climbing rope is worth the effort and will save you…
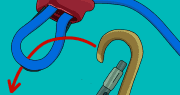
A belay device is a metal tube that you feed a climbing rope through, used with a screwgate carabiner, in order to belay a rock climber.
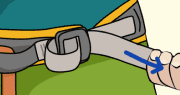
Learn how to wear a climbing harness correctly, how to use them and choose them. This article explains everything you need to know.

Your rope is the main part of the climbing system. Learn what climbing ropes are and how to use them for rock climbing, abseiling and belaying.
Climbing Gear: What Do I Need To Get Started? RopeYour rope is the main piece of climbing gear. It connects you, via your harness, to the quickdraws on the wall and to your climbing partner….
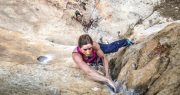
What is Rock Climbing? Rock climbing is awesome. It’s an activity in which you push the boundaries of your physical and mental capabilities, often leaving you bursting with a vibrant excitement that you never knew…