Attaching to the Anchor > Slings, Daisy Chains and Common Mistakes
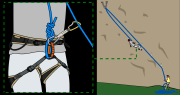
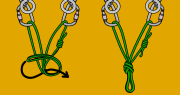
Attaching to the Anchor – Slings, Daisy Chains and Common Mistakes The Top Shelf To free up space at the central point, you can clip in to the ‘top shelf’ of the cordelette. This is…
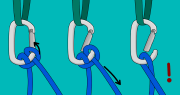
Attaching to the Anchor – Slings, Daisy Chains and Common Mistakes The Top Shelf To free up space at the central point, you can clip in to the ‘top shelf’ of the cordelette. This is…
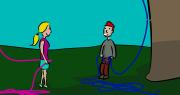
How to Be a Better Belayer Just as people pick up ‘bad habits’ after they pass their driving test, climbers often get lazy with belaying once they have learnt the basics. Here are some tips…
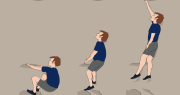
Climbing Technique: Movement Climbing is like a dance. The aim is to choreograph different types of holds and moves into one fluid movement. It is much more efficient and enjoyable to move up fluidly, methodically…
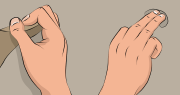
Climbing Technique: Handholds The weight on your arms increases as the rock gets steeper and the footholds get smaller. Beginners often ‘over grip’ the rock and burn out their forearms too soon, making it impossible…

Climbing Technique: Footwork This section introduces the most common foot, hand and body positions used in rock climbing. How you grip handholds or stand on footholds depends on their shape, size and position. How you…

Multi-Pitch Sport Climbing A multi-pitch route is one that is split into two or more pitches. This may be because it is longer than your rope, or it could be a wandering route that would…
Sport Climbing – How to Descend Lower, Abseil or Walk Off? There are basically three ways to descend; walk off, lower or abseil (rappel). You will either lower or abseil to get down from most…
Sport Climbing – Lead Skills Lead climbing a sport route is similar to lead climbing at the indoor wall, but with a few more factors to consider. These are described below. Quickdraw Ends Quickdraws have…
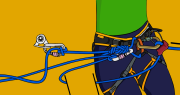
Sport Climbing Anchors – Belaying from the Top For most sport climbs, you will belay from the bottom – just like you would at the indoor gym. However, you should belay from the top of…
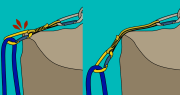
Cleaning a Sport Climbing Anchor ‘Cleaning’ a sport anchor means removing all of your gear from it. Three of the main ways to do this are described below. Which you choose depends on the type…
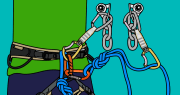
Sport Climbing Anchors – Setting Up a Top Rope With the security of an anchored rope above, top-roping is the safest way to climb. A top-roped climber can rest on the rope whenever they are…
Sport Climbing Anchors – Introduction Many climbs have bolted ‘sport anchors’ at the top. This is the standard for sport climbs worldwide, but is also common at many North American trad climbing venues. These bolted…
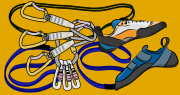
Sport Climbing Gear – What Do You Need? Rope You’ll need a ‘single-rated’ rope for sport climbing. They are marked with a ‘1’ symbol at the end of the rope. A 70m length with a…
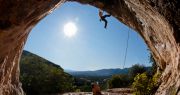
What is Sport Climbing? Sport climbing is physical. It’s a relatively safe form of rock climbing in which you push the boundaries of your physical capabilities, often achieving goals that you previously thought were impossible….