Sport Anchors – Part 4 of 4 – Belaying from the Top

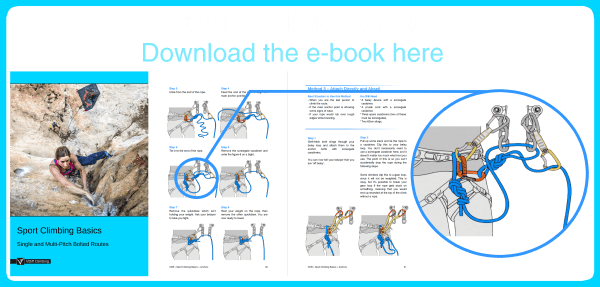
'Sport Climbing Anchors - Belaying from the Top' is part of the book - Sport Climbing Basics.

VDiff sport climbing book

For most sport climbs, you will belay from the bottom – just like you would at the indoor gym. However, you should belay from the top of the route when the anchor is in a poor position to lower from or abseil, or if you intend to walk off the top.


Step 1 - Equalize
Attach a cordelette to the anchor in the same way as if you were setting up a top rope.
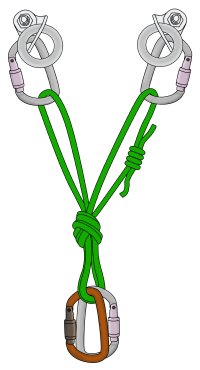
How to set up sport climbing anchors

Step 2 - Attach
You'll need to attach yourself to the anchor in a way that you can see your partner as they follow the pitch and brace yourself if they fall. Once you are tight to the anchor, make sure you are positioned in a straight line between the central anchor point and the climber. You shouldn’t be pulled sideways if the climber falls.

You'll often need to extend your anchor to get into the optimal belay position. There are many ways to do this, each with their own advantages and limitations. The most common attachment and belay methods are described below.
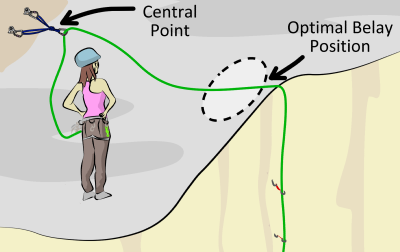
belay position for sport climbing anchors

Step 3 - Choose a Belay Method
Pull up all the slack rope in the system until it's tight on your partner, then choose a method to belay them.

Three of the most common belaying methods are described below. It's important to understand the advantages and limitations of each, and be able to adapt these methods to suit any situation.


VDiff sport climbing book

Attaching to Sport Climbing Anchors

Method 1 - Clip Directly
Clip your belay loop into the central point directly with a screwgate carabiner.

Advantages
- Simple

Disadvantages
- No dynamic aspect to the anchor (using the rope is much better. See methods 2-4)
- Very difficult to adjust belay position

Best Situation to Use this Method
If extending the anchor with the rope would put you in a bad position to belay.
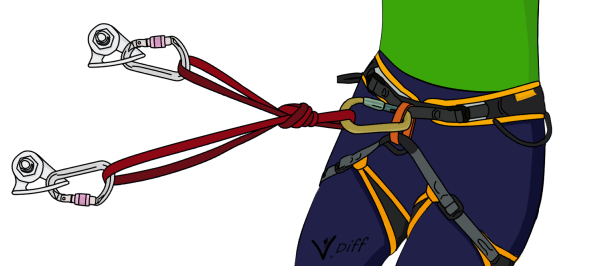
How to belay sport climbing

Method 2 - Tie to the Central Point
Tie your rope to the central point using a clovehitch. Then fine-tune your belay position by adjusting the clovehitch; just shuffle rope through and pull it tight. The rope between you and the central point will need to be fairly tight.

Advantages
- Only uses a small amount of rope

Disadvantages
- Belay position must be close to the central point

Best Situation to Use this Method
If the central point is within reasonable reach of your belay position (up to 2 meters or so).
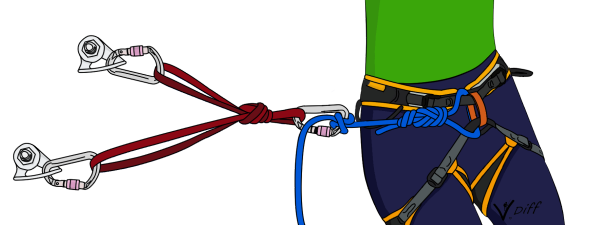
How to attach to a climbing anchor

Method 3 - Loop Through the Central Point
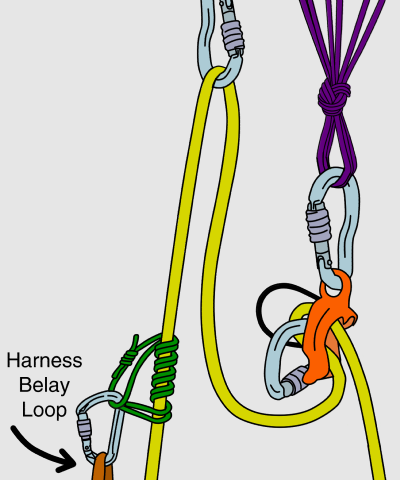
Clip the rope through the screwgate on the central point, then walk to your belay position. Attach a screwgate to your rope loop and then clovehitch the rope to it.

Advantages
- You can fine-tune your belay position without moving back to the anchor.

Disadvantages
- Uses more rope and one extra screwgate than method 2

Best Situation to Use this Method
If the central point is out of reach from your belay position.
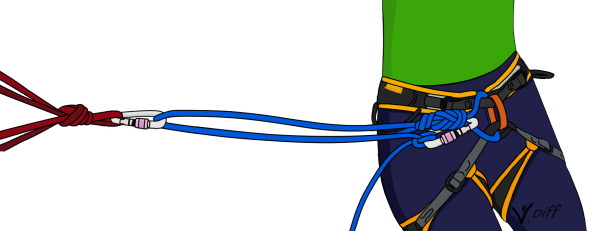
How to clip to a sport climbing anchor

Method 4 - Attaching Directly to the Bolts
Clovehitch the rope to both bolts, leaving a little slack between the two. Then clovehitch the rope to your rope loop with another screwgate.

Advantages
- Equalizes two points
- Doesn’t require using a cordelette

Disadvantages
- Must be close to the anchor in order to fine-tune your belay position.
- The central point is created at your belay loop. This means that you must belay directly from your harness (you can't use guide mode).

Best Situation to Use this Method
If you forget to bring a sling/cordelette.
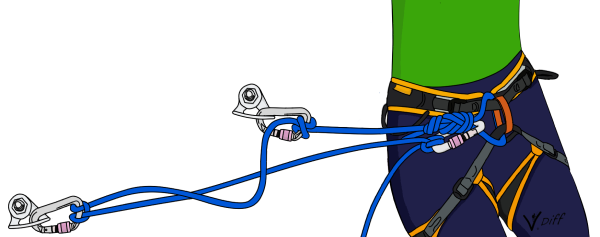
How to clip to a climbing anchor

Sport Climbing Anchors: Belaying from the Top

Method 1 - Redirected Belay
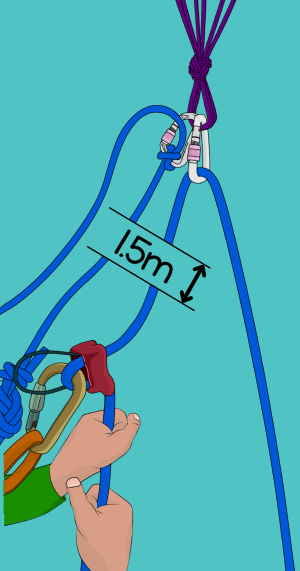
Clip another screwgate carabiner to the central point and run your partners rope through this, then down to your belay device. You'll be able to belay as you normally would on a top rope.

Your belay device will need to be at least 1.5 meters away from the central point. This reduces the chance of you being sucked into it if your partner falls.

Also, make sure that the rope isn't rubbing against your attachment knot at the central point.

Advantages
- Most of the weight of a falling climber is transferred to the anchor, not your harness.

Disadvantages
- It's possible to get pulled into the central point if your partner falls, particularly if they are heavier than you. In this case, there is a real danger of losing control of the brake rope.

Best Situation to Use this Method
When you have a nice ledge to stand on and the central point is just above your head.
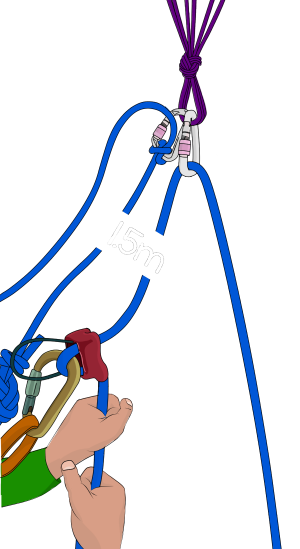
Indirect belaying redirected belay

Method 2 - Belay Directly from your Harness
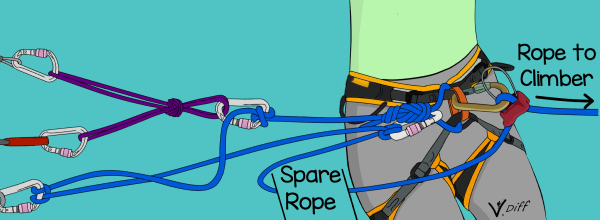
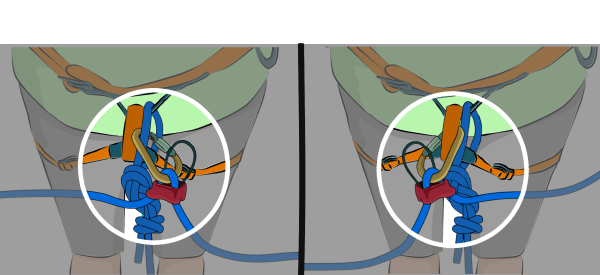
Attach your belay device to either your belay loop or rope loop. This can be set up so the brake rope comes out of either the top or bottom of the belay device – choose whichever way is easier to lock off the brake rope.

In most situations, the weight of a falling climber will pull down from you, not up. Because of this, you will need to lock off upwards not downwards.

Advantages
- You can use this method for almost every belay situation.

Disadvantages
- If your partner falls, it's possible that their weight will pull uncomfortably on your harness or over your legs.

Best Situation to Use This Method
If you have used your rope to equalize the anchor.
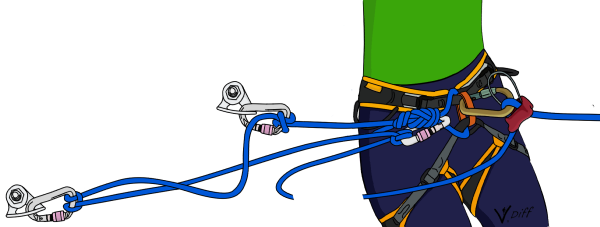
Belaying directly from harness

Method 3 - Guide Mode
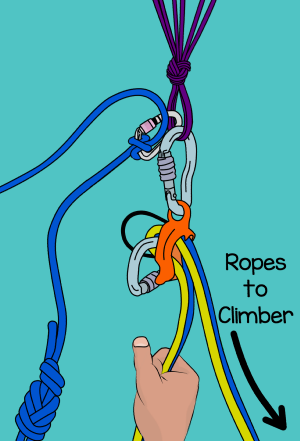
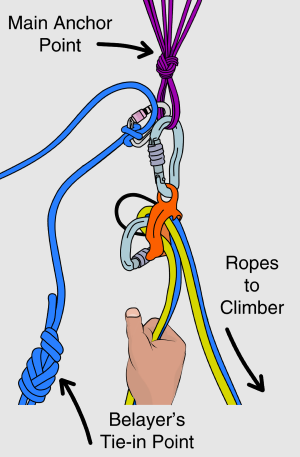
Some belay devices have a 'guide mode' function - they can be set up in a way which locks automatically if a climber falls. They can be used as a normal belay device too. Guide mode often works well on sport climbing anchors.

Read our article about how to use guide mode.
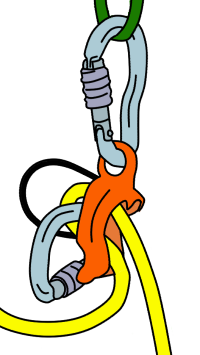
How to use guide mode climbing

Where to Put the Spare Rope

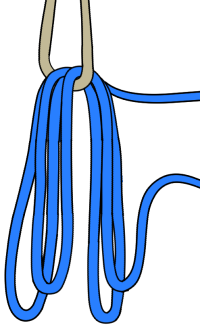
There are basically two options. Either stack it into a neat pile somewhere or stack it through a sling.

For the sling method, start by pushing a long loop of rope through the sling. Continue doing this, making smaller loops each time (bigger loops are more likely to get tangled into each other when you are belaying the leader on the next pitch).

However you choose to stack the rope, make sure it is within reach and that you can do it one-handed; you'll need to belay at the same time!
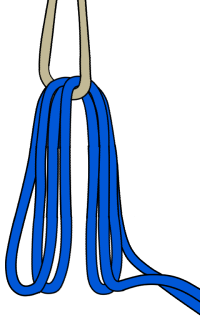
How to use guide mode climbing

Rope Loop or Belay Loop?

You can belay either from your belay loop or from your rope loop.

In some situations, using the rope loop can be more comfortable - it allows you to transfer the weight of a fallen climber onto the anchor, rather than having their weight pulling on your harness.

If you are unsure, just use your belay loop.

Belaying directly from harness

Trad Anchors – Part 4 of 4 > Belaying the Second

This 'Belaying the Second' article is part of the book - Trad Climbing Basics.

VDiff learn to trad climb e-book book

Belaying from an Anchor

Once you’ve climbed a pitch and built an anchor, you will need to belay your partner up. Pull up all the slack rope in the system until it's tight on your partner, then choose a method to belay them.

Three of the most common belaying methods are described below. It's important to understand the advantages and limitations of each, and be able to adapt these methods to suit any situation.

Method 1: Re-directed Belay

Clip a screwgate to the central point. Run your partner’s rope through this and down to your belay device. You'll be able to belay as you normally would on a top-rope. Your belay device will need to be at least 1.5 meters away from the central point. This reduces the chance of you being pulled into it if your partner falls. Also, make sure that the rope isn't rubbing against your attachment knot at the central point. Consider attaching to the top shelf to avoid this if possible.

Advantages
- Most of the weight of a falling climber is transferred to the anchor, not your harness.

Disadvantages
- It's possible to get pulled into the central point if your partner falls, particularly if they are heavier than you. In this case, there is a real danger of losing control of the brake rope.
- More difficult to set up when using half ropes (you'll need a separate point for each rope)

redirected belay anchor

Best Situation to Use This Method
When you have a nice ledge to stand on and the central point is just above your head.

Method 2: Belaying Directly from your Harness

Attach your belay device to either your belay loop or rope loop. This can be set up so the brake rope comes out of either the top or bottom of the belay device – choose whichever way is easier to lock off the brake rope.

In most situations, the weight of a falling climber will pull down from you, not up. Because of this, you will need to lock off upwards not downwards.

Advantages
- You can use this method for almost every belay situation.

Disadvantages
- If your partner falls, it's possible that their weight will pull uncomfortably on your harness or over your legs.

Best Situation to Use This Method
If you have used your rope to equalize the anchor.

belaying from harness at anchor

VDiff trad climbing book

Method 3: Belaying in Guide Mode

Some belay devices have a guide mode function - they can be set up in a way which locks automatically if a climber falls. They can be used as a normal belay device too.

You can set up guide mode as shown, with one rope or two.

Simply pull the brake strands through as the climber moves up. If they fall, the device will lock by itself almost instantly. Even though guide mode belay devices are auto-locking, you should always keep hold of the brake rope.

Before you use guide mode, you should understand how to lower a climber (see our guide mode article).

guide mode belay anchor

Advantages
- The weight of a falling climber isn't on your harness, which is much more comfortable!
- You can bring up two climbers at the same time (on two different ropes) - great if climbing as a team of three.
- Because you are not directly attached to your belay device, it is easier to detach yourself from the system in an emergency.

Disadvantages
- Time-consuming to lower a climber, even a short distance.

Best Situation to Use This Method
When climbing as a team of three.

Rope Loop or Belay Loop?

You can belay either from your belay loop or from your rope loop. In some situations, using the rope loop can be more comfortable - it allows you to transfer the weight of a fallen climber onto the anchor, rather than having their weight pulling on your harness.

Remember that if you used two ropes in the anchor, you'll need to belay from both rope loops. If you are unsure, just use your belay loop.
belaying from rope loop or belay loop

Where To Put the Spare Rope

There are basically two options. Either stack it into a neat pile somewhere or stack it through a sling.

For the sling method, start by pushing a long loop of rope through the sling. Continue doing this, making smaller loops each time (bigger loops are more likely to get tangled into each other when you are belaying the leader on the next pitch).

However you choose to stack the rope, make sure it is within reach and that you can do it one-handed; you'll need to belay at the same time!

stacking a climbing rope

Abseiling > The Carabiner Brake – How To Abseil Without a Device

This article about The Carabiner Brake is part of the book - The Trad Climber's Guide To Problem Solving.

VDiff trad climbing self rescue book

Dropping your belay device at the top of a ten-pitch abseil descent isn't recommended. But if you do, knowing how to use the carabiner brake will change your descent from epic to easy (You can use a munter hitch to abseil, but it tends to kink the rope and causes abrasion to the sheath).

You Will Need:
- 1 screwgate
- 4 snapgate carabiners.

Full size oval or D-shaped carabiners provide the smoothest descent, but almost any carabiner can be used. Really small or sharp-spined carabiners should only be used as a last resort.

drop belay device climbing

How To Set Up The Carabiner Brake

Step 1
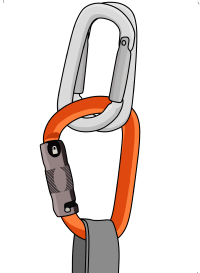
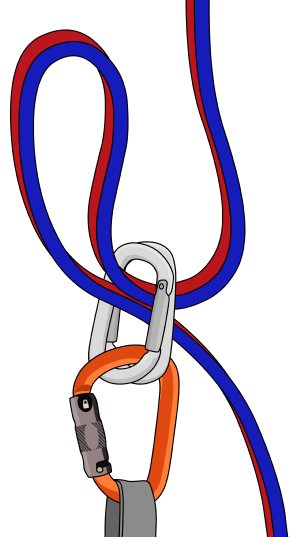
Clip a screwgate to your belay loop and fasten it. Then clip two snapgates to the screwgate, making sure the gates are facing opposite directions and they are opposed.

Carabiner brake abseil rappel no belay device


Step 2
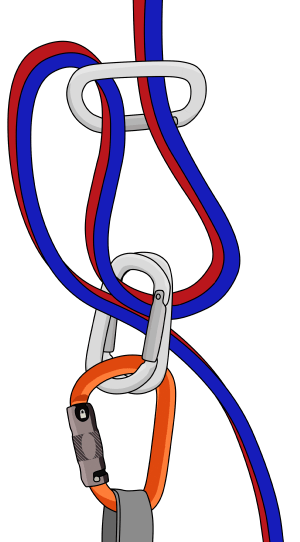
Push a bight of both ropes through the snapgate carabiners.

Carabiner brake abseil rappel no belay device


Step 3
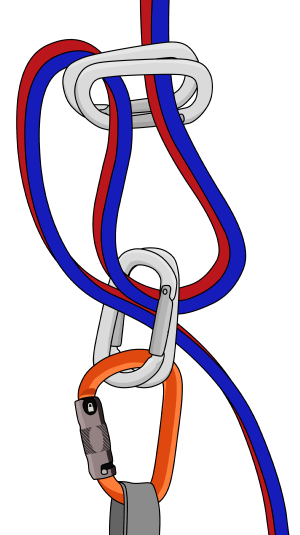
Clip another snapgate around the ropes and also through the loop as shown.

Carabiner brake abseil rappel no belay device


Step 4
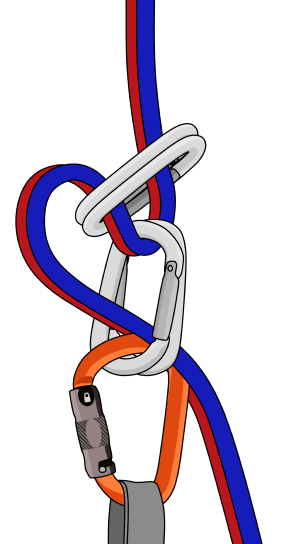
Clip a second snapgate next to this, with the gates on the same side, but facing opposite ways.

Carabiner brake abseil rappel no belay device


Step 5
Pull down on the rope until the carabiners align over each other.

Carabiner brake abseil rappel no belay device


Step 6
Make sure the rope runs over the spines (not the gates) of the outer carabiners.

You can now add a prusik and abseil as you would with an ATC.

As always, remember to check the system before you detach from the anchor.

Carabiner brake abseil rappel no belay device

VDiff climbing self rescue book

How To Belay In Guide Mode

'How To Belay In Guide Mode' is part of the book - Trad Climbing Basics.

VDiff learn to trad climb e-book book

Guide Mode is an auto-locking belay technique. It is a safe way for the leader to bring up the second. Do not use this method for lead belaying.

How To Set Up Guide Mode

Some ATC-style belay devices have a 'guide mode' function - they can be set up in a way which locks automatically if a climber falls. They can be used as a normal belay device too. You can set up guide mode as shown, with one rope or two.

Simply pull the brake strands through as the climber moves up. If they fall, the device will lock by itself almost instantly. Even though guide mode belay devices are auto-locking, you should always keep hold of the brake rope.

Advantages
- The weight of a falling climber isn't on your harness, which is much more comfortable!
- You can bring up two climbers at the same time (on two different ropes) - great if climbing as a team of three.
- Because you are not directly attached to your belay device, it is easier to detach yourself from the system in an emergency.

Disadvantages
- Time-consuming to lower a climber, even a short distance.

How to set up guide mode belay using two ropes

Best Situations to Use this Method
- When it is unlikely that you will need to lower the climber (e.g: climbing an easy slab route)
- When climbing as a team of three


VDiff trad climbing book

How To Lower a Climber in Guide Mode

Before you use guide mode, you must understand how to lower a climber.

Note: The belayer's anchor attachment has been omitted from the following diagrams for clarity.

Lowering a Short Distance
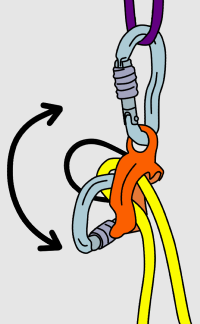
If the climber only needs a few inches of slack, you can wiggle the belay carabiner as they weight the rope. Carabiners with a perfectly round cross-section are not so effective at this.

How to lower a climber in guide mode

Step 2

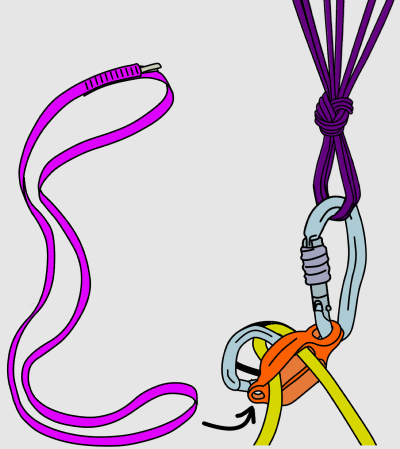
Girth hitch a sling through the small hole on your belay device (newer devices have a big enough hole to clip a carabiner. If yours does, you can clip a sling to it with a carabiner).

Sling through the hole in guide mode belay plate

Step 3
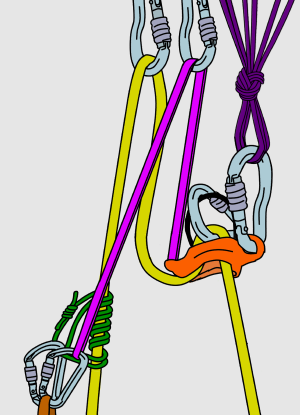
Redirect the sling through a high point of the anchor with a carabiner, then fasten the sling to your belay loop with another carabiner. This will allow you to use your weight to release the belay device.

You could also stand in the sling to release the belay device, though it's often easier to control when clipped to your harness.

You are now able to lower the climber in a controlled manner. Remember to slide the prusik knot as you continue lowering.

Lowering a climber in guide mode

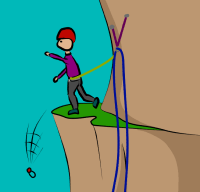
Warning
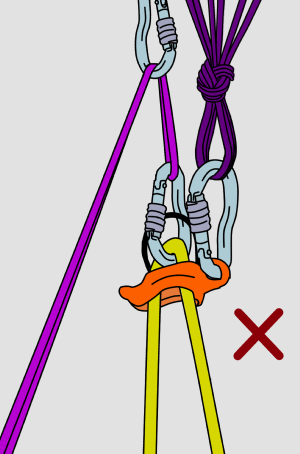
Never weight the belay carabiner as shown.

This will disengage the device and cause the climber to fall.

Dangers of guide mode belaying

Tying-Off a Climber in Guide Mode

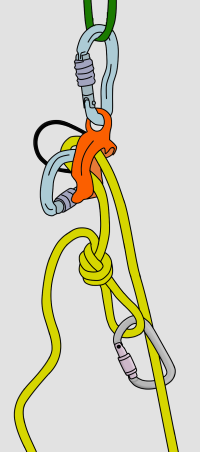
If you need to go completely hands-free while belaying in guide mode, you can tie-off the device.

Simply form a loop in the brake strand and clip it to the rope. Be aware that if the knot jams up into the belay device, it will be difficult to lower a climber without belaying them up a few inches first. Consider this before you tie them off.

Tying off a guide mode belay

Top Tip
If swapping leads on a multipitch, you'll need to change from Guide Mode to normal belaying when the second has reached the anchor. To do this, put the second on belay as normal with another belay device, then remove the Guide Mode setup. It's better if the next leader removes the Guide Mode setup so the belayer can keep both hands for belaying.

Guide mode belaying

Guide Mode with a GriGri

You can belay directly from the anchor with an assisted-braking belay device in a similar way to the guide mode technique.

This method can be very dangerous if used incorrectly. Learn more here.

belaying with a grigri direct from anchor