Improvised Hauling
Improvised Hauling * This article is about using improvised basic hauling techniques while trad climbing. To learn more about hauling on big walls, see this article. Hauling a bag on a separate rope can be…
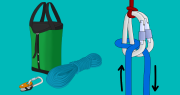
Improvised Hauling * This article is about using improvised basic hauling techniques while trad climbing. To learn more about hauling on big walls, see this article. Hauling a bag on a separate rope can be…

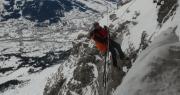
Climbing on Loose Rock and Runout Routes Climbing on Choss Accidents involving loose rock fall into three main categories:1) Belayers being hit by rocks from the leader2) Leaders falling because they held/ stood on loose…
Abseiling: Bad Anchors and Loose Rock Poor abseil anchors are often found on seldom travelled multi-pitch descents or alpine ridge traverses. Sometimes there is no anchor where you need one, or the existing anchor is…
Self Rescue: Escaping the Belay The belay escape is a technique whereby the belayer frees themselves from the responsibilities of belaying. This fundamental skill is necessary for many rescue situations. Situations when you may need…
Climbing Self Rescue: Introduction Having a good knowledge of self-rescue skills is essential for any climber. The more effectively you are able to improve a poor situation (e.g; if you are able to escape the…
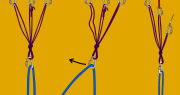
Advanced Trad Anchors: Minimal Gear Anchors The following minimal gear anchors are great to know in case you reach the top of a pitch without a cordelette, only a meter of rope to spare and…
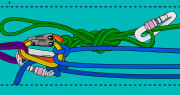
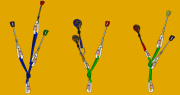
Advanced Trad Anchors: The Sliding-X Self-Equalizing Trad Anchors Advantages The main advantage of using a self-equalizing anchor is that it continues to distribute the load equally between the anchor pieces as the loading direction changes….
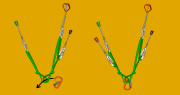
Advanced Trad Anchors : Getting Perfect Equalization In Trad Climbing Basics, we introduced various methods of creating belay master points by tying an overhand knot in a sling or cordelette. These methods are safe, simple…
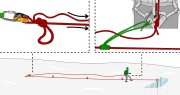
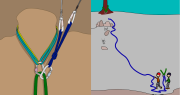
Crevasse Rescue > Raising Systems Imagine you are travelling on a glacier as a team of two, and your partner in front suddenly disappears down into the snow. Step 1The first and most important thing…