Improvised Hauling
* This article is about using improvised basic hauling techniques while trad climbing. To learn more about hauling on big walls, see this article.
Hauling a bag on a separate rope can be much easier than climbing with it on your back. This technique is useful for:
– Long, steep multi-pitches when your daypack is heavy
– Overnight routes
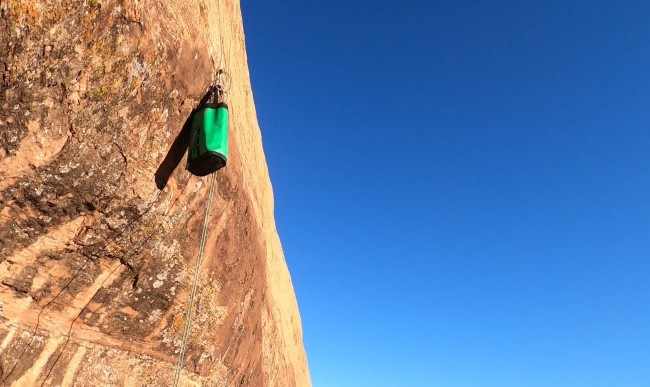
Hauling is typically only beneficial on terrain steeper than 80 degrees, where there are few obstacles and no loose rock. Otherwise, you’ll be better carrying the load on your back.
Basic Hauling Equipment
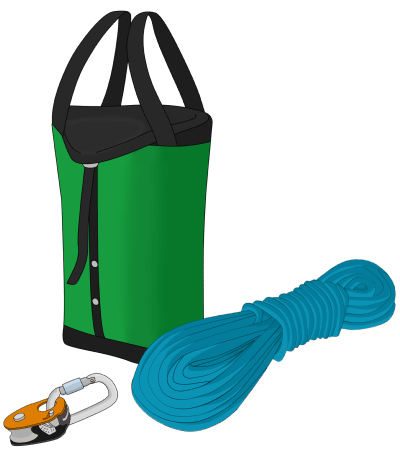
For a basic hauling set up, you’ll need:
– A durable bag
– A second rope
– A hauling device (such as a Petzl Micro Traxion)
How to Haul
Step 1
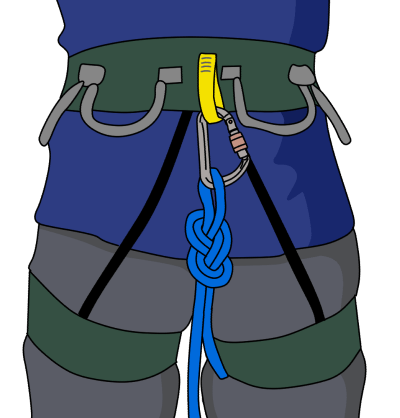
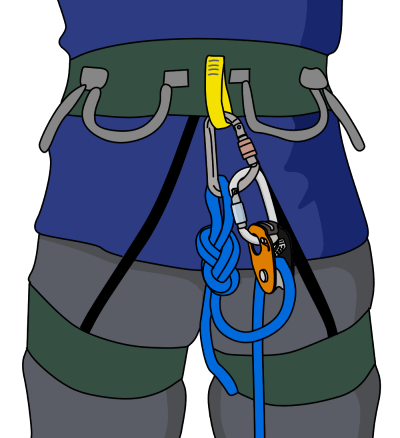
Attach one end of the haul rope to the back of your harness. If your harness doesn’t have a designated ‘haul loop’, you can loop a short sling around the waist belt and attach the rope to that.
Be careful of using gear loops – they can break if the rope gets stuck.
Step 2
Attach the bag to the other end of the haul rope and also directly to the anchor with a sling.
Step 3
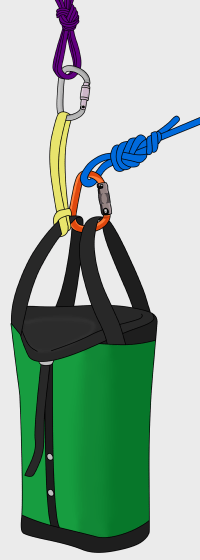
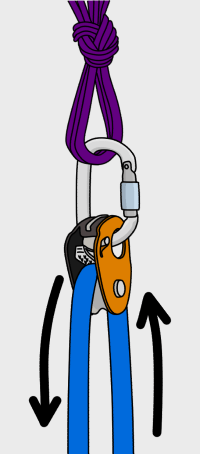
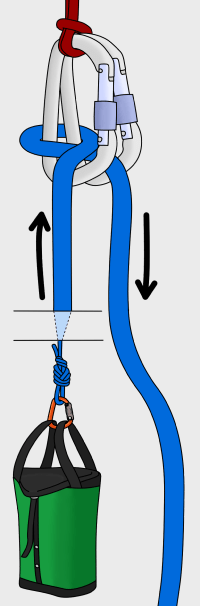
When the leader arrives at the top of the pitch, they attach the hauling device to the master point.
Feed the rope through the device first, then unclip the rope from your harness (this ensures that you cannot drop the rope).
Pull through slack until the rope is tight on the bag.
Step 4
The belayer releases the bag from the lower anchor.
Step 5
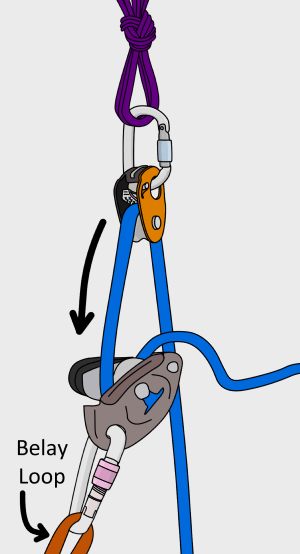
The leader hauls the bag up, stacking the rope neatly as they go. For light loads, it is quickest to hand-over-hand the rope and periodically pull slack through the hauling device.
For heavier loads, it is much easier to use your body weight to pull the bag up. Use an assisted-braking belay device (such as a GriGri) as shown.
Step 6
Clip the bag to the anchor with a sling and remove the hauling setup. You can now belay your partner.
Warning!
Some hauling devices may not always lock with certain rope diameters. If your chosen technique involves letting go of the rope, you should add the occasional back up knot so the bag cannot fall the full length of the rope.
Basic Hauling Tips
* A specifically designed ‘mini haulbag’ is best, but any backpack can be used, providing the terrain is suitable.
Hauling a lightweight pack up low-angled rock will most likely result in you losing all your belongings and dislodging rocks. Make sure to attach the pack securely, tuck away any straps and use common sense.
* Using a dynamic lead rope (instead of a static rope or cord) as your haul line gives you more options. It acts as a back up if your main rope is damaged, or it can be used in conjunction with the main rope for wandering pitches (i.e: treat them as half ropes). Having a second rope also doubles the length of your abseils.
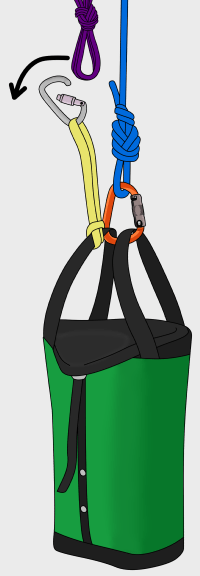
* On long traversing pitches, the bag should be attached to the middle of the rope (with an alpine butterfly) at the point when the leader reaches the anchor.
This enables the belayer to lower the bag out gently with the remaining rope. If the bag is fairly light, you can simply lower it out by hand. Heavier loads may need to be lowered out using a munter hitch or belay device.
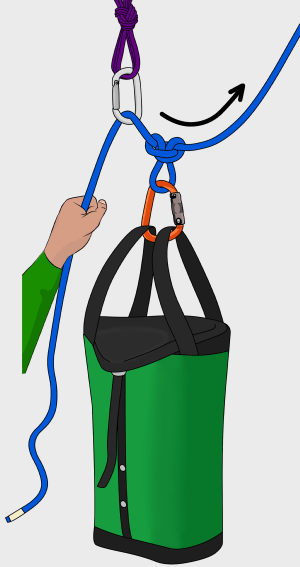
* If you don’t have a pulley, an alternative for light loads is to simply belay the bag up with an auto-blocking belay device (such as a GriGri or an ATC in guide mode) or a garda hitch.
If the bag gets stuck, you can pause hauling and begin belaying your partner. Once they have climbed up and freed the bag, you can tie-off the belay and continue hauling.
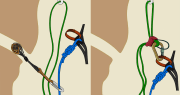
* Some hauling devices are easily dropped. To prevent this, the leader can trail the haul rope with the device pre-attached as shown.
After leading a pitch, the device can be attached to the anchor before removing the rope from your harness. This means that you can’t drop either the device or the rope while setting up the haul.
Related Topics

The article above is part of the book – The Trad Climber’s Guide To Problem Solving
E-book (pay what you want)
Paperback
Kindle
Free Sample
Learn how to:
– Use a variety of self-rescue techniques
– Build self-equalizing anchors with minimal gear
– Abseil without a belay device
– Abseil with damaged ropes
– Descend from bad anchors
– Negotiate loose rock
– Use basic aid techniques
– Simul-climb safely
– Prevent accidents from occurring in the first place
Plus much more.