Improvised Aid Climbing
* This article is about using improvised basic aid techniques while trad climbing. To learn more about aid climbing on big walls, see these articles.
Using protection pieces as hand or foot holds is generally regarded as a poor style of ascent.
But using this simple technique to get yourself out of trouble is very good style.
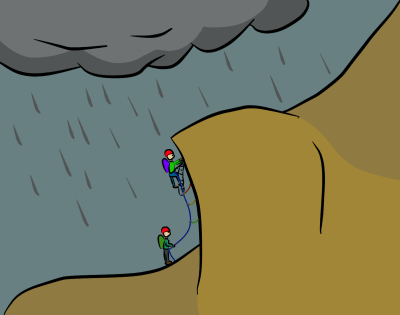
Many alpine routes have sections that, in poor weather, may be impossible without using aid. Just a few aid moves may be all that is needed to reach a summit or a safer descent.
Knowledge of aid techniques can also provide a way to safely move up or down a crag in an emergency.
French-Free
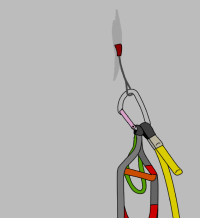
This is the most basic form of aid climbing which means grabbing hold of a piece of gear and pulling on it to miss out a move. You could also clip a sling directly to the gear to use as a foot loop.
If you think your partner may struggle to follow a section of the climb, you can help them by placing gear frequently enough so they can pull from one piece to the next.
Times when you might french-free:
– To avoid a tough move
– If you need to move quickly and don’t have time to figure out a crux sequence
– If you think you’ll fall while clipping a piece of gear. You can hold onto the gear, then clip, then continue climbing
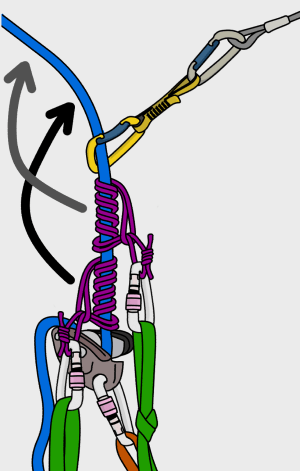
Basic Aid Climbing Setup
Aid climbing is more efficient when using daisy chains and etriers, but these are not worth taking on a climb unless you specifically plan on aiding sections.
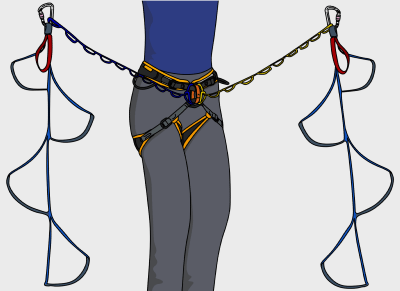
Here is an improvised set of ‘aiders’:
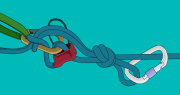
* Two double-length slings girth hitched through tie-in points (or belay loop), with overhand knots tied at intervals. Knots are offset so the loops stay open (improvised daisy chains).
* Two long slings/pieces of webbing attached to daisy chains with a carabiner. Offset overhand knots are tied at intervals (improvised etriers).
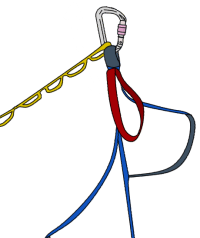
* Carabiner attached to belay loop. This is used for shortening the daisy chain or clipping yourself directly into gear
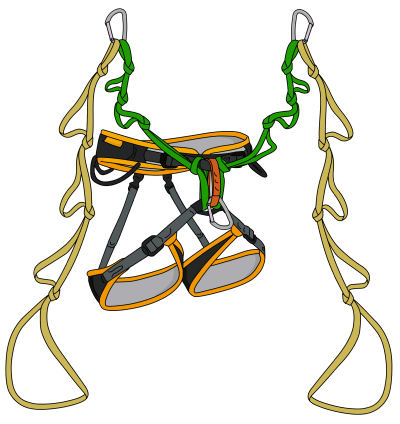
It’s better if the daisy chain is on the spine side of the carabiner, and the etrier is on the gate side.
This allows your daisy to slide up the spine (rather than get stuck in the gate, or unclip from it) when you stand up high.
Basic Aid Climbing Technique
Step 1 – Place Gear
Place a piece of gear and clip an aider to it.
Step 2 – Test Gear
Unless you’ve just clipped a bolt or an obviously bomber piece of gear, you should test it before fully committing. How you test it depends on what the gear is.
First, ease your weight onto the piece, until the majority of your body weight is on it.
Nuts, slings and pitons can be ‘bounce tested’. Do this by bouncing your weight on your top daisy, with a slightly increased force each time. This puts more force on the piece than just your bodyweight will, so if it survives the bounce test it’s unlikely to randomly pull out when you’re weighting it. If it fails, you’ll swing gently onto your daisy on the lower piece, which should still hold because you bounce tested it – right?
More easily damaged or low-strength gear, (such as cams or micro nuts) should only be very gently bounced.
Tiny cams or skyhooks shouldn’t be bounce tested, as they would be damaged over time. To test, weight them and press your body away from the wall to generate a little more force than bodyweight without the harsh impact of a bounce. Move side-to-side and outwards from the wall a little, too. This simulates the direction you might pull the piece when you’re higher up on it.
Try not to look directly at the piece you are testing – if it fails, it’ll hit you in the face! Look away, and wear a helmet.
Step 3 – Commit
Once you’re happy that the piece will at least hold your weight, it’s time to commit. Shorten your daisy or clip in directly to the piece so you can sit in your harness.
Step 4 – Reset
Reach back down and clip your lead rope into the lower piece. Then remove your aider from it.
Step 5 – Get High
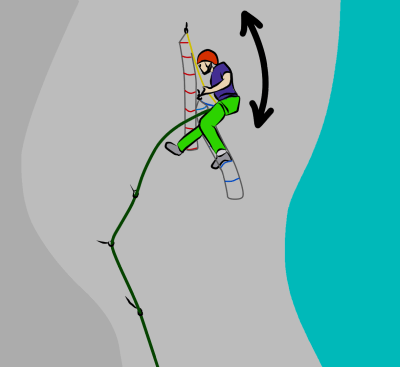
Getting as high on your top piece as you can means less moves to the top.
On slabby terrain, use the steps of your aider to walk upwards. With practise you should be able to stand in the top step. Your daisy will slide up the spine of its carabiner. Adjust your daisy shorter to give you some downwards tension for balance. This also means that if you lose balance you won’t fall the full length of the daisy.
Vertical or overhanging terrain is more strenuous. Pull on the gear while walking up the steps until you can clip directly into the gear with the carabiner on your belay loop. Once you are as high up as you can get, it’s time to place a piece of gear and repeat step one.
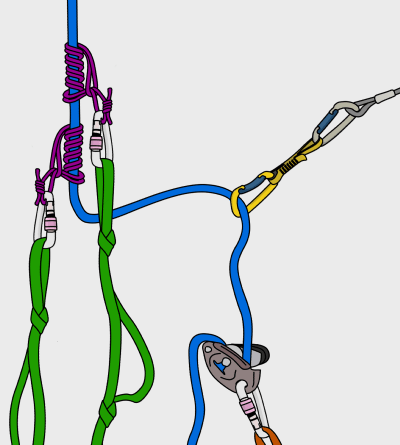
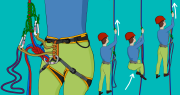
Following an Aid Pitch with Prusiks
To follow a section of aid, you can either prusik up the rope or aid up using the same technique as the leader. Make sure to communicate with the leader so they know whether to belay you or fix the rope to the anchor.
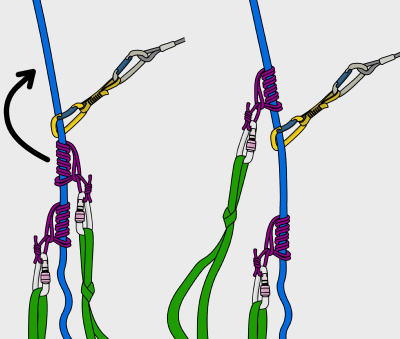
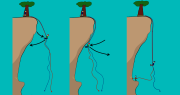
Removing Gear while Prusiking
If the rope isn’t pulling tight on to a piece of gear, you can simply unclip the gear from the rope and remove it. Make sure to unclip the gear when your prusik is still a few inches below it; your prusik will jam into it if you go too close.
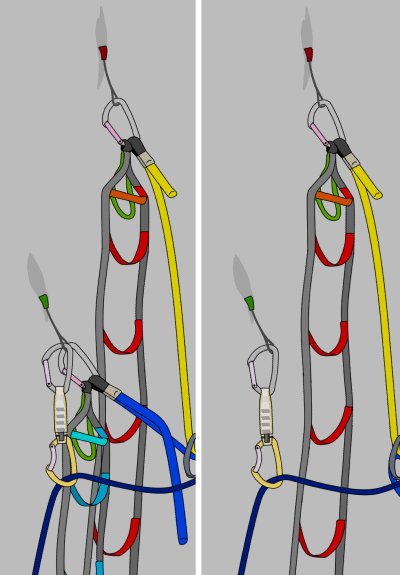
Often, the rope will be pulling the gear tight and it is very hard to unclip. In this situation:
– Weight your lower prusik
– Remove your upper prusik from the rope
– Re-tie the prusik on the rope above the gear and weight it
– Now you can more easily remove or unclip the gear
Sometimes, this results in your lower prusik getting ‘sucked in’ to the piece of gear (particularly if the route is slightly traversing or overhanging). For pitches like this, it is useful to have a belay device (GriGri’s work best) setup on your belay loop. Here’s how:
Step 1
Prusik close to the piece.
Step 2
Pull slack through your GriGri and weight it.
Step 3
Remove both prusiks (one at a time) and re-attach them above the piece.
Step 4
Release rope through your GriGri so that you are weighting the prusiks.

Step 5
Now you can remove the gear.
Aiding Traverses and Overhangs
The system for aiding a roof is basically the same as a traverse. Just place a piece, reach as far sideways as you can, and place your next piece.
It’s hard to transfer your weight to your new piece to test it, so try stamping in your etrier instead of weighting your daisy. Remember that your follower will have to clip from piece to piece to clean the pitch, so don’t back clean them!
To clean a traverse or a steep overhang, you’ll need to take your prusiks off the rope and clip directly into the gear that the leader placed. Effectively, you are ‘leading on top rope’. Simply clip across the pieces, removing the ones behind you as you go. Make sure to re-adjust your back up knots frequently, so you won’t fall far if a piece fails.
Basic Aid Climbing Tips
* When leading, clip as high on the piece as possible (e.g; in the plastic thumb-loop of a cam, rather than the sling). This gives you more height, meaning quicker overall progress.
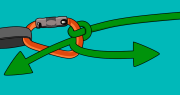
* Always use a back up (such as a clovehitch attached to your belay loop with a screwgate) when prusiking up a rope.
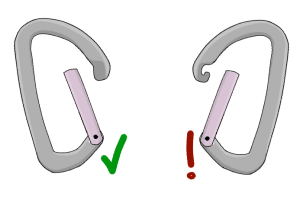
* It’s better to use a ‘keyhole’ style carabiner for your aiders, as it will be less likely to get stuck on slings and wires than a ‘nose’ style carabiner. You can use either a snapgate or screwgate.
* When switching from aid to free climbing in the middle of a pitch, attach a sling to your top piece. This will be your final foot step before you free climb. Make sure to clip your aiders and daisies away on the back of your harness so you won’t trip over them.
Related Topics
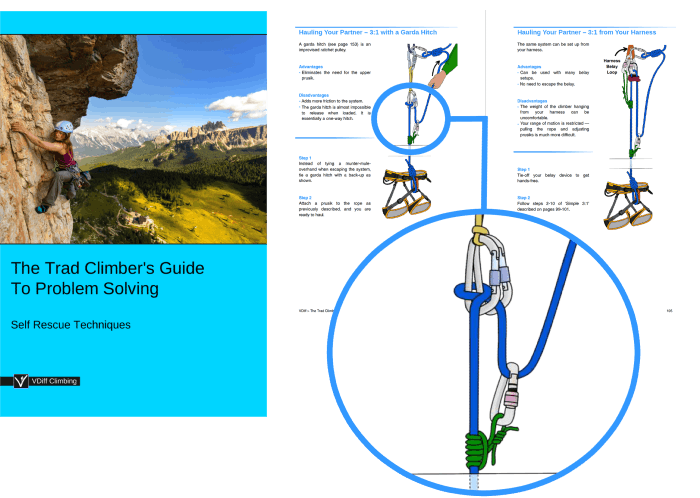
The article above is part of the book – The Trad Climber’s Guide To Problem Solving
E-book (pay what you want)
Paperback
Kindle
Free Sample
Learn how to:
– Use a variety of self-rescue techniques
– Build self-equalizing anchors with minimal gear
– Abseil without a belay device
– Abseil with damaged ropes
– Descend from bad anchors
– Negotiate loose rock
– Use basic aid techniques
– Simul-climb safely
– Prevent accidents from occurring in the first place
Plus much more.