Self Rescue > Rope Soloing
Self Rescue: Rope Soloing Rope soloing is a technique where you belay yourself instead of being belayed by your partner. You can use this technique to lead or top rope belay. More complicated techniques are…

Self Rescue: Rope Soloing Rope soloing is a technique where you belay yourself instead of being belayed by your partner. You can use this technique to lead or top rope belay. More complicated techniques are…
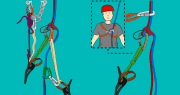
Self Rescue: Tandem Abseiling Tandem abseiling means two people descending with the same device. It is most useful when descending with an injured climber. A simple tandem abseil setup:– ‘Lead’ abseiler is attached to the…
Self Rescue: Mid-Pitch Retreat Sometimes, a climb may prove to be too difficult, forcing you into a mid-pitch retreat. This is fairly straightforward if you:– Can downclimb– Are less than half a rope length up…
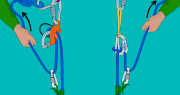
Self Rescue: Hauling your Partner How to Haul your Partner This section describes methods of hauling your partner up part of a climb. Times when you may need to set up a hauling system include:–…
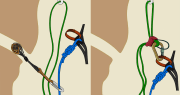
Self Rescue: Escaping the Belay The belay escape is a technique whereby the belayer frees themselves from the responsibilities of belaying. This fundamental skill is necessary for many rescue situations. Situations when you may need…

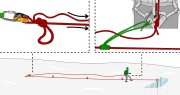
Climbing Self Rescue: Introduction Having a good knowledge of self-rescue skills is essential for any climber. The more effectively you are able to improve a poor situation (e.g; if you are able to escape the…
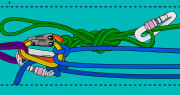
Crevasse Rescue: Raising Systems Setting up a ‘raising system’ means using your rope and gear to pull your partner out of a crevasse. How to Set Up a Raising System Step 1The first and most…