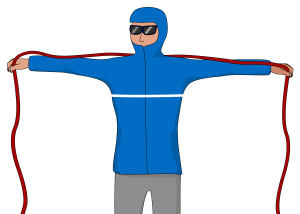
Glacier Travel: Using the Rope
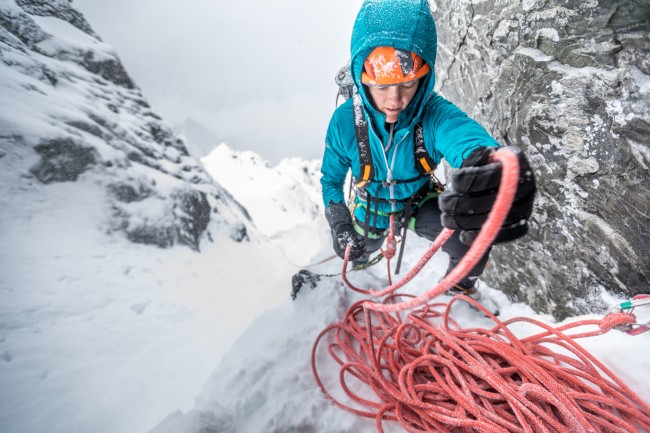
It can be tempting to cross a glacier without bothering to get the rope out, especially if it looks easy or if other climbers have crossed without problems before. This attitude is extremely dangerous. Not being roped up will greatly reduce the chance of being rescued from a glacier’s main hazard – falling into a crevasse.
The process of roping up is:
1) Two climbers tie into the ends of the rope.
2) The appropriate length of rope is measured between climbers.
3) The middle climbers tie in (for a team of three or four) or jamming knots are tied (for a team of two).
4) Chest coils are taken with the extra rope.
Each of these steps are described in detail in this article.
Glacier Group Size
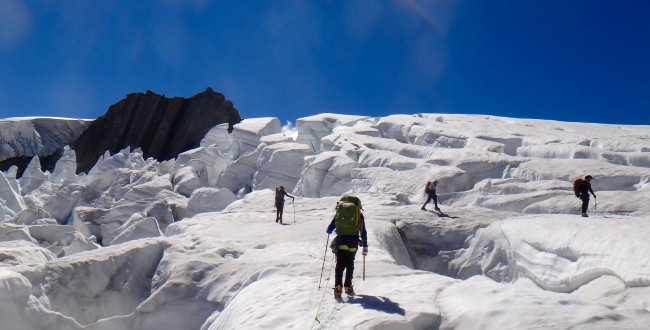
A roped team of three is a standard size for travel on a non-technical glacier. It is safer than a team of two (with an extra climber to hold a fall) and easier to manage than a team of four. Never travel on a glacier alone. Two or more independent teams is beneficial (e.g; six climbers split into two teams of three). If a team is involved in an accident, they will have backup help.
Glacier travel is very risky for a team of two if no other roped teams are nearby. The climber who stops the fall must build an anchor while in the arrest position, set up a hauling system and complete the entire rescue by themselves. In this scenario, it is essential that both climbers are proficient at crevasse rescue.
Glacier Rope Length
The minimum length of rope required for glacier travel is:
– 50 meters for a team of three or four
– 40 meters for a team of two
Tying Into the End of the Rope
The rethreaded figure-8 is widely recognised as being the safest way to connect the end of the rope to your harness.
The climbers who tie into the end will also take chest coils.
Measuring the Rope
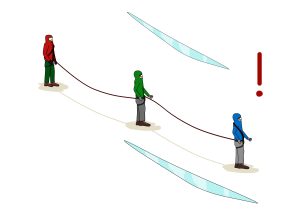
Climbers should tie into the rope at certain distances from each other. This spaces people far enough apart so that when crossing a typical crevasse, only one person is at risk of falling in at any time. A general guide of the minimum distances are given below.
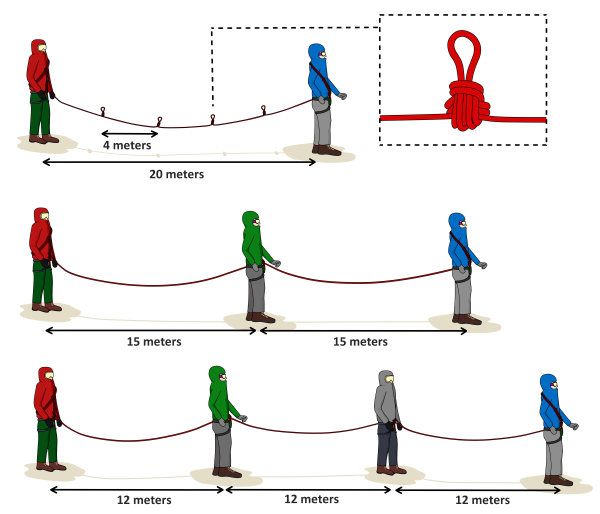
Being closer than these recommended minimums is dangerous because it puts the whole team at risk of falling into the same crevasse. Consider tying in with more distance on glaciers that may have bigger crevasses. Basically, being further apart is safer. The only downsides of being far apart is that communication can become harder and it is more difficult to keep the rope taut.
Arm Spans
The distance of rope is easily measured using arm spans. For many people, a double arm span of rope is about 1.5 meters (check this beforehand and adjust your calculation as necessary).
Remember that 1.5 meters of rope (1 span) is used when tying into the middle or when tying a jamming knot. For example, a team of two climbers need to be 20 meters apart (approx 13 spans) with 4 jamming knots (4 spans). So a total of 17 spans of rope must be measured.
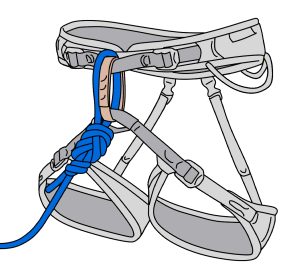
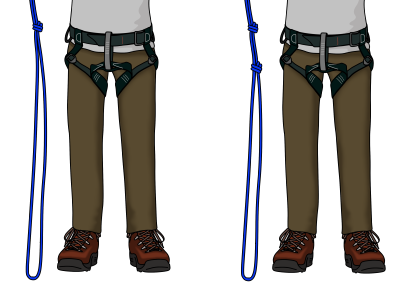
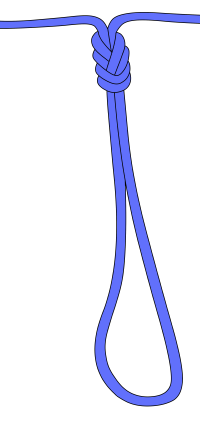
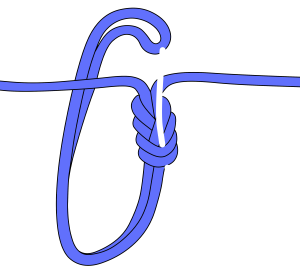
Tying Into the Middle of the Rope
The remaining climbers in a three or four person team must tie into the middle of the rope. This will be the very middle in a team of three (a rope with a middle marker helps). For a team of four, the middle two climbers will be evenly spaced from the rope’s center.
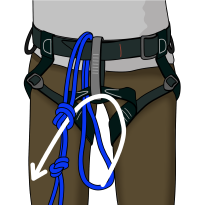
Step 1
Tie an overhand knot with a long bight of rope, from waist height to the floor.
Step 2
Tie a second overhand 6 inches down from the first.
Step 3
Thread the bight through your harness and back through the overhand knot as shown.
Step 4
Tie a stopper knot
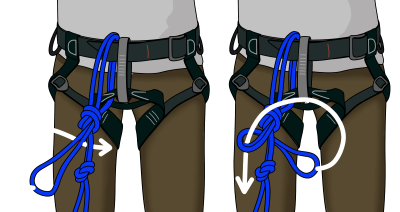
Step 5
Clip the tail back to your belay loop with a screwgate carabiner.

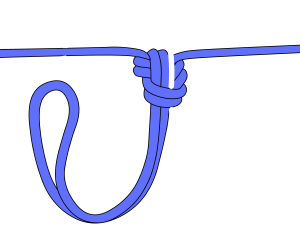
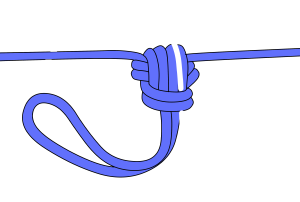
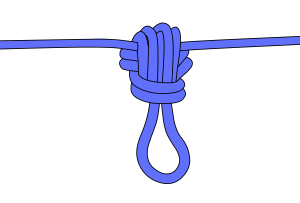
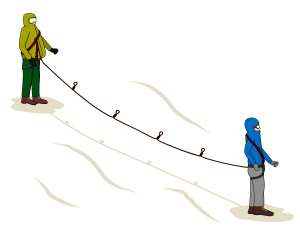
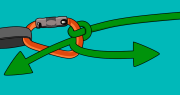
Jamming Knots
It will be very challenging to hold the weight of a falling climber when travelling in a team of two. To help with this, you should tie jamming knots in the rope. During a fall, the rope cuts through the snow on the lip of the crevasse, creating a slot which the knot (hopefully) jams into.
This knot won’t hold the fall by itself – it merely adds some friction which assists the climber in arresting the fall. Knots should be tied at 4 meter intervals.
Step 1
Tie a figure-8 on a bight, with a 60cm long loop.
Step 2
Pull the bight around the back of the knot and though the figure-8 as shown.
Step 3
Do this again…
…twice more, to create a large jamming knot.
Jamming knots add complications during a crevasse rescue. In a team of two, it is still worth having the knots and then dealing with the extra problem of passing them during a rescue.
Without the knots, both climbers are much more likely to end up in the crevasse, which is a far worse situation! In a larger group, with more climbers to hold the fall, it is usually better to travel without jamming knots.
Chest Coils
When travelling in alpine terrain, it is often preferable for the rope to be shorter than its full length. A good way to achieve this is for the climber at each end of the rope to use chest coils. This keeps the rope easily accessible in the event of a rescue, and also means the length of rope can be adjusted quickly if needed.
Taking the Coils Off
Reverse this process, taking the coils off one at a time. If you take them all off at once and drop them in the snow, it will make the most epic tangle!
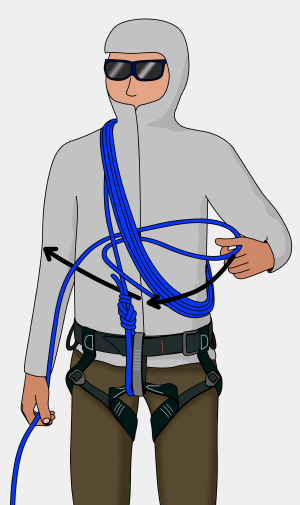
Step 1
Tie in with a neat figure-8 and put your jacket hood up.
Step 2
Take the rope straight up the right side of your chest and around your neck, making sure the rope is snug, not slack.
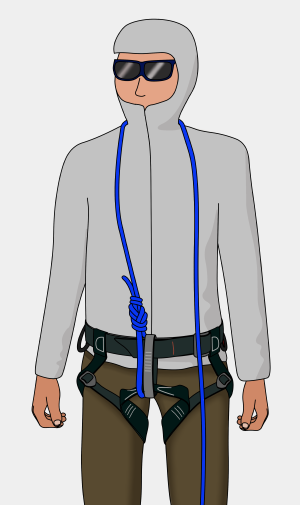
Step 3
With your left hand held at waist height, coil the rope between your neck and left hand, making sure each coil is of equal length and tension. Keep taking chest coils until the desired length of rope remains between you and your partner.
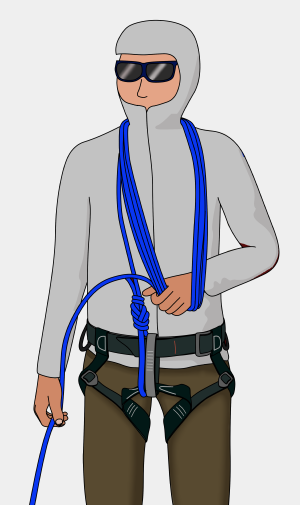
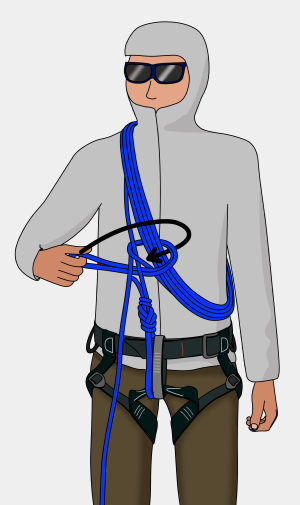
Step 4
Put your left arm through the coils, so they hang on your right shoulder across your body.
Step 5
With your left hand, reach through the coils and behind the initial vertical strand and grab the live rope. Pull this back out through the coils until you have a 40cm bight of rope.
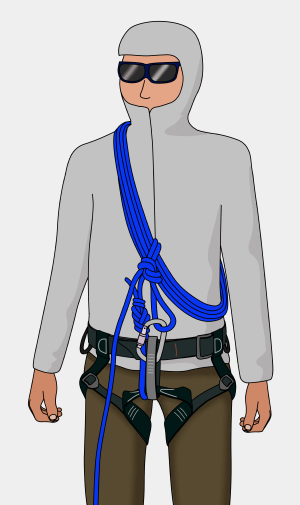
Step 6
Tie this bight of rope in an overhand knot, incorporating the live rope as shown. If the chest coils are tied correctly, you should be able to pull the live rope without getting strangled.
Step 7
Clip the remaining bight of rope to your belay loop.
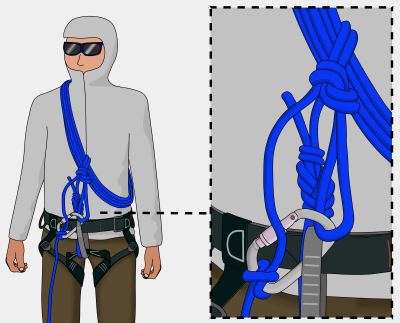
Step 8
Tie a clove hitch on the live rope and clip it to your belay loop. This redirects the pull from chest height down to waist height, meaning that if your partner falls in a crevasse, you stand a better chance of holding the fall and not being pulled over head first!
Ropework Tips
Travel Perpendicular
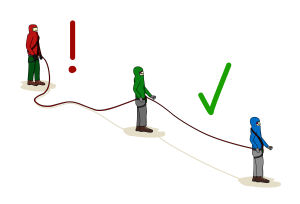
Travelling with the rope at 90 degrees to crevasses only exposes one climber at a time to the hazard of falling into the crevasse.

If the rope is running parallel to a crevasse, the whole team risks falling in at the same time!
Tight Rope
Keep the rope tight between each person at all times to reduce shock loading. Not only would a climber fall further if the rope is slack, but it will be much harder for the climber on the surface to hold the fall.
Experience
Ideally, the most experienced mountaineer who is the best at spotting crevasses and choosing a route through them should be at the front.
Weight Differences
If there is a significant weight difference between climbers, the lighter climber should be in the down slope position, so that gravity assists them when trying to hold the fall of the heavier climber.
Roping Up on a Dry Glacier
Moving together while roped up on a dry glacier (one that is completely free of snow) can be more dangerous than going un-roped. Arresting a fall on hard ice is nearly impossible and will likely result in broken ankles and more climbers in the crevasse. However, when crossing crevasses on a dry glacier, consider making an anchor and belaying each other across.
Related Topics


The article above is part of the book – Glacier Travel and Crevasse Rescue

E-book (pay what you want)
Paperback
Kindle
Free Sample
Learn:
– The fundamentals of glacier travel
– What gear you need to safely cross a glacier
– How to tie into the rope with chest coils
– How to move efficiently on snow
– How to make snow and ice anchors
– Different methods of performing a crevasse rescue
– How to prusik out of a crevasse
Plus much more.