How To Climb a Big Wall > Hauling (Part 2)
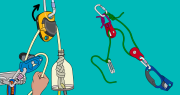
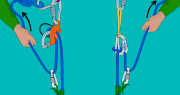
How to Climb a Big Wall: Hauling (Part 2) Docking the Haulbag Once the haulbag is at the belay, you’ll need to ‘dock’ it. This means attaching the haulbag to the belay in such a…
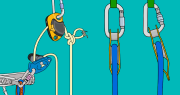
How to Climb a Big Wall: Hauling (Part 2) Docking the Haulbag Once the haulbag is at the belay, you’ll need to ‘dock’ it. This means attaching the haulbag to the belay in such a…
How to Climb a Big Wall: Hauling (Part 1) Big Wall Hauling Fundamentals There are different hauling systems you can use to get your equipment up the wall. 1:1 hauling is the simplest and most…
Self Rescue: Hauling your Partner How to Haul your Partner This section describes methods of hauling your partner up part of a climb. Times when you may need to set up a hauling system include:–…