How To Climb a Big Wall > Fixing Pitches
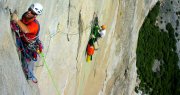
How to Climb a Big Wall: Fixing Pitches When to Fix Pitches It is common to fix ropes on a big wall. Often this is because you’ve climbed the first few pitches and want to…
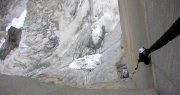
How to Climb a Big Wall: Fixing Pitches When to Fix Pitches It is common to fix ropes on a big wall. Often this is because you’ve climbed the first few pitches and want to…
How to Climb a Big Wall: Hauling (Part 2) Docking the Haulbag Once the haulbag is at the belay, you’ll need to ‘dock’ it. This means attaching the haulbag to the belay in such a…
How to Climb a Big Wall: Hauling (Part 1) Big Wall Hauling Fundamentals There are different hauling systems you can use to get your equipment up the wall. 1:1 hauling is the simplest and most…

How to Climb a Big Wall: Packing the Haulbag A poorly packed haulbag is a nightmare on the wall. Small essential items will sneak their way to the very bottom, or you’ll be unable to…

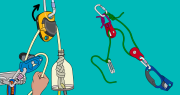
How to Climb a Big Wall: Following Cleaning an aid pitch is different than cleaning a trad pitch. Instead of climbing the rock, you will use jumars to ascend the rope. There are two reasons…
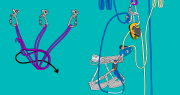
How to Climb a Big Wall: The Belay Setting up a big wall belay is more complicated than a standard trad belay but follows some of the same principles. Belays are bolted on most popular…
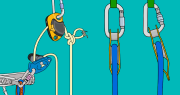
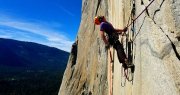
How to Climb a Big Wall: Leading The Lead Climbing Setup Step 1 – On Belay Before you leave the belay (or ground), you’ll need to get set up for the lead. Both climbers tie…
Big wall gear: In addition to regular trad gear, you’ll need some specialist stuff to aid climb. Here is a full description of everything you need.
Aid Climbing Ratings On this page, you will learn: Video version: Aid Climbing Grades: The Theory The grades range from A1 to A5, and from C1 to C5. ‘A’ grades refer to anything that requires…

What is Big Wall and Aid Climbing? On this page, you will learn: Video version: What is Big Wall Climbing? Big wall climbing is a guaranteed adventure. A big wall is essentially a vertical expanse…