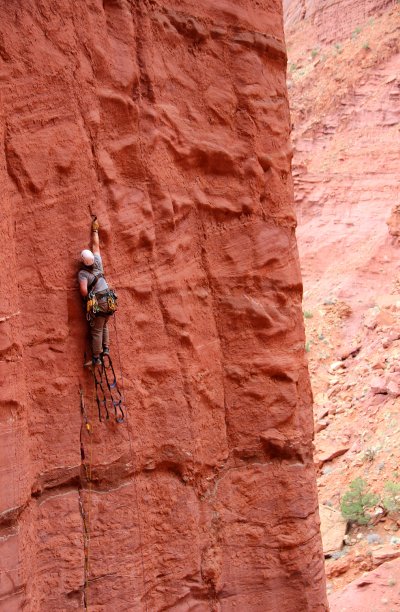
Aid Climbing Gear: Pitons
The dark art of smashing pitons into rock with a hammer has been frowned upon by climbers since the 1970’s when less destructive protection (cams and nuts) was developed. Advancements in modern aid climbing gear have completely removed the need for hammering on most easier routes. Many old aid lines can now be aided (or free climbed) with clean gear by using the piton scars created from hundreds of early ascents. Even moderate aid routes (A2-A3) are often climbed clean or with only a few hammered placements.
However, if your chosen route relies on fixed pitons or copperheads to go ‘clean’, you should be prepared to replace them if they are missing or useless. If you plan to climb harder aid or modern routes with few ascents, you’ll need to know all the tricks of the trade. Remember – there is a big difference between gently tapping a piton into a crack, and smashing it in so hard that the whole feature turns to dust or the piton is stuck there forever. Practise placing and removing them on a worthless non-climbable boulder before you weld them into an established aid route.
Types of Piton
Pitons are available in many shapes and sizes. Common types are shown here. You may find many other obscure shapes and sizes of piton. They all work in the same basic way.
Piton Material
Pitons are typically made of hardened steel, meaning they can stand up to the abuse of repeated placements.
Pitons are also available in softer steel and other malleable metals. These are designed to deform into cracks for a more secure placement, however they are harder to clean and don’t last for as many placements as the harder steel versions.
File down any burrs on your pitons as these can damage your rope or slings.
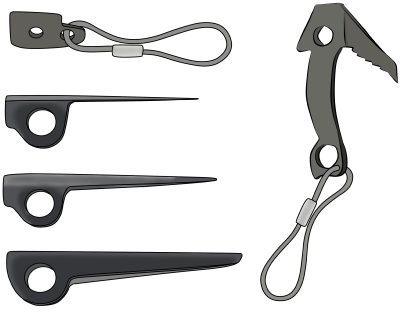
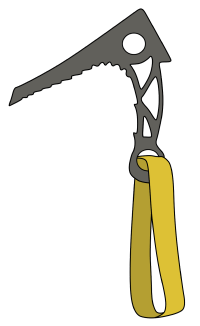
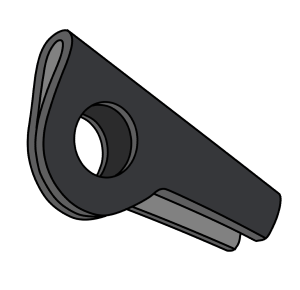
Spectres
Spectres are basically a cross between a fat beak and an ice axe.
Originally designed for hammering into icy cracks or frozen turf on winter routes, these pitons can be useful on hard aid too.
Sawed Angles
These are angle pitons which have been sawed in half so they can fit into shallow but wide pods and scars.
To make your own, saw a regular angle in half (approximately) with a hacksaw. Then make the edges smooth with a metal file.
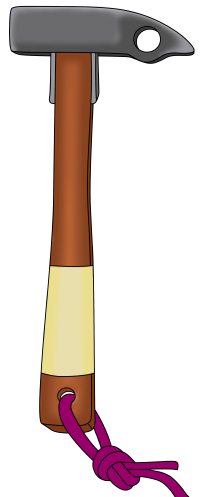
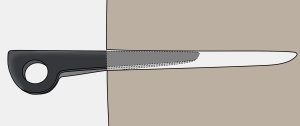
Big Wall Hammers
You will need a hammer to place and remove pitons. A good wall hammer has a:
– Square head for hammering in corners
– Hole in the head which is big enough to clip a carabiner
– Rounded point (opposite side from the square head) for precise placements and copperheading
– Head weight of at least 500 grams
– Good weight distribution between the handle and head
– Wooden handle, or a fibreglass handle wrapped in rubber, to reduce vibrations on the hand
– Good grip at the bottom of the handle (finger tape works well on wooden handles)
– Sling to wear it over the shoulder
– Clip-in point in the sling
Wearing a Hammer
Put the hammer’s sling over your shoulder and then wear your chest harness over the top. If using it frequently (for almost every placement), just let it hang down, making sure it stays clear of the lead rope.
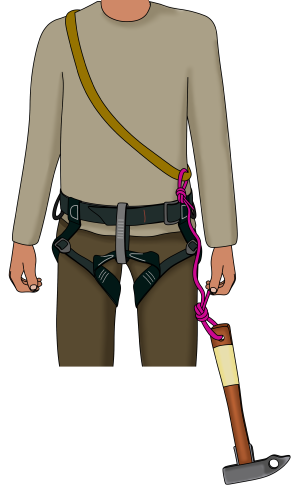
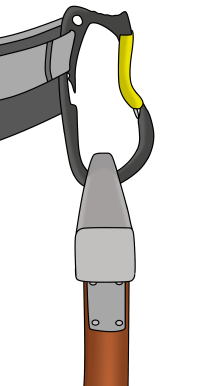
When not using it, clip it away to your harness (head-side up). If your harness doesn’t have a holster, use a Petzl Caritool carabiner to store it away. This allows easy clipping and unclipping with one hand.
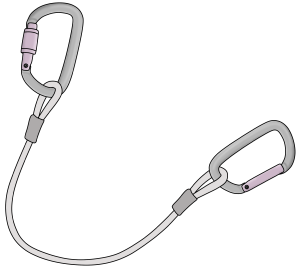
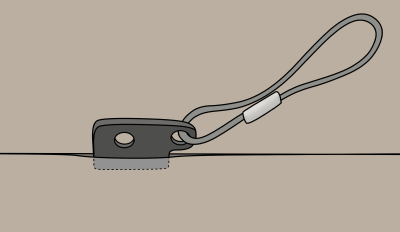
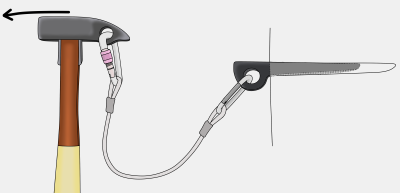
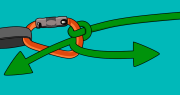
Funkness Device
As a nut tool is used to remove clean gear, a funkness device is used to remove pitons. This is a length of thick wire with a swaged loop at either end. It’s better to use a screwgate for the end which attaches to your hammer because this carabiner has a tendency to unclip itself.
Use old carabiners for your funkness – they will get battered so don’t use them for anything else.
Rurps
The rurp (Realised Ultimate Reality Piton) was originally designed to be hammered into hairline cracks. Since beaks were invented, the rurp has become fairly redundant. However, rurps do have an advantage over beaks in horizontals or roof cracks.

The Placement
The ideal rurp placement is an incut horizontal crack which is too shallow for a knifeblade.
Place the thin end of the rurp into the slot. It should go in about half way by hand.
Then tap it so the thick end wedges into the slot.
If it bottoms out (hits the back of the placement without being fully driven) you’ll probably be better trying a circlehead instead. If it can easily be hammered up to the cable, you may need to stack another rurp with it or try a stubby arrow instead.
Removal
Lift the cable out of the way and give it a gentle tap back and forth to unseat it. You can now gently funk it out with your funkness device.
If the rurp is buried up to the cable, you’ll have to funk it fairly hard. Be careful though – this can damage the cable.
Blades, Arrows and Angles
Knifeblades, lost arrows and angles are the original types of piton. They are less useful nowadays since the introduction of larger sized beaks and offset cams. However, they are often way stronger and more secure than anything else that will fit in a weird placement, particularly in horizontal slots.
The Placement
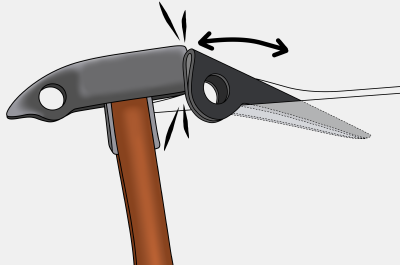
Slide the piton approx 2/3 of it’s useable length into the crack, then hammer it in to the eye. In most cases, you’ll need to hit them fairly hard to make the placement good. Essentially, the piton acts as a wedge and relies on outward pressure from the sides of the crack to remain in place.
The piton should make a higher-pitched ring with each firm hammer blow. When you hear the same pitched ring twice in a row, the piton has reached it’s optimum depth. Hammering more will probably make it difficult to remove.
The ideal piton reaches its optimal depth just before the eye contacts the rock. If the piton goes in up to the eye easily, you’ll need to remove it and try a bigger size. If you hear a dull thud, the piton has probably bottomed out. In this case more hammering will not help. Try stacking another piton with it or remove it and try something else.
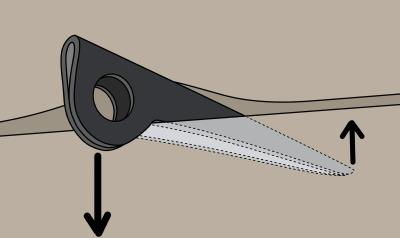
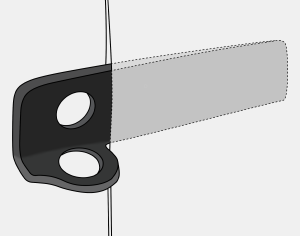
Horizontal Cracks
In horizontals, the back of the piton is pushed up when the eye is weighted down. This helps to lock it in place.
Pitons can be excellent in incut cracks. In these placements, you may not even need to hammer them.
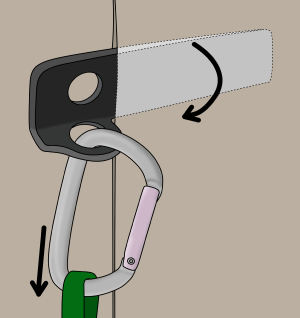
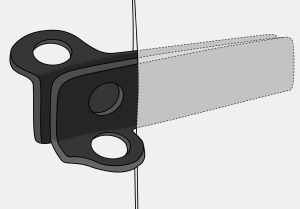
Vertical Cracks
In vertical cracks, the piton torques into place when weighted (like a cam hook, but with less leverage). Make sure to clip the perpendicular eye on blades.
Roof Cracks
You’ll need to go against clean climbing ethics to get an upwards driven piton of any kind to hold your weight.
Weld it in with your hammer as hard as you can. The harder you hit, the better it will be. Then apologize to the rock for your destructive behaviour.
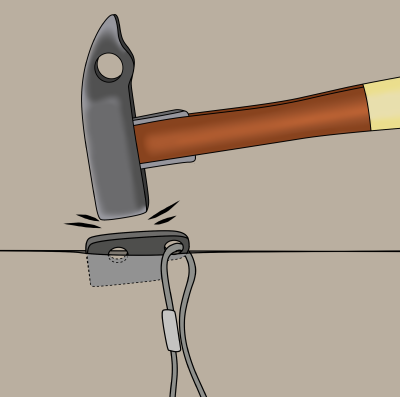
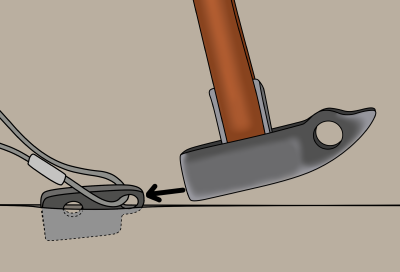
Removing Pitons
To remove a piton, you will first need to unseat it and then pull it out the way which it went in. Depending on how driven the piton is, this can sometimes be done by hand, sometimes with a hammer and sometimes using a funkness device.
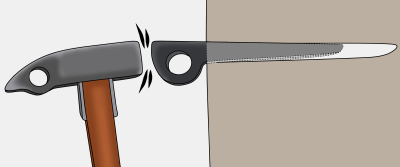
Step 1
Unseat the piton by tapping it side-to-side (in horizontals) or up and down (in vertical cracks) a few times. This loosens the pitons grip in the crack.
Step 2
Clip your funkness device to the piton and also to your hammer. Swing your hammer outwards to shock-load the piton out of the crack.
Lean to one side so you don’t hit yourself in the face with the piton. If this doesn’t work, repeat step 1 and try again.
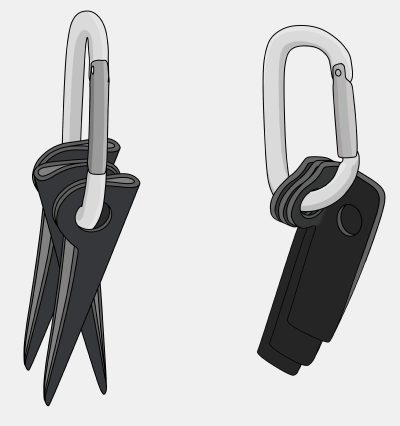
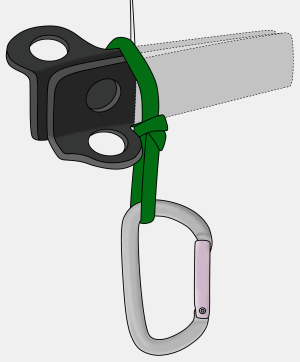
Piton Racking
Rack blades in groups of 3-5, facing the same way so they spoon each other. Arrows and angles can be racked as a group of 3, facing in alternate directions.
Use oval carabiners for racking pitons – other shapes cause pitons to sit awkwardly and be more fiddly to remove.
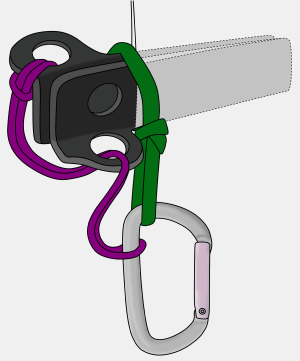
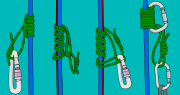
Piton Stacking
Stacking means having two or more pitons side by side in the same slot. Stacking is useful when a placement is too shallow for a large piton and too wide for a smaller one. Any piton can be stacked with another to make a more secure placement – be creative.
Step 1
Place the first piton.
Step 2
Tap a second immediately next to it. The idea is to wedge them in tightly together.
Step 3
Once you’ve created your iron artwork, loop a sling over it with a slip knot, pushing it as close to the rock as possible to reduce leverage.
Step 4
Attach a keeper cord to the pitons so you won’t lose them if they fall out.
Make sure the keeper cord isn’t weighted.
Related Topics
The video above is part of a complete big wall course
– Safe and approved syllabus
– Structured and easy to navigate
– Lifetime access
– Download videos in 4K
– Regular updates
– Much more detailed than the book version
→ Get the course
The article above is part of the book – Big Wall and Aid Climbing

E-book (pay what you want)
Paperback
Kindle
Free Sample
Learn how to:
– Lead and follow aid pitches
– Use cam hooks and skyhooks
– Set up a big wall belay
– Use different hauling systems
– Descend with a heavy load
– Place pitons and copperheads
– Camp on a vertical wall
Plus much more.