Abseiling: How to Increase Friction
Whether you’re abseiling down a skinny rope at the sport crag, or retreating down a multipitch with rain-slicked ropes and a heavy pack, the following techniques will help you increase friction when abseiling, and get down safely without rope-burnt palms.
Increasing Friction when Abseiling
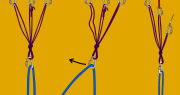
Method 1 – Reverse
Many belay devices are asymmetrical, offering more friction if reversed. Try it out both ways around to see which way provides the most friction for your device.
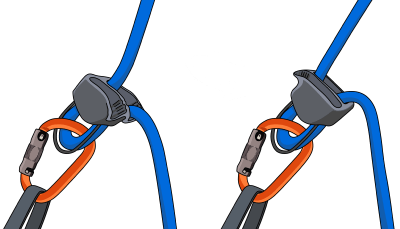
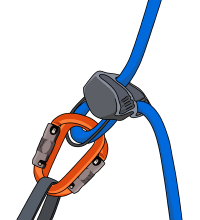
Method 2 – Double Up
Try attaching your belay device to your belay loop with two screwgate carabiners, instead of just one. Large carabiners work best for this.
Method 3 – Extend
Extend your belay device with a sling. This puts your belay device further away from your body, making it a little easier to control.

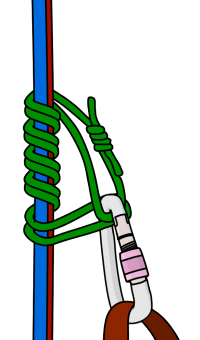
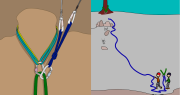
Method 4 – Prusik
We recommend always using a prusik knot for abseiling. A prusik won’t provide ‘consistent’ extra friction during the abseil, but it will autolock if set up correctly. This means you can ‘rest’ mid-abseil and provides added security for tricky descents. You can use a prusik in conjunction with any of the other described methods to further increase friction when abseiling.
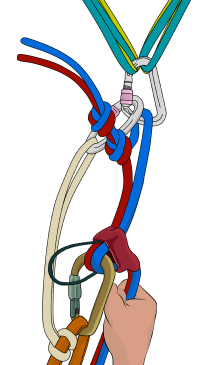
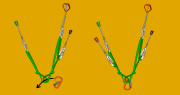
Maximum Friction: The Z-Abseil
The Z-abseil is quick to set up and provides excellent friction, meaning that you can abseil rain-soaked skinny ropes confidently.
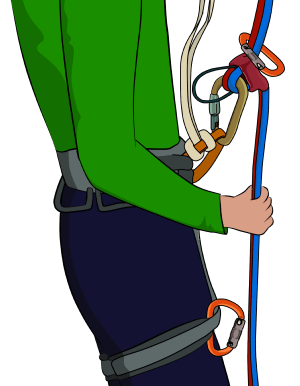
Step 1
Set up your belay device for abseiling as normal, staying attached to the anchor with a sling.
Step 2
Clip a screwgate to one of your leg loops and clip another screwgate around the ropes above your belay device.
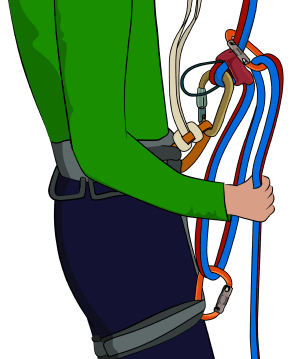
Step 3
Run the ropes down from your belay device through the leg-loop screwgate, up through the upper screwgate and back down to your brake hand. Make sure the ropes are running neatly next to each other.
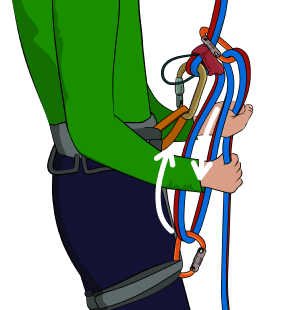
Step 4
Fasten up the screwgates and make a final check of the system. Then detach yourself from the anchor to enjoy a maximum friction descent.
Z-Abseil Top Tips
* Make sure your screwgates are fastened tight. Vibrations in the rope can cause some types of screwgate to unfasten. Check them during your descent.
* If you don’t have enough screwgates, you can use two opposite and opposed snapgates instead.
* You can use the same method for single rope abseils. Simply set up the system in the same way.
* Don’t use this method when abseiling with a GriGri. The top carabiner will hold the handle down and prevent it from locking.
* It’s possible to set this system up mid-abseil – useful on the last half of a long abseil when the weight of the rope below you has decreased. This will be easier if you pre-attach the two screwgates before you leave the anchor; one on your leg loop and one sliding down the ropes above you.
* As always, make sure to practise this in a safe environment before abseiling down those icy 7.8mm ropes.
Related Topics

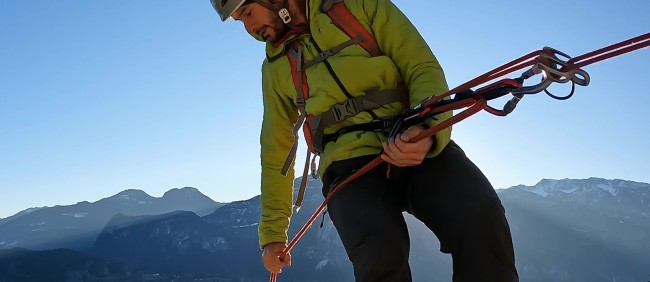
The video above is part of a complete self-rescue course
– Safe and approved syllabus
– Structured and easy to navigate
– Lifetime access
– Download videos in 4K
– Regular updates
– Much more detailed than the book version
→ Get the course
The article above is part of the book – The Trad Climber’s Guide To Problem Solving
E-book (pay what you want)
Paperback
Kindle
Free Sample
Learn how to:
– Use a variety of self-rescue techniques
– Build self-equalizing anchors with minimal gear
– Abseil without a belay device
– Abseil with damaged ropes
– Descend from bad anchors
– Negotiate loose rock
– Use basic aid techniques
– Simul-climb safely
– Prevent accidents from occurring in the first place
Plus much more.