

The Figure-8: How to Tie In to a Climbing Rope
Unless you are bouldering, you’ll need to tie the end of the rope to your harness before you climb. The best way to do this is using a rethreaded figure of 8 knot.
It’s important that you do it correctly, as this knot connects you to the whole climbing system and keeps you safe. Try to avoid talking to someone or distracting them while they tie in.
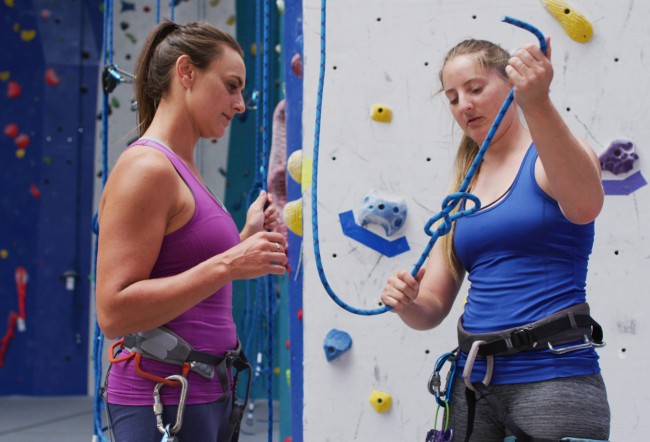
Likewise, once you start tying your figure-8, keep going until you’ve finished before responding to any questions.
Accidents have happened because climbers were distracted halfway through tying in and then fell with a half-completed or incorrect knot.
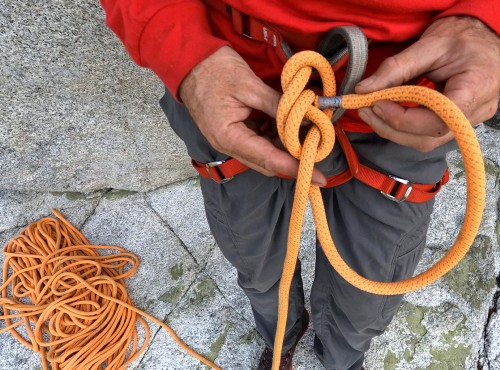
Tying the Figure of 8
Step 1
Make a loop about a meter from the end of the rope. Wrap the end of the rope around the base of the loop, then push the end through as shown.
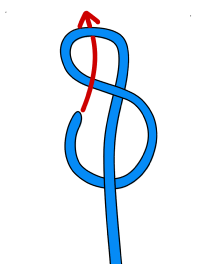
Step 2
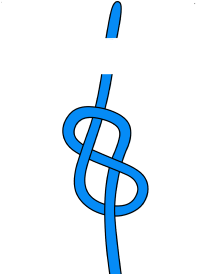
You should end up with an ‘8’. Make sure the knot is around 90cm from the end of the rope. The exact length varies with ropes of different diameters.
Step 3
Pass the end of the rope through both of the two points on the front center of your harness – the same ones your belay loop runs through. It is important that the rope goes through your harness in exactly the same way as your belay loop does.
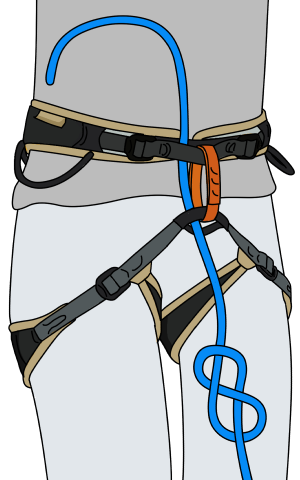
Step 4
Use the end of the rope to re-trace the figure-8. Follow the twists of the rope starting from where it joins your harness.
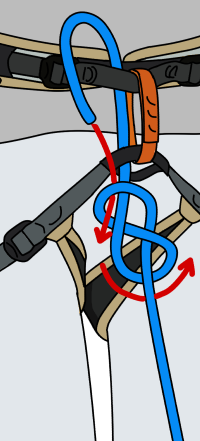
Step 5
Continue following the twists until you end up back at the start of the knot.
Pull the whole thing tight.
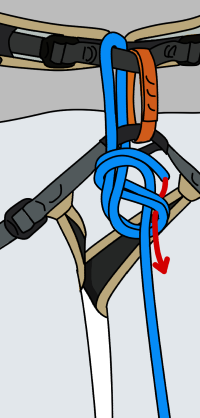
Step 6
Make sure the end of the rope is around 25cm long. If it is shorter, you’ll have to untie and start again. After this, you will need to tie a stopper knot. Loop the short section of rope around the main length.
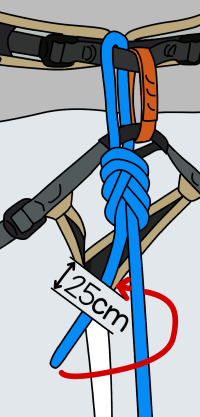
Step 7
Do this twice, with the second loop closer to you than the first.
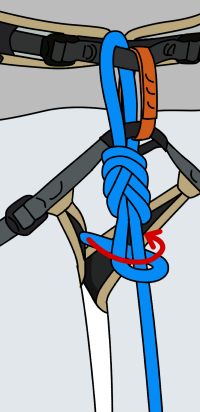
Step 8
Push the end of the rope through these two loops as shown.
Step 9
Make sure the stopper knot is pushed right up against your figure-8 knot. Pull it tight.
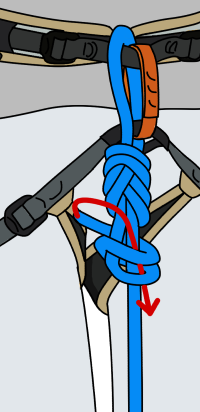
The Stopper Knot
The stopper knot has no bearing on safety as long as you tied your figure-8 correctly, so don’t panic if the stopper knot starts to unravel as you climb.
The purpose of the stopper knot is to ensure that you have left enough tail to stop the figure-8 failing – a short tail could slip through the knot.
Also, if you left a long tail dangling without a stopper knot, it could be mistaken for the main rope when clipping quickdraws, or the anchor. Always tie a stopper knot for these reasons.
If you didn’t have enough rope left to tie a stopper knot, you’ll need to retie the figure-8 so that you do.
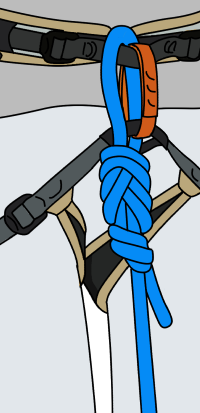
Common Figure-8 Mistakes
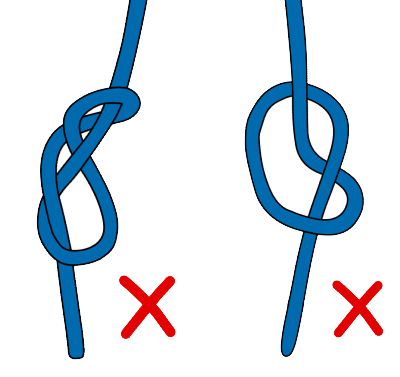
Incorrect 8 shapes
Only threading rope though one part of the harness.
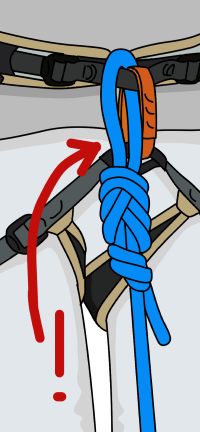
Safety Check: Have You Tied In Correctly?
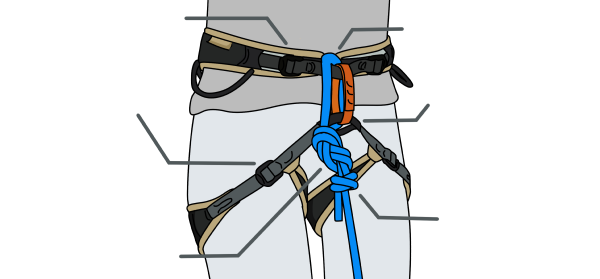
Visually inspect your knot, and your partner’s knot, before every climb.
If someone asks you a question or distracts you when you are tying your knot, wait until you have finished before answering. Do nothing else until the knot is complete.
Related Topics
This article is part of the book – Rock Climbing Basics: The Beginner’s Guide to Indoor Climbing
E-book (pay what you want)
Paperback
Kindle
Free Sample
Learn how to:
– Use rock climbing gear
– Tie into the rope
– Belay (lead and top rope)
– Climb efficiently
– Understand fall potential
– Find the right climbing partner
Plus much more.