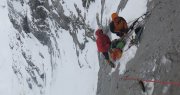
How to Train for Big Wall Climbing
On this page, you will learn:
- How to safely practise placing aid climbing gear, jumaring, hauling and other big wall systems.
- What things you need to be competent at before getting on the wall.
- How to make a training plan for your chosen big wall route.
Video version:
How to Practise Aid Climbing
Top Rope
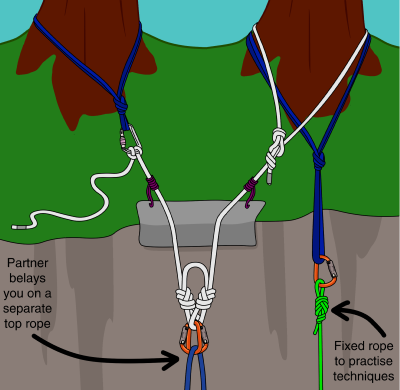
Many of the skills can be safely practised with a top rope. This could be done inside at the gym or outside at a single pitch crag. Stay away from popular routes and ideally choose a crag with crack climbs that are easy to protect.
By setting up a top rope and a fixed rope as shown, you can safely practise placing gear, jumaring, cleaning gear, hauling and descending. With a sensible top rope setup, pendulums and lower-outs can be practised safely too. Progress to leading without a top rope back-up once you are confident moving up your aiders and testing gear.
Rock Angle
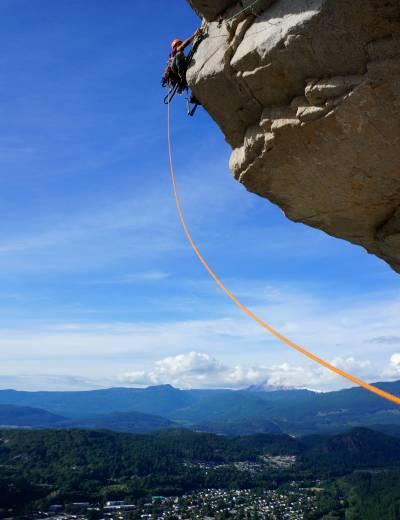
Try setting up top ropes on different angles of rock. An angle which is vertical or slightly lower than vertical is a good starting point. Progress to steeper rock and overhangs after that. Leading and cleaning are more difficult on steeper ground and require a modified technique. You’ll need to practise them both.
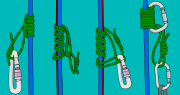
Jumaring
Practise jumaring down ropes as well as up them. This helps you develop a good thumb-catch technique.
Hooks and Pitons
Stay away from established routes when practising placing hooks, copperheads or pitons. These types of gear can permanently damage the rock. Find a worthless lump of nonclimbable rock instead. If practising at ground level, bring a bouldering pad so you don’t hurt yourself if a piece blows unexpectedly. Aid-bouldering may not be the most fashionable form of climbing, but it’s a great way to learn the art of hooking and piton craft.
Hauling
Start by hauling a light load to figure out the system and then progressively add more weight each time. Fill your haulbag with water bottles or rocks. Pad the inside of your haulbag well if using rocks (a few layers of cardboard or an old piece of carpet) so you don’t wear holes in it before even climbing a wall.
Time
Time how long it takes to lead, clean and haul a pitch of similar length and difficulty to your chosen route. Remember to factor in time spent on belay changeovers too. Keep practising to improve your time and use this as a basis for calculating how long each pitch will take on the wall.
Multi-Pitch
Once you’ve built up an understanding of big wall systems on single pitches, you can progress to a multi-pitch crack climb. Aid climb the crack (even if you could easily free climb it), set up a belay and practise your belay transition and organisation. Take a haulbag and a portaledge too. It’s much more difficult to set up a portaledge when hanging on the wall than it is when standing on the ground. Cook a meal in your hanging stove, spend the night up there and climb a pitch in the dark if you want a full simulation of life on the wall. A two-pitch climb can be done with a night’s sleep halfway and you’ll still be back down in time for work in the morning. Don’t forget your poop tube!
Big Wall Training Plan
To train for a trad or sport climb, you typically need to focus on improving your strength. However to train for a big wall, you need to focus on practising aid techniques and rope systems. Forget about climbing harder grades in the gym – that will make little difference. It doesn’t matter how good you are at other disciplines of climbing, big walling is a whole different game. It helps to be competent at leading 5.9 (HVS for the Brits), but climbing harder than that is not necessary.
Your first big wall begins by making a training plan which is focused on practising the techniques described on this website. Plenty of practise is essential. Skills such as hauling and jumaring are strenuous, slow and clunky at first, but with practise you’ll develop a smooth technique and then it becomes much easier. You should aim to reach a level of competence where you can set up any system without needing to refer back to this website.
However you choose to practise, always go with a partner and always back up any system which you are not familiar with.
Download the sample training plan here.
Training Checklist
The following checklist should be completed before attempting any big wall. Review what worked and what didn’t work during each session and focus on improving the things you found most difficult. This list assumes that you are already competent at multi-pitch trad climbing and self-rescue techniques. As with anything worthwhile, it will take time to build up a good level of competence. Trying to shortcut this process is extremely dangerous and will probably result in disaster.
After you and your partner have become fully competent at all the skills listed, you can try a short wall (e.g: South Face of Washington Column or West Face of The Leaning Tower). Once you have climbed a few shorter walls, you can move on to a bigger objective (e.g: The Nose or Salathe on El Capitan). With the competence gained from training and the experience gained on shorter walls, you’ll not only reach the top safely and efficiently, but also have a great time doing so!
Placing all types of regular trad gear
Using cam hooks and skyhooks
Bounce testing
French-freeing
Leading a straight-up aid pitch
Leading an overhang
Leading a traverse
Passing gear between the belayer and leader during a pitch
Leading a pendulum
Switching between aid and free climbing during a pitch
Leading a tension traverse
Fixing mid-pitch
Setting up the belay
Releasing haulbags on a straight up pitch
Releasing haulbags on a traverse
Belay transitions
Cleaning a straight up aid pitch
Cleaning an overhang
Cleaning a traverse
Lowering out from a pendulum point
Jumaring a free-hanging rope
Packing a haulbag
Docking a haulbag
1:1 hauling
2:1 hauling
3:1 hauling
Space hauling
Hauling past a knot
Hauling low-angled terrain
Descending with a heavy load
Descending with a heavy load past a knot
Lowering haulbags
Lowering haulbags past a knot
Abseiling with a damaged rope
Descending low-angled terrain
Retreating mid-pitch
Setting up the bivi
Setting up a portaledge and fly (if applicable)
Using a hanging stove (if applicable)
Note
If you plan to fix pitches, short fix, climb as a team of three or climb a route requiring pitons, copperheads or a bolt kit, you’ll obviously need to practise those skills too.